
User's Manual


L15LD400 Series Quick Set-Up Guide R1
10
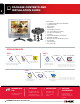
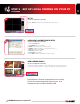
FORMATTING THE NEW HARD DRIVE:
The New Hard Drive MUST be formatted. If a new HARD DRIVE is
detected, the system will prompt you to FORMAT the drive. Please
refer to the system’s user manual for HDD installation.
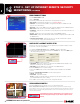
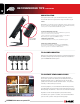
HDD INSTALLATION:
The System comes with a pre-installed Hard Drive, however
the unit will work with a replacement single Hard Drive (up to
400GB).
NOTE: Make sure that the System is OFF and the power cable has been
disconnected before changing the Hard Drive. For detailed instructions,
check your user’s manual included with the system.
TIP ON CAMERA MOUNTING:
Note: Test the cameras prior to selecting a permanent mounting
location by temporarily connecting the Cameras and Cables to
your L15LD400 DVR Combo System.
Pre-installed
160 GB HDD
SETTING THE NEW DRIVE TO MASTER:
• Refer to the General Jumper Pin Setting on HDD Surface (generally
located on a sticker on the top of the drive).
• Set the Jumper Pin Set to Master (1 Drive). NOTE: Use a Hard Drive
Model with a power supply rated UDMA66 or higher.
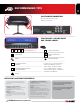
CONNECTING THE IDE CABLE:
• Confirm the IDE Cable is securely connected within the System.
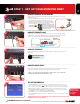
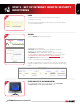
RECOMMENDED TIPS CONTINUED
NOTE: You must have an active internet connection to the
Observation System to be able to perform Remote viewing or
playback. Remote access is dependant on your connection
speed, internet traffic and other network factors - the speed is
normally 1~2 FPS (frames per second).
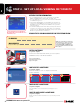
For faster playback, it is recommended to download previously
recorded video using the backup function and play it back using
Backup Player 2.0 Software - refer to the user manual for details.
Regardless of the network playback speed, video is being
recorded on your system in real time, and can be viewed when
you are at the system or through the backup player.
TIP ON REMOTE VIEWING AND PLAYBACK: