
Use and Care Manual
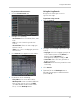
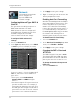
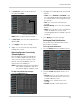
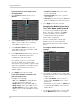
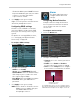
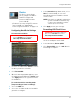
Table Of Contents
- DVR Overview
- Basic Setup
- Step 1: Connect the BNC Cameras
- Step 2: Connect the Mouse
- Step 3: Connect the Ethernet Cable
- Step 4: Connect the Monitor
- Step 5: Connect the Power Adapter and Power on the DVR
- Step 6: Verify Camera Image
- Step 7: Set the Time
- Default System Password & Port Numbers
- Quick Access to System Information
- Connecting Cameras
- Mouse Control
- Remote Control
- Using the On-Screen Display
- Setting the Date and Time
- Recording
- Playback and Backup
- Playing Back Recorded Video
- Using the On-Screen Playback Controls
- Advanced Playback Controls (ECO Blackbox+ Series Only)
- Finding Events in the Playback Bar (ECO Blackbox+ Series Only)
- Controlling the Time Range of the Playback Bar (ECO Blackbox+ Series Only)
- Using Zoom in Playback Mode (ECO Blackbox+ Series Only)
- Using Video Clip Backup (ECO Blackbox+ Series Only)
- Backing Up Video
- Viewing Backed Up Video
- Converting Backed Up Video to AVI Files
- Playing Back Recorded Video
- Managing Passwords
- Using the Main Menu
- Display
- Configuring Custom Channel Names
- Changing the Position of the Channel Name
- Adjusting Camera Color Settings
- Enabling Covert Recording
- Configuring the Time and Recording Time Display
- Configuring Sequence Time
- Changing the Video-out Resolution
- Adjusting Menu Transparency
- Restoring the System’s Resolution if you see a Blank Screen
- Adjusting the Video Margin
- Adding Privacy Zones
- Creating a Custom Split-screen Display (ECO Blackbox+ Series Only)
- Record
- Search
- Network
- Alarm
- Device
- System
- Advanced
- Configuring the "Auto Reboot" feature
- Upgrading the System Firmware
- Restoring to Factory Default Settings
- Restarting or Shutting Down the DVR
- Configuring System Warnings
- Saving Your System Configuration to a USB Flash Drive (ECO Blackbox+ Series Only)
- Loading a System Configuration from a USB Flash Drive (ECO Blackbox+ Series Only)
- Display
- Setting up your DVR for Remote Connectivity
- Lorex Client 11: Client Software for PC
- Remote Viewing Interface
- Changing Viewing Modes
- Taking Screen Shots
- Recording Video
- Showing / Hiding Channels
- Adjusting Sub-menu Options
- Changing the Save Directory of Screenshots or Recorded Video
- Changing the Format of Recorded Video (PC Only)
- Configuring PTZ Settings
- Video Playback
- Configuring Display Settings
- Configuring Privacy Zone Settings
- Configuring Recording Parameters
- Configuring the Recording Schedule
- Configuring System Recording Quality
- Configuring Basic Network Settings
- Configuring the System Substream
- Configuring Email Notification Settings
- Changing the Mobile User Name and Password
- Configuring DDNS Settings
- Configuring Motion Detection Settings
- Configuring your System to "Beep" During Motion
- Configuring Alarm Notifications (ECO Blackbox+ Series Only)
- Configuring Hard Drive Recording Mode
- Configuring PTZ Parameters
- Configuring the System Time and Date
- Changing the System’s Menu Time Out
- Configuring System User Accounts
- Viewing System Information
- Upgrading System Firmware
- Restoring Default Settings
- Configuring Event Settings
- Configuring Auto-Reboot
- Lorex Player 11: Playing Backed up Video on PC
- Lorex Player for Mac: Viewing Backed up Video on Mac
- Mobile Apps: Accessing your DVR Using a Mobile Device
- Appendix A: System Specifications
- Appendix B: Connecting a PTZ Camera
- Appendix C: Connecting Additional External Monitors
- Appendix D: Recording Audio
- Appendix E: Replacing the Hard Drive
- Troubleshooting
- Getting Started
46
Using the Main Menu
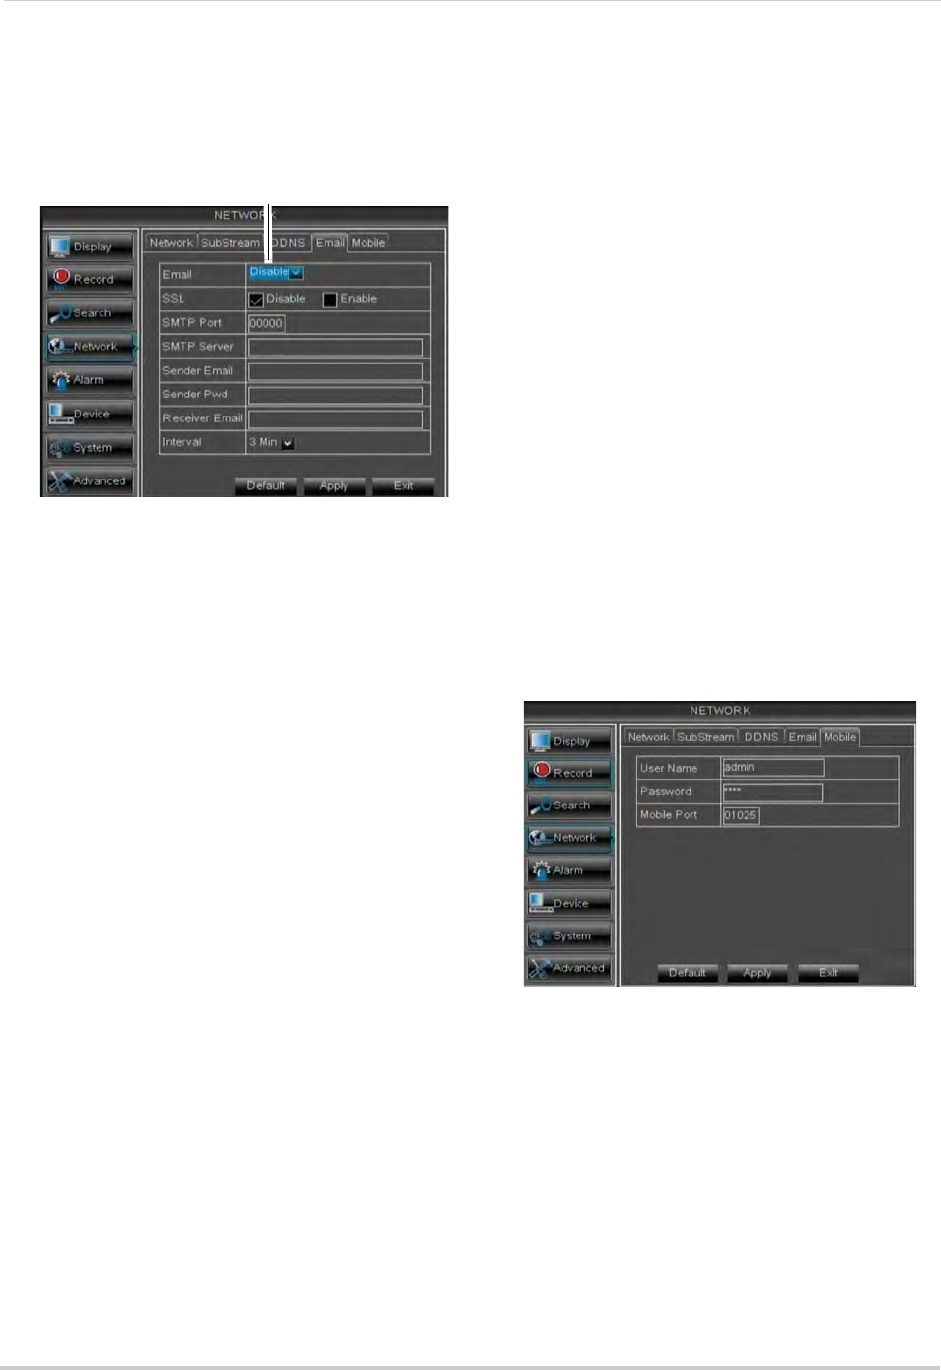
If you want to use Lorex’s email server
(recommended):
1 In the Email dr
op-down menu, select
Default.
2 In the Se
nder Email field, enter the email
address of the sender. This can be any
email address of your choice.
3 In the Rec
eiver Email field, enter the
email address you want the DVR to send
alarm notifications to.
4 In the Interv
al drop-down menu, enter the
Duration the DVR must wait before
sending out a new notification.
For example, if you select a 3 minute
int
erval, the DVR will send out email
notifications every 3 minutes until the DVR
stops detecting motion. The DVR will only
send out notifications when it detects
motion triggers.
5 Cl
ick Apply to save your settings.
If you select "Enable", and want to use
y
our own email server:
1 Co
nfigure the following:
• SS
L: Select ON/OFF to enable/disable
Secure Socket Layer protocol.
• SMTP P
ort: Enter your SMTP address.
• SMTP Serv
er: Enter your SMTP Server.
• Sender Email: Ent
er the sender email
address. This can be any address of your
choice.
• Sender Passw
ord: Enter your email
server’s password.
• Rec
eiver Email: Enter the recipient’s
email address.
• Interv
al: Enter the interval the DVR waits
before sending a new email notification.
2 Click Appl
y to save your settings.
Changing the Mobile Connectivity
Port, User Name, and Password
To connect to your DVR using a mobile
device, you must complete the entire
remote setup process described in
“Setting up your DVR for Remote
Connectivity” on page 55.
Use the steps below to change your
Mobile Port
or the user name and
password used to connect with a mobile
device.
To configure mobile connectivity
settings:
1 Click the Mo
bile tab.
2 If
you want to change the user name and
password used to connect to the DVR using
a mobile device:
• Under Use
r Name, enter a new user
name. Under Password, enter a new
password.
• By default, the user name is admin and
the pas
sword is 0000 to connect with a
mobile device.
3 T
o change the Mobile port, click the field
beside Mobile Port to enter a new port.
Select Default