
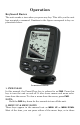
user manual


31
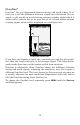
Zoom
The zoom feature enlarges all images on the screen by doubling the size
of the echoes (a 2X zoom). For example, if the current auto depth range
is 0 to 60 feet, Zoom will show an enlarged view of the water column
from 30 feet to 60 feet, always keeping the bottom in view.
To zoom in the display, repeatedly press
MENU until the ZOOM menu
appears. Press
↓ to select ON, then press PWR to clear the menu.
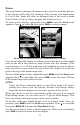
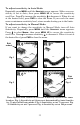
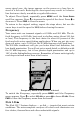
Zoom feature turned off (left). Zoom turned on (right).
You can tell when the display is in Zoom mode when the top of the depth
scale on the left of the screen no longer shows zero. For example, if the
current range is 0 to 80 feet with zoom off, switching to zoom would en-
large the water column from 40 feet to 80 feet. The number 40 would ap-
pear at the top of the depth range scale.
To turn off the zoom feature, repeatedly press
MENU until the ZOOM menu
appears. Press ↑ to select
OFF, then press PWR to clear the menu. The top
of the depth range scale returns to zero.
NOTE:
Using the Zoom command while in auto Zoom mode will always
enlarge the echoes near the bottom, because auto Range always
keeps the bottom displayed in the lower portion of the screen.
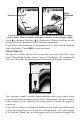
When you choose to use the zoom feature while the unit is in manual
Depth Range mode, you can select one of 17 pre-set Zoom Ranges. This
lets you enlarge a desired segment of the water column.
To do this, make sure Depth Range is set to manual mode. Next, re-
peatedly press
MENU until the ZOOM menu appears. Press ↓ to select ON,
then press
MENU UP to display the ZOOM RANGE menu.
Use the arrow keys to select a desired zoom size. When you are finished,
press
PWR to clear the menu from the display.