Lum/nex ® Luminex 100™ IS Developer Workbench Guide Version 2.
© LUMINEX CORPORATION, 2005. All rights reserved. No part of this publication may be reproduced, transmitted, transcribed, or translated into any language or computer language, in any form or by any means without prior express, written consent of: LUMINEX CORPORATION 12212 Technology Boulevard Austin, Texas 78727-6115 U.S.A. Voice: (512) 219-8020 Fax: (512) 219-5195 Luminex® 100™ IS Developer Workbench Guide Version 2.3 CN-M029-01 PN 89-00002-00-084 Rev.
Contents Developer Workbench Guide 1 Luminex 100™ IS . . . . . . . . . . . . . . . . . . . . . . . . . . . . . . . . . .1 The Process . . . . . . . . . . . . . . . . . . . . . . . . . . . . . . . . . . . . . . . . . 1 About This Guide . . . . . . . . . . . . . . . . . . . . . . . . . . . . . . . . . . . . 1 General Guidelines. . . . . . . . . . . . . . . . . . . . . . . . . . . . . . . . .2 Bead Handling . . . . . . . . . . . . . . . . . . . . . . . . . . . . . . . . . . . . . . 2 Limitations . . . . . .
Luminex 100 IS Developer Workbench GuideVersion 2.3 xMAP Technology Create Template . . . . . . . . . . . . . . . . . . . . . . . . . . . . . . . . . .15 Quantitative Assay Template. . . . . . . . . . . . . . . . . . . . . . . . . . . 15 Qualitative Assay Template. . . . . . . . . . . . . . . . . . . . . . . . . . . . 21 Data Collection Only . . . . . . . . . . . . . . . . . . . . . . . . . . . . . . . . . 29 Maintenance Template. . . . . . . . . . . . . . . . . . . . . . . . . . . . . . . .
xMAP Technology Contents Procedure . . . . . . . . . . . . . . . . . . . . . . . . . . . . . . . . . . . . . . . . . 57 Enumerate the Coupled Microspheres . . . . . . . . . . . . . . . . . . . 58 Technical Notes . . . . . . . . . . . . . . . . . . . . . . . . . . . . . . . . . . . . 58 LumAvidin Binding Protocol . . . . . . . . . . . . . . . . . . . . . . . .59 Introduction. . . . . . . . . . . . . . . . . . . . . . . . . . . . . . . . . . . . . . . . 59 Equipment. . . . . . . . . . . . . . . . . . . . .
Luminex 100 IS Developer Workbench GuideVersion 2.3 iv xMAP Technology PN 89-00002-00-084 Rev.
D Developer Workbench Guide Luminex 100™ IS The Process The Luminex 100 IS system was developed to increase efficiency in the clinical laboratory and in research and development. End users in the laboratory must run microtiter plates using xMAP® microspherebased assay kits developed for use with xMAP technology. The Luminex 100 IS Developer Workbench software provides the mechanism to develop templates for use on the Luminex 100 IS system. The basic process follows these steps: 1.
Luminex 100 IS Developer Workbench Guide Version 2.3 xMAP Technology General Guidelines Bead Handling Limitations • • • Safety Precautions xMAP microspheres are susceptible to photobleaching; photobleaching effects are cumulative. Minimize exposure of xMAP microspheres to light during your development and manufacturing phases to maintain product integrity. xMAP microspheres are hydrophobic in the aqueous medium provided and will settle if left undisturbed. Resuspend prior to dispensing.
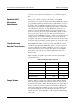
xMAP Technology Handling Instructions Note: Refer to the product information sheet that accompanies your xMAP microspheres for additional information. Bead Selection General Guidelines xMAP Carboxylated Microspheres come in various configurations. The handling of the product varies with the size of the container and the fill volume. Avoid excessive agitation of the product to reduce foaming and surface precipitation. The xMAP microspheres will settle if left undisturbed.
xMAP Technology Luminex 100 IS Developer Workbench Guide Version 2.3 and do not exceed a bead concentration of 2.5 x 10⁶ microspheres/ mL. Repetitive xMAP Microsphere Measurements Classification and Reporter Fluorochromes The reporter, bound to reagents at the surface of the xMAP microspheres, provides raw analytical data. Each xMAP microsphere of a particular signal theoretically binds an equal number of reporter molecules.
xMAP Technology General Guidelines The volume restrictions that the amount expelled back places on the assay design can be expounded by the following formula: [“Total well volume” (µL ) – “Sample uptake volume”(µL)] + 160(µL)
Luminex 100 IS Developer Workbench Guide Version 2.3 Gating Note: Gate positions are dependent upon buffer composition. Any changes made to the buffer composition in your assay may result in a different optimal gate location. Plates xMAP Technology Determine the gating on the doublet discriminator channel for the assay during development. The numeric values appear on the left side of the histogram. Use the numerical gate position, as determined in development, to set the gate location in the template.
xMAP Technology Developer Workbench Software Developer Workbench Software Access the Developer Workbench Software through the Acquisition Detail tab in the Luminex IS 2.3 Software. For a detailed description of the Acquisition Detail tab, see the Luminex IS Software Manual for Version 2.3. Developer Workbench Toolbar After you develop an Assay in the Acquisition Detail tab, use these tools to perform Developer Workbench Related Activities. 1 Create New Product 2 3 4 5 6 1.
Luminex 100 IS Developer Workbench Guide Version 2.3 xMAP Technology To start only the stand-alone Developer Workbench: 1. On your desktop, double-click the Developer Workbench icon. When the Developer Workbench software starts, the Developer Workbench toolbar opens in the Acquisition Detail tab. This is the same toolbar that appears when DWB is running through the Luminex 100 IS software.
xMAP Technology Create New Product Create New Product Assay kits include products that are standards, controls, or standards and controls. Once you create a product, it can be used in multiple templates. However, you should create separate products specific for use with each template. You can not import different products into one template. Adding one product and then another removes the first, replacing it with the second. Refer to the Glossary in the Luminex IS Software Manual for Version 2.
Luminex 100 IS Developer Workbench Guide Version 2.3 xMAP Technology Figure 1. Create New Product Dialog Box—Standards 2. Click New to enter a new product into the system. The first time you create a product the New button is grayed out. See Figure 1. 3. Select Standard. 4. Enter the Product Number, Product Name, and Manufacturer Name for the product you are creating. 5. Enter the Number of Tests for this product and press Enter on the keyboard. Each test represents an analyte.
xMAP Technology Create New Product the button repeats the process. For example, Protein 1 becomes Protein 11, Protein 2 becomes Protein 12 and so on. Apply Unit Button—select to apply the same unit value entered on the first line to all other tests. For example, if mg/mL is entered for the first Test Unit, then select Apply Unit to make all tests mg/mL. 7. Enter the Number of Standards for this product and press Enter on the keyboard. 8. Enter the Reagent Name for each standard in this product.
Luminex 100 IS Developer Workbench Guide Version 2.3 xMAP Technology 2. Click New to enter a new product into the system. The first time you create a control the New button is grayed out. 3. Select Control. 4. Enter the Product Number, Product Name, and Manufacturer Name for the product. 5. Enter the Number of Tests for this product and press Enter on the keyboard. Each test represents an analyte. The bead ID for each test you select when creating the template using this product. 6.
xMAP Technology Standards and Controls Create New Product To create a product that consists of standards and controls: 1. Click Create Product on the toolbar. The Create New Product dialog box opens. See Figure 3. Any currently defined products will be listed at the top of the dialog box. Figure 3. Create New Product Dialog Box—Standards and Controls 2. Click New to enter a new product into the system. The first time you create a product the New button is grayed out. 3. Select Both. 4.
Luminex 100 IS Developer Workbench Guide Version 2.3 xMAP Technology each test is selected when you create the template using this product). 6. Enter the Test Name (analyte) and Test Units used for each test. Apply Suffix Button—select to automatically apply the number one to the existing test name. For each successive test name it applies the test name and number at one increment higher than the previous test name. For example: Enter a Test Name of Protein and click Apply Suffix.
xMAP Technology Create Template Create Template There are four template types: • • • • Quantitative Assay (Standards or Controls) Qualitative Assay (Standards or Controls) Data Collection Only Maintenance (no tests) You can create each Quantitative and Qualitative template using one product that is composed of a definable number of standards and controls. Quantitative Assay Template You define each Quantitative template using a single product. The product must contain multiple standards.
xMAP Technology Luminex 100 IS Developer Workbench Guide Version 2.3 2. Type the correct information in the Developing Company, Created By, Template Name Version No, and Description boxes. If you do not enter a template name, the system automatically enters a unique value. The lab personnel will see this when they select the template to use with a kit. 3. Under Template Type, select Quantitative. 4. Enter the Sample Vol (µL) for this template. This is the amount of sample that will be tested.
xMAP Technology Create Template Figure 6. The Product Name column shows all saved products you created. Select the desired product from the list. Figure 6. Open Reagent Products Dialog Box—Add a Standards Product 10. Highlight the product to add to the template; the associated test and reagent information displays for your reference. You cannot edit this information here. If the desired product is not present in the list, select New to create a new product. Click Open. 11.
Luminex 100 IS Developer Workbench Guide Version 2.3 xMAP Technology Figure 7. Select Bead IDs 13. In the Min Beads column, enter the number of beads to collect for each test. Click Apply Min Beads to apply the same minimum bead requirement that you entered on the first line to all other tests. 14. Click in the Curve Fit column, then select the arrow to see a list of formulas. Select the desired curve fit formula for each test. Figure 8 displays a list of curve fit formulas.
xMAP Technology Create Template Figure 8. Select Curve Fit Formula 15. Click Next to display and select commands. See Figure 9. Figure 9. Select Available Commands 16. In the Available Commands list, click the desired commands then click the single right arrow (>) to add them to the Template Commands list. Type a value in the Repeat box to add multiple instances of a command. Click the left arrow (<) to remove the command. PN 89-00002-00-084 Rev.
xMAP Technology Luminex 100 IS Developer Workbench Guide Version 2.3 Note: You can return and edit any unused templates using the Edit Template feature. 17. These commands become part of the template and are always performed in the order specified. Each well command is automatically assigned to the next available well. Laboratory personnel can select the starting location on the plate, but they can not change these commands or the order in which they are performed.
xMAP Technology Create Template Table 3: Available Commands (Continued) Command Qualitative Assay Template PN 89-00002-00-084 Rev. B Definition Drain to reservoir Removes and refills sheath fluid from the cuvette. Sheath fluid is expelled into the reservoir. Drain to well Removes and refills sheath fluid from the cuvette. Sheath fluid is expelled into a well. Prime Primes the system to remove air from the sheath side of the analyzer.
xMAP Technology Luminex 100 IS Developer Workbench Guide Version 2.3 “Quali” value for each test. Control products are optional, but are recommended for judging the acceptability of batch results. To create a template for qualitative tests using standards and controls: 1. Click Create Template on the Developer Workbench toolbar. The Template Setup wizard opens. See Figure 10. Figure 10. Template Setup Wizard—Enter Specific Information 2.
xMAP Technology Create Template 7. Enter the Low Limit and High Limit for the Doublet Discriminator Gate. 8. Click Next. The Apply Standard/Control wizard opens. See Figure 11. Figure 11. Apply Standard/Control 9. Click Apply Standard/Control to add a product. The Open Reagent Product dialog box opens. See Figure 12. PN 89-00002-00-084 Rev.
Luminex 100 IS Developer Workbench Guide Version 2.3 xMAP Technology Figure 12. Open Reagent Product Dialog Box—Add a Standard Product 10. Highlight the product to add to the template; the associated test and reagent information appears for your reference. You can edit the information in a following step. If the desired product is not present in the list, select New to create a new product. Click Open. 11. The system applies the product (standard, control, or both) to the template.
xMAP Technology Create Template Figure 13. Select Bead IDs 13. Under Min Beads, enter the number of beads to collect for each test. Click Apply Min Beads to apply the same minimum bead requirement shown on the first line to all other tests. 14. Configure formulas. You can select one of the pre-defined formulas from the Qualitative Analysis Method list or edit one of the formulas and add it to the list under a new name. See Figure 14.
xMAP Technology Luminex 100 IS Developer Workbench Guide Version 2.3 Figure 14. Select Qualitative Formula Qualitative Formula Synopsis: For qualitative analysis the Luminex 100 IS software uses the algorithm: FI sample -----------------------× Ki FI s tan dard Where: FI = Fluorescent Intensity Ki = a “Quali” value entered in lot information to determine the value of the qualitative assay standard. The “Quali” value determines a cutoff or threshold.
xMAP Technology Create Template the current values for the selected formula. See Figure 15. You can add a new range, edit an existing range, or delete a range. When you add a new range set it clears the existing ranges. Figure 15. Range Editor Dialog Box Set up a Qualitative Formula: To set up a qualitative formula follow the steps in this example using your values. This example uses ranges 0 to 25 for non-reactive and 25 to 75 as reactive. a. Select Adv Qual Formula, then click Edit Formula.
xMAP Technology Luminex 100 IS Developer Workbench Guide Version 2.3 Table 4: Algorithm Formulas Qualitative Analysis Method Algorithm Lum Qual Formula FI sample ------------------------ × Ki FI s tan dard Adv Qual Formula FI sample ------------------------ × Ki FI s tan dard Default Values Default Ranges 0 to .9 .9 to 1.1 1.
xMAP Technology Create Template automatically assigned to the next available well. Laboratory personnel can select the starting location on the plate during batch setup, but cannot change these commands. If you have more than one command that involves the reservoir, those actions must use the same solution. Note: You can return and edit any unused templates using the Edit Templates feature. For a complete list of template command descriptions see Table 3 on page 20. 17.
Luminex 100 IS Developer Workbench Guide Version 2.3 xMAP Technology Figure 18. Template Setup Wizard—Select Data Collection Only 4. Enter the Sample Vol (µL) for this template. This is the amount of sample that will be tested. The volume in the wells must be at least 25 µL greater than the sample volume. 5. Enter a Sample Timeout (sec) for this template. This is the maximum time in seconds that the analyzer spends acquiring each sample. 6. Enter the target XY Heater Temp (°C) for this template.
xMAP Technology Create Template Figure 19. Enter the Number of Tests 9. Type the number of desired tests in the Tests box. Press Enter on the keyboard. A blank entry for each test displays in the adjacent area (each test is an analyte bound to a unique bead set). 10. For each test, type the appropriate information in the Name, Units, and Description boxes. Click Apply Units to apply the same unit shown on the first line to all other tests. See Figure 20. Figure 20. Define Test Parameters 11.
Luminex 100 IS Developer Workbench Guide Version 2.3 xMAP Technology You can also select the first bead ID and click Apply Bead ID Increment +1 to auto-fill the remaining entries with sequential bead IDs. See Figure 21. Figure 21. Select Bead IDs 12. In the Min Beads column, enter the number of beads to collect for each test. Click Apply Min Beads to apply the same minimum bead requirement on the first line to all other tests. 13. Click Next to proceed to the Select Template Commands wizard.
xMAP Technology Create Template 15. After you enter all the information into the template, click Save and then click Close. Figure 22. Select Template Commands Maintenance Template Create a maintenance template to facilitate your startup procedure, shutdown procedure, troubleshooting, or calibration. Ensure that the maintenance template you create is consistent with the Luminex 100 analyzer operations and maintenance requirements. See the Luminex 100 IS System Manual Version 2.3 for more information.
Luminex 100 IS Developer Workbench Guide Version 2.3 xMAP Technology included in the template name that the lab personnel see when they select the template to use with a kit. Figure 23. Template Setup Wizard—Create a Maintenance Template 3. Under Template Type, select Maintenance. 4. Use the default settings for Sample Volume, Sample Timeout, and Doublet Discriminator Gate. 5. Enter the target XY Heater Temp (°C) for this template if appropriate.
xMAP Technology Template Maintenance Figure 24. Select Template Commands 6. In the Available Commands list, click the desired commands then click the single right arrow (>) to add them to the Template Commands list. Type a value in the Repeat box to add multiple instances of a command. Click the left arrow (<) to remove the command. These commands are then part of the template and are always performed in the order specified for any batch that uses this template.
xMAP Technology Luminex 100 IS Developer Workbench Guide Version 2.3 You can print template information directly from the Luminex 100 IS software. Just select the template and click Print. Follow the onscreen dialog boxes. Edit Templates The system provides two template edit procedures: • • Edit an Unused Template Edit an unused template (no associated batches) Edit a used template (with associated batches) An unused template has no associated batches. To edit an unused templates: 1. At the Acq.
xMAP Technology Template Maintenance Cybergenlabs Pete B. Protein Map Protein, A, B, C 1.23 Figure 26. Template Setup Wizard—Select Template Information Edit a Used Template A used template has associated batches. To edit a used template: 1. At the Acq. Detail tab, click Edit Template on the Developer Workbench toolbar. An Open Template dialog box opens. Associated batches display a lock icon in ID cell. See Figure 27. Figure 27.
xMAP Technology Luminex 100 IS Developer Workbench Guide Version 2.3 2. Select the template to edit (the template ID cell displays lock icon) and click Edit. The Select Template Information wizard displays showing the selected template. See Figure 28. Cybergenlabs Pete B. Protein Map Protein, A, B, C 1.23 Figure 28. Select Template Information 3. Edit the Template Name and assign a new Version no. to the template. 4.
xMAP Technology Template Maintenance Figure 29. Open Template Dialog Box—Select Unused Template to Delete 2. Select the template to delete and click Delete. A dialog box opens, asking you to confirm whether you want to delete the template. Click Yes to delete. The template ID displays only the gray background if no batches are associated. If the template displays a lock, you can not delete it. To delete it you must delete the data batch that is associated with this template. 3.
xMAP Technology Luminex 100 IS Developer Workbench Guide Version 2.3 Figure 30. Open Template Dialog Box—Select Used Template to Delete 3. Select the template you want to delete (the template ID column displays the lock icon) and click Delete Batch. Batch results associated to this batch are deleted. You can not retrieve the deleted batch data. 4. A Warning message prompt displays. Click Yes to selectively delete batches. Click No to delete all batches. 5.
xMAP Technology Template Maintenance . Figure 31. Open Template Dialog Box—Select Template To Print You can print a template during the creating or editing process once you save it in the Template Setup wizard. To print a template during creation or editing: 1. At the Acq. Detail tab, click Edit Template. The Open Template dialog box opens. See Figure 31. 2. Select the desired template and click Edit. The Template Setup wizard opens, displaying the current values for the selected template.
Luminex 100 IS Developer Workbench Guide Version 2.3 xMAP Technology Figure 33. Template Setup Wizard—Print a Template 4. Click Save. The Print button becomes active. 5. Click Print at the bottom of the Template Setup wizard. A Template Report dialog box opens displaying information about the open template. See Figure 34. Figure 34. Template Report Dialog Box 42 PN 89-00002-00-084 Rev.
xMAP Technology Template Maintenance 6. Click Print at the top of the Template Report dialog box. The Windows Print dialog box opens. See Figure 35. Figure 35. Windows Print Dialog Box 7. Select the desired options. Click Print. 8. Click the X at the top-right corner of the Template Report dialog box to close the dialog box. Import a Template To import a template: 1. Select the Acq. Detail tab. 2. On the Developer Workbench toolbar, click Import Template.
xMAP Technology Luminex 100 IS Developer Workbench Guide Version 2.3 Figure 36. Import Template Dialog Box Export a Template Note: You can also export templates from the toolbar at the bottom of the Template Wizard dialog box. Export your template to a file that can be distributed with your kit on diskette or CD. Unless you are distributing a template to another computer system, it is not necessary to export a template.
xMAP Technology Help Figure 38. Template Saved Dialog Box 3. Click OK. 4. Copy the template from the folder to a diskette or CD.
xMAP Technology Luminex 100 IS Developer Workbench Guide Version 2.3 System Information To display system information: 1. On the Developer Workbench toolbar, Click Help> About Developer Workbench, then click System Info. The System Information dialog box opens. See Figure 39. Note: The OS Name entry reflects which operating system you have, Windows 2000 or Windows XP. Figure 39. System Information Dialog Box 2. Navigate through the folders to display the desired information. 3.
xMAP Technology Help From the opening help screen select the desired topic from Contents in the left pane or follow the topics in the right pane. Luminex Technical Support Website Additional information is available on the Luminex website. Search on the desired topic or navigate through menus. Also, review the website’s FAQ section. To access Luminex Technical Support FAQ website: In your browser’s address field, enter www.luminexcorp.com. From the main page, click Support, then FAQs.
Luminex 100 IS Developer Workbench Guide Version 2.3 48 xMAP Technology PN 89-00002-00-084 Rev.
A xMAP Protocols Updates or additions to these protocols are posted on the Luminex Tech Support website at http://luminexcorp.custhelp.com. At the main menu, select a subject or perform a search for the desired information. The protocols in this appendix are presented in the following order: Protein Coupling Protocol Oligonucleotide Coupling Protocol LumAvidin™ Binding Protocol xMAP Microsphere Handling xMAP Microsphere Dispersion Luminex xMAP microspheres settle and aggregate if left undisturbed.
xMAP Technology Luminex 100 IS Developer Workbench Guide Version 2.3 Vortexing and sonicating are not effective in resuspending the xMAP microspheres or preventing aggregation. However, vortexing and sonicating are recommended once the microspheres are transferred. Over time, it is normal to see a presence of beads on the surface of the liquid in the stock vials. You may notice a container wall residue and suspended macrobead aggregates.
xMAP Technology xMAP Microsphere Handling It is not advisable to construct an assay without defining the concentration of the subject-coupled xMAP microsphere preparation. The total surface area (total number of xMAP microspheres) represented in an assay is a critical variable, so the optimization and control of this variable begins with manipulation of known xMAP microsphere numbers. xMAP microspheres can be counted with a hemacytometer.
Luminex 100 IS Developer Workbench Guide Version 2.3 xMAP Technology Protein Coupling Protocol Introduction Use these protocols as a general starting point for developing assays. Optimize all assays for your reagents in your specific application. Updates or additions to these protocols are posted on the Luminex website at http://luminexcorp.custhelp.com. At the main page, select a subject or perform a search for the desired information.
xMAP Technology Preparation Protein Coupling Protocol 1. Allow all reagents to warm to room temperature. 2. Using an analytical balance, weigh approximately 10 mg of Sulfo-NHS into a tube. Repeat for EDC. Procedure xMAP Microsphere Activation 1. Vortex and sonicate the stock microspheres for 20 seconds. 2. Transfer 5.0 × 10⁶ of the stock microspheres to a USA Scientific microfuge tube. 3. Centrifuge the stock microspheres at ≥ 8,000 × g for 1 to 2 minutes. 4.
Luminex 100 IS Developer Workbench Guide Version 2.3 Coupling, Blocking, and Storage xMAP Technology 1. Add the protein preparation to the resuspended microspheres. 2. Bring total volume to 500 µL with Coupling Buffer. Vortex. 3. Rotate the mixture for 2 hours in the dark at room temperature. 4. Centrifuge the microspheres 1 to 2 minutes at ≥ 8,000 × g. Aspirate the supernatant. 5.
xMAP Technology Protein Coupling Protocol different buffer. If your protein does not couple satisfactorily under these recommendations, try PBS, pH 7.4 as an alternative coupling buffer. 3. Minimize the exposure of EDC and Sulfo-NHS to air; secure closures on stock and aliquot containers. Use aliquots immediately and discard containers after use. 4. The optimal coupling concentration for a given protein is determined by coupling at various concentrations within the recommended range of 1 to 125 µg.
Luminex 100 IS Developer Workbench Guide Version 2.3 xMAP Technology Oligonucleotide Coupling Protocol Introduction Use these protocols as a general starting point for developing assays. Optimize all assays for your reagents in your specific application. Updates or additions to these protocols are posted on the Luminex website at http://luminexcorp.custhelp.com. At the main page, select a subject or perform a search for the desired information.
xMAP Technology Procedure Oligonucleotide Coupling Protocol 1. Disperse the pellet with sonication, and vortex the container for 20 seconds. 2. Transfer 5.0 × 10⁶ of the stock microspheres into a 1.5 mL microcentrifuge tube (See Technical note 2). 3. Microcentrifuge the xMAP microspheres at ≥ 8,000 × g for 1 to 2 minutes. 4. Aspirate the supernatant, being careful not to disturb the pellet. Resuspend the microspheres in 50 µL of 0.1 M MES, pH 4.5. Vortex and sonicate. 5.
Luminex 100 IS Developer Workbench Guide Version 2.3 Enumerate the Coupled Microspheres xMAP Technology 1. Dilute the resuspended coupled microspheres 1:100 in deionized water. 2. Mix thoroughly using a vortex. 3. Transfer 10 µL to a hemacytometer. 4. Count the microspheres within the 4 large corners of the hemacytometer grid. 5. Microspheres/µL = (Sum of microspheres in 4 large corners) x 2.5 x 100 (dilution factor). 6. Store the preparation at 2oC - 8°C. Protect it from light. Technical Notes 1.
xMAP Technology LumAvidin Binding Protocol LumAvidin ™ Binding Protocol Introduction Use these protocols as a general starting point for developing assays. Optimize all assays for your reagents in your specific application. Updates or additions to these protocols are posted on the Luminex website at http://luminexcorp.custhelp.com.
Luminex 100 IS Developer Workbench Guide Version 2.3 xMAP Technology 5. Aspirate the supernatant and add 250 µL of the biotin-conjugated molecule in Reaction Buffer. Vortex and sonicate for approximately 20 seconds. 6. Dilute the biotin-conjugated molecule solution to a concentration of 4 to 4000 nM. 7. Add 250 µL of the biotin-conjugated molecule solution to the microsphere suspension and mix immediately by vortex. 8. Rotate the mixture for 30 minutes in the dark at room temperature. 9.
B Compatibility with Luminex 100 Version 1.7 Certain settings in the Luminex 100 Version 1.7 software must have particular values for your assay to be compatible with the Luminex 100 IS system. See Table 5. Table 5: Value Settings for the Luminex 100 Default bead map: 100 regions Sample size: between 20 and 200 µL Events per bead: recommend 100 Flow rate: Fast You cannot have Luminex 100 Version 1.7 and Luminex 100 IS loaded on the same system. Record your gate values on the Luminex 100 Version 1.
Luminex 100 IS Developer Workbench Guide Version 2.3 xMAP Technology Figure 40. Options Dialog Box—User Tab 3. Click New Session on the main window. The Sessions dialog box opens on the New Sessions window. On the General tab, set Sample Size between 20 and 200 µL. In the Flow Rate section, select Fast. Click OK. See Figure 41. Figure 41. Settings Dialog Box—General Tab 62 PN 89-00002-00-084 Rev.
C Customize Splash Screen Splash Screen When the Luminex 100™ IS 2.3 software starts, the Luminex splash screen displays for about ten seconds. See Figure 42. You can replace this splash screen with your own custom splash screen. . Figure 42. IS Software Splash Screen You create your own splash screen and import it into the Luminex 100 IS 2.3 software startup process. The software can use any .html file as a splash screen. These files can include graphics and hypertext links.
Luminex 100 IS Developer Workbench Guide Version 2.3 xMAP Technology To enter the path and dimensions for the graphic that you select as a splash screen: 1. On the Tools menu, click Options, and then click the Splash Screen tab. See Figure 43. Figure 43. Options Dialog Box—Splash Screen Tab 2. Enter the location of the graphic to use for the splash screen. Use the browse button to locate the graphic within the PC.
Index A About Developer Workbench 45 about this guide 1 Acquire 20 Acquire Background 20 Acquire Control 20 Acquire Standard 20 Acquire Test Specimen 20 algorithm formulas 28 Apply Suffix button 10 Apply Unit button 11, 12, 14 assays nonheated 6 assays, heated 6 Available Commands 20 available commands 20 B Backflush 20 Bath Sonicator 50 bead concentration 3 bead handling 2 bead map 3 bead selection 3 Bead Selection table 3 buttons, Create New Products 9 C Calibrate CAL1 20 Calibrate CAL2 20 calibration,
xMAP Technology Luminex IS Developer Workbench Guide Version 2.
xMAP Technology Index template types 15 U user manual, conventions 1 V Vacuum 51 value settings, Luminex 100 Version 1.
Luminex IS Developer Workbench Guide Version 2.3 68 xMAP Technology PN 89-00002-00-084 Rev.