Lum/nex ® No Top Plate Swivel Base Installation and User Manual
© Luminex Corporation, 2010. All rights reserved. No part of this publication may be reproduced, transmitted, transcribed, or translated into any language or computer language, in any form or by any means without prior express, written consent of: LUMINEX CORPORATION 12212 Technology Boulevard Austin, Texas 78727-6115 U.S.A. Voice: (512) 219-8020 Fax: (512) 219-5195 Luminex® No Top Plate Swivel Base Installation and User Manual PN 89-00002-00-244 Rev.
Standard Terms and Conditions For Use of Instrument Product By opening the packaging containing this product ("Product") or by using such Product in any manner, you are consenting and agreeing to be bound by the following terms and conditions. You are also agreeing that the following terms and conditions constitute a legally valid and binding contract that is enforceable against you.
TIME, LOSS OF REVENUE OR PROFITS, FAILURE TO REALIZE SAVINGS, LOSS OF PRODUCTS OF BUYER OR OTHER USE OR ANY LIABILITY OF BUYER TO A THIRD PARTY ON ACCOUNT OF SUCH LOSS, OR FOR ANY LABOR OR ANY OTHER EXPENSE, DAMAGE OR LOSS OCCASIONED BY SUCH PRODUCT INCLUDING PERSONAL INJURY OR PROPERTY DAMAGE UNLESS SUCH PERSONAL INJURY OR PROPERTY DAMAGE IS CAUSED BY SELLER'S GROSS NEGLIGENCE.
shall not reverse engineer, decompile, disassemble or modify the Product. Buyer acknowledges that Luminex retains ownership of all patents, trademarks, trade secrets and other proprietary rights relating to or residing in the Product and Buyer receives no rights to such intellectual property rights by virtue of its purchase of Product other than as expressly set forth herein. Buyer shall have no right to use any trademarks owned or licensed to Luminex without the express written permission of Luminex. 4.
b) Activation. You can activate the SOFTWARE by obtaining a license key provided by Luminex Technical Support at support@luminexcorp.com or 1-877-785-2323 or 1-512381-4397. c) Branding. You may only add additional branding or other graphics to SOFTWARE with Luminex’s express written consent. d) Upgrades. You may only obtain updates or upgrades for the SOFTWARE from Luminex Technical Support at orders@luminexcorp.com or authorized resellers.
comply with any of the terms or conditions of this EULA. Upon any termination of this EULA, you agree to destroy the SOFTWARE and erase any copies residing on your computer equipment. 6. RIGHTS IN SOFTWARE. All rights and title in and to the SOFTWARE and any copies thereof are owned by Luminex or its suppliers.
viii
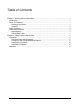
Table of Contents Chapter 1: About Luminex Swivel Base............................................................................... 1 Introduction ..................................................................................................................... 1 About This Manual .......................................................................................................... 1 Warnings and Notes .................................................................................................
Luminex No Top Plate Swivel Base Installation and User Manual x
CHAPTER 1 About the NTP Swivel Base Introduction The Luminex NTP (No Top Plate) Swivel Base enables manufacturers of biotechnical instruments to provide custom top plates expressly designed to support their instruments. This manual includes information about the following topics: • • • • • • About This Manual Safety Practices Technical Information Installation Operation Cleaning About This Manual Warnings and Notes The following informational notes and warnings appear as necessary in this manual.
Luminex No Top Plate Swivel Base Installation and User Manual Symbols The following symbols appear as necessary in this manual. Puncture or Pinch Point Warning Manufacturer Date of Manufacture Safety Practices Become familiar with the safety information in this section before using the NTP Swivel Base. This instrument includes mechanical components that, if handled improperly, are potentially harmful. Make certain the swivel base rests securely on a stable surface, to avoid any possibility of toppling.
About the NTP Swivel Base Technical Information Specifications • Weight: 44 lb (19.96 kg) • Dimensions: • Height: 3.30 inches (83.82 mm)(Height can be increased up to 1” using the adjustable leveling feet) • Width: 18.75 inches (476.25 mm) (excluding control knobs) • Depth: 23.5 inches (596.9 mm) • Retraction Depth: 4.90 inches (124.
Luminex No Top Plate Swivel Base Installation and User Manual 4
CHAPTER 2 Using the NTP Swivel Base NOTE: In the following chapter, photographs show the NTP Swivel Base with a top plate. This is included for illustration purposes only. The top plate provided by a manufacturer can differ from the one shown. Installation To install the NTP Swivel Base: 1. Place the NTP Swivel Base onto the flat surface where it will reside. 2. Place a level on top of the plate, right to left, to determine whether it is level. FIGURE 3. Swivel Base with Level 3.
Luminex No Top Plate Swivel Base Installation and User Manual 4. If necessary, use a 7/16” wrench to adjust one or more feet to make the top plate level. FIGURE 4. NOTE: Adjusting a Foot with the Wrench All four feet of the NTP Swivel Base are adjustable by approximately 1”. Operation The Luminex NTP Swivel Base both swivels and moves left to right. A pair of knobs, one on the front and one on the back, controls each kind of movement. FIGURE 5.
Using the NTP Swivel Base FIGURE 6. Swivel Base, Side View 1 2 1 Front and back swivel knobs 2 Front and back slide knobs To move the middle section to the left or right: 1. Pull both the front and back slide knobs slightly outward. 2. Rotate each knob about one-quarter turn and release it. The middle section is now disengaged and can move right and left, carrying the top plate with it. 3. Move the middle section as necessary.
Luminex No Top Plate Swivel Base Installation and User Manual To swivel the top plate: • Pull both the front and back swivel knobs slightly outward. • Rotate each knob about one-quarter turn and release it. The top plate is now disengaged and can swivel as necessary. • Swivel the top plate as necessary. The top plate can only be locked into place in the 3 o’clock, 6 o’clock, 9 o’clock, and 12 o’clock positions. • Pull one of the knobs slightly outward.