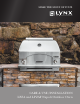
MAKE THE MOST OF YOUR CARE & USE/INSTALLATION LPZA and LPZAF Napoli Outdoor Oven
WARNINGS WARNING • NEVER USE DENTED, RUSTY OR DAMAGED PROPANE CYLINDERS. NEVER STORE ADDITIONAL OR EMPTY PROPANE CYLINDERS IN THE OVEN CABINET OR IN THE VICINITY OF THIS OR ANY OTHER APPLIANCE. DO NOT STORE PROPANE CYLINDERS INDOORS OR ON THEIR SIDES. • NEVER OPERATE THIS APPLIANCE UNATTENDED OR WITHIN 10FT (3.0M) OF ANY COMBUSTIBLE STRUCTURE, OR 25FT (7.5M) OF ANY FLAMMABLE LIQUID. • CHILDREN SHOULD NEVER BE LEFT ALONE OR UNATTENDED IN AN AREA WHERE AN OVEN IS LOCATED.
WARNINGS...continued WARNING READ THIS MANUAL CAREFULLY and completely before using your oven to reduce the risk of: 1. 2. 3. 4. Fire Burn hazard, personal injury or property damage Ruined pizza or other unpleasant cooking experiences Unapproved installation or servicing. THIS PRODUCT IS DESIGNED FOR OUTDOOR USE ONLY. Improper installation, adjustment, alteration, service or maintenance can cause property damage, injury or death.
A MESSAGE TO OUR CUSTOMERS You’ve just joined the world of Lynx cooks … a discriminating collection of amateur and professional chefs that take outdoor cooking to a new level. Your oven has been designed and built with meticulous attention to detail and it offers some unique and powerful features. You can achieve maximum performance and enjoyment of these features only by carefully reading this manual ... before your first cook-out.
HOW TO LIGHT YOUR NAPOLI OUTDOOR OVEN...continued 4. Turn the knob to the “LITE” position and continue to hold the knob in for an additional 10 – 20 seconds to allow the thermocouple to heat up and keep the safety valve open. LITE 5. If the burner should go out, turn the knob off for 1 minute and repeat steps 3 and 4. CHECKLIST BEFORE EACH USE (FOR YOUR SAFETY) • Do you smell gas? If yes, shut off everything and call the gas company or a qualified plumber to check for leaks, if not please continue.
TABLE OF CONTENTS 6 | HOW TO LIGHT YOUR OVEN 4 A MESSAGE TO OUR CUSTOMERS 4 CHECKLIST BEFORE EACH USE 5 USE & CARE GUIDELINES Lynx Oven Models 7 7 IMPORTANT SAFETY PRECAUTIONS 8 BEFORE YOU START If Shipment Arrives Damaged Important Notes 9 9 9 UNPACKING & ASSEMBLY 10 BAKING IN WINDY CONDITIONS 11 USING YOUR LYNX OVEN Pre-Bake Checklist Cooking Suggestions Lighting your Oven 12 12 13 15 CLEANING YOUR LYNX OUTDOOR OVEN 16 TROUBLESHOOTING YOUR LYNX OVEN Potential Problems Contacting Lyn
USE & CARE GUIDELINES This use & care manual covers the Lynx Napoli Outdoor Oven models listed below. Some features and options will vary based upon the model that you purchased. LYNX OVEN MODELS BUILT-IN FREESTANDING LPZA LPZAF COUNTER TOP MODELS LPZA The Napoli Outdoor Oven comes equipped with legs ready for counter top installation. For built-in applications remove the legs and follow the cut out dimensions found in this manual.
IMPORTANT SAFETY PRECAUTIONS PLEASE REVIEW THESE IMPORTANT SAFETY PRECAUTIONS BEFORE YOU USE YOUR OVEN. 1. NEVER LEAVE THE OVEN UNATTENDED WHILE COOKING. 12. Do not lean on side shelves and never place a load weighing more than 25 pounds on a side shelf. 2. Always use caution when operating the oven in a windy area. (See INDEX: “Baking in Windy Conditions” for further details.) 13.
BEFORE YOU START WARNING • Never locate the oven under a unprotected roof or overhang, in a building, garage, shed or other such enclosed area. • Never locate the oven under any unprotected combustible construction. • Installation must conform with local codes or, in the absence of local codes, with either the National Fuel Gas Code, ANSI Z223.1/NFPA 54, Natural Gas and propane Installation Code, CSA B149.1, or Propane Storage and Handling Code, B149.2, in Canada.
UNPACKING & ASSEMBLY The oven arrives nearly ready to use and requires only minor assembly. By carefully following the uncrating and unpacking steps, you will improve the customer’s first Lynx experience. Shipping weight on smaller units is app. 300 pounds and larger units may weigh over 500 pounds. WARNING: EXCESSIVE WEIGHT HAZARD! Use two or more people to move or install this unit. Failure to follow this instruction can result in back or other personal injuries.
BAKING IN WINDY CONDITIONS Outdoor cooking can create more heat than interior kitchen ranges. But there are a few things you can do to further prevent the possibility of improper heat buildup: These high-performance burners require a constant, steady supply of fresh air to mix with the fuel. Your Lynx oven pulls air in through the front and vents hot gases out through the vent stack. • If you suspect the oven is overheating, using an oven mitt, open the front door.
USING YOUR LYNX OUTDOOR OVEN Best results are achieved when the outdoor oven is allowed to preheat a minimum of 35 minutes with the door closed for best performance. Allow a little more time for colder ambient temperatures. With the burners on high the outdoor oven internal temperature can reach 700 °F to 800 ° F. After preheating, a medium high setting is an ideal temperature for preparing thin and medium crust pizza.
COOKING SUGGESTIONS NO-COOK PIZZA SAUCE 1 28 oz. Can of San Marzano Tomatoes. Do not drain, use tomatoes and liquid. 1 Tsp Salt 1/2 Tsp Sugar 1 Tsp Minced Garlic 1 Tsp Oregano, dry 1 Tbsp Basil, fresh, finely chopped Directions for Pizza Sauce: 1. Blend all ingredients in a blender, except for basil. 2. Mix in freshly chopped basil and store in an air tight container in the fridge until needed. PIZZA DOUGH Makes 1 large pizza.
COOKING SUGGESTIONS ...continued Make sure the oven is properly preheated before cooking your pizza to prevent sticking to the pizza deck. Similarly, do not use frozen pizza in the oven to prevent sticking and overcooking. Pizzas should not be prepared until ready to go into the oven. Pizzas allowed to sit will tend to stick to the pizza peel or counter top. Cook most medium and smaller pizzas directly on the oven deck at higher temperature for 4 to 8 minutes.
LIGHTING YOUR OVEN WARNING 1. Never attempt to light a burner if you smell gas. 2. Remove the oven door, or pull out the baking tray when lighting your outdoor oven. 3. Releasing fuel into a closed oven before lighting will increase the risk of explosion, property damage , personal injury or death. 4. Keep your face and body as far from the oven as possible when lighting.
CLEANING YOUR LYNX OVEN STAINLESS STEEL Lynx products are known for their attractive appearance. We achieve this by selecting only the finest grades of stainless steel and applying exacting workmanship. In order to maintain this attractive appearance over the life of the oven it is important to take the following steps: • After each use wipe down the exterior of the oven to remove grease and splatters.
TROUBLESHOOTING YOUR LYNX OVEN BEFORE YOU CALL FOR SERVICE • Is there fuel supplied to the oven? • Is your propane cylinder empty? Have you recently refilled the propane cylinder? If so, is the connection tight? • Is the main shut-off valve open? • Have you opened the valve on the propane cylinder? • Are you using the correct type of fuel? (LP or Natural Gas) (See INDEX: “Gas Requirements” for further details.
POTENTIAL PROBLEMS ...continued LOW OR INSUFFICIENT HEAT Ensure that you’ve preheated the burner(s) for at least 20 to 35 minutes with the door closed. Proper leveling during installation is critical. An oven that is out of level will cause erratic burner combustion and inefficient, uneven heating. A carpenter’s spirit level should be used to level the oven both front-to-back and side-toside. If the low heat problem persists: • Shut off all burner controls and close the LP cylinder valve.
POTENTIAL PROBLEMS ...continued in place by two spring tension tabs. The bulbs are easily removable without the use of tools. Simply grasp the glass lens at the outer corners, near the front tension clips and push the lens back. Then, swing the lens down and pull it loose. You may have to loosen the screw to remove the lens. Pull on spring tabs to release light cover Avoid touching the glass of a new bulb. Halogen bulbs are very sensitive to the oils found in human skin.
CONTACTING LYNX CUSTOMER CARE Before calling Lynx Customer Care, please make sure you have the following information: • Model number Your satisfaction is of the utmost importance to us.
LYNX LIMITED WARRANTY I. Limited Lifetime Warranty contained in this manual, or the local codes. The stainless steel body and the burners are warranted to be free from defects in material and workmanship when subjected to normal domestic use and service for the life of the original purchaser. This warranty excludes surface corrosion, scratches, and discoloration which may occur during normal use.
LYNX COMMON AREA LIMITED WARRANTY The Lynx Limited Warranty covers residential installations only and is non-transferable to any other party. This ‘nonresidential’ warranty applies when the product is installed in common areas where more than a single party has rightful access to its use or in locations considered beyond normal residential use such as B&B’s, and private clubs.
WARNINGS WARNING 1. Always maintain the required clearances from combustible construction as detailed. The oven is designed for outdoor use only. Never use in a garage, building, shed, breezeway or other enclosed area. This oven shall not be used under any unprotected overhead combustible construction. 2. Gas ovens are not design certified for and are not to be installed in or on recreational vehicles, portable trailers, boats or any other moving installation. 3.
SPECIFICATIONS & INSTALLATION BUILT-IN INSTALLATIONS OVERHEAD PROTECTION AND EXHAUST REMOVAL The Lynx Built-In oven is designed for easy installation into masonry enclosures. Do not install this appliance under any unprotected overhead combustible construction. If installed under any combustible construction the cooking area over the oven must be covered with an exhaust hood. The hood must provide 3 to 6 inches of overhang on all exposed sides.
SPECIFICATIONS & INSTALLATION...continued LYNX 30 IN. NAPOLI OUTDOOR OVEN LYNX 30 IN.
GAS CONNECTIONS WARNING NEVER CONNECT A GAS LINE DIRECTLY TO THE OVEN. A PRESSURE REGULATOR MUST BE INSTALLED ON ALL GAS EQUIPMENT. ALL LOCAL CODES REQUIRE IT AND LYNX SUPPLIES THE CORRECT REGULATOR WITH YOUR OVEN. REMOVING OR FAILING TO INSTALL THE PRESSURE REGULATOR CAN RESULT IN FIRE AND SERIOUS PERSONAL INJURY AND WILL VOID THE WARRANTY. The oven is factory set to use either propane (LP) or natural gas (NAT). It is critical that the gas you use matches that which the oven was set up for.
GAS CONNECTIONS ...continued This is available at your local hardware store or from your dealer. LP GAS Ovens set up for LP gas come equipped with an LP hose/ regulator assembly for connection to a standard 20 lb. LP cylinder. (Type 1). All fittings necessary to attach the assembly to the oven are included. The LP cylinder must include a collar to protect the cylider valve, and when the cylinder is not being used with the oven place a dust cap on the valve.
GAS CONNECTIONS ...continued LP Connections Make sure the LP cylinder valve is fully closed. It is possible for the valve to be open without releasing gas but, as soon as you start connecting the regulator, gas will leak from the connection. Insert the regulator inlet into the cylinder valve and turn the black coupler clockwise until the coupler is hand tight. Do not over-tighten this connection. • Turn on the gas valve and confirm that the igniter is glowing.
ELECTRICAL CONNECTIONS WARNING: ELECTRICAL GROUNDING • Product installation must meet local electric codes or, in the absence of local codes, the latest edition of the National Electrical Code ANSI/NFPA No. 70 or the Canadian Electrical Code CGA 1.6b2005. • Use only a Ground Fault Interrupter (GFI) protected circuit with this outdoor cooking gas appliance. • Do not use this outdoor cooking appliance if it has been submerged under water without thorough inspection by a qualified technician.
FINAL CHECKS LEAK TESTING DANGER! To prevent fire or explosion hazard, DO NOT smoke or allow any potential source of ignition (sparks, electrical arcing, etc) in the area while performing a leak test. Leak tests should be conducted outdoors only. Never conduct a leak test using fire or flame. There should be no lifting, fluttering or lazy blue flames. Some food particles will show as yellow flames but should burn off.
WIRING SCHEMATICS LPZA & LPZAF ASSEMBLY NAPOLI OUTDOOR OVEN CARE & USE/INSTALLATION | 31
LYNX NAPOLI OUTDOOR OVEN EXPLODED PARTS VIEW Napoli Oven LPZA 9.20.
LYNX NAPOLI OUTDOOR OVEN PARTS LIST ITEM PART No. DESCRIPTION 1 70323 COVER, HOOD WELDMENT 2 70319 HOOD WELDMENT 3 35117 DOME, EZ CAST 4 35316 GASKET, FIBERGLASS 5 80943 FLOOR SUPPORT ASSEMBLY 6 81119 PULLOUT TRAY ASSY. 7 80939 ACCESS DOOR ASSY. 8 35175 CONTROL PANEL, RH 9 80949 CONTROL PANEL, LH 10 70336 BASE PAN WELDMENT 11 70343 SUPPORT, WHEEL ASSY. RH 12 70344 SUPPORT, WHEEL ASSY.
MODEL-SPECIFIC BTU OUTPUTS & MAX. RUNS FOR APPLIANCES MODEL-SPECIFIC BTU OUTPUTS MODEL LPZA INFRARED BURNER (Btu) TOTAL INPUT 2 @ 20,000 40,000 Btu/Hr MAXIMUM RUNS FOR ALL APPLIANCES ON SUPPLY LINE 34 | Run Length 3/4” Pipe (in feet) Max BTU for all Appliances on line 10 360,000 20 245,000 30 198,000 40 169,000 50 150,000 60 135,000 70 123,000 80 115,000 NOTE: IF A 1/2 INCH LINE IS USED WITH NATURAL GAS IT SHOULD BE NO LONGER THAN 12 FEET.
INDEX # 4/11 Regulator .............................................................. 27 O Obtaining Service from LYNX........................................ 20 B Baking in Windy Conditions.......................................... 11 Before Each Use ........................................................... 12 Before You Start .............................................................. 9 BTU Outputs, Model Specific ....................................... 34 P Parts List.............................
The best outdoor kitchen products come from: Lynx Grills, Inc. 7300 Flores Street Downey, CA 90242 Service: (888)-289-5969 Fax: (562) 299-6978 www.lynxgrills.