TRIGGER FINGER 16-Pad MIDI Drum Control Surface Quick Start Guide This guide is intended to help get you started quickly. In order to achieve optimal usage of your new Trigger Finger, we recommend that you carefully study the enclosed product manual, either after completing the process described in this guide or before.
Trigger Finger English Installation Procedure Basic Installation Because it is a class-compliant device, installing the Trigger Finger on your Windows XP or Mac OS X computer is simple and straightforward: Use the supplied USB cable to connect the Trigger Finger to a USB port on your computer and you’ll be ready to go! You can do this while the computer is on or off, and no further driver installation will be necessary.
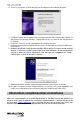
4. Follow the driver installer’s on-screen directions. 5. At various points in this installation process, you may be notified that the driver being installed has not passed Windows Logo Testing. Click “Continue Anyway” to proceed with the installation. 6. Click “Finish” once the installer is complete. 7. Connect your new MIDI controller to an available USB port and switch it on. 8. Windows will identify the new MIDI controller and will display a “Found New Hardware Wizard.
Trigger Finger Procédure d’installation Périphérique compatible en natif (class-compliant), le Trigger Finger est très facile à installer avec Windows XP ou Mac OS X : Utiliser le câble USB fourni pour connecter le Trigger Finger à un port USB de votre ordinateur et... c’est prêt ! Vous pouvez le brancher que votre ordinateur soit allumé ou éteint, sans qu’aucun pilote ne soit nécessaire.
4. Suivez les instructions à l’écran données par le programme d’installation du pilote. 5. A différents stades de l’installation, des messages peuvent vous indiquer que le pilote n’a pas passé le test du logo Windows. Cliquez dans ce cas sur Continuer afin de poursuivre l’installation. 6. Cliquez sur “Terminer” une fois la procédure d’installation terminée. 7. Branchez votre nouveau contrôleur MIDI à un port USB disponible en utilisant le câble fourni, et allumez-le. 8.
Trigger Finger Installation Grundlegende Hinweise Trigger Finger ist standardkonform mit Windows XP und Mac OS X, sodass für diese Betriebssysteme keine extra Treiber installiert werden müssen. Installation des Multi-Client-Treibers für Windows Auch wenn Trigger Finger standardkonform ist, benötigen Sie dennoch einen Multi-Client-Treiber, wenn Sie das Gerät zusammen mit mehreren Software-Anwendungen nutzen wollen.
4. Folgen Sie der Bildschirmführung. 5. Während der Installation erscheint mehrfach die Meldung, dass die Treibersoftware noch nicht für Windows zertifiziert wurde. Klicken Sie in diesen Fenstern einfach auf “Installation fortsetzen”. 6. Klicken Sie dann auf “Fertigstellen”, um das Installationsprogramm zu beenden. 7. Schließen Sie Trigger Finger über das mitgelieferte Kabel an einen freien USB-Steckplatz Ihres Computers an und schalten Sie das Gerät ein. 8.
Trigger Finger Procedimiento de instalación Instalación básica Dado que Trigger Finger es un dispositivo que cumple con la normativa vigente, la instalación de la unidad en su computadora Windows XP o Mac OS X es sencilla y directa: Utilice el cable USB que le suministramos para conectar el Trigger Finger a un puerto USB de su computadora, y ya estará listo para empezar a trabajar. Puede realizar la conexión con la computadora encendida o apagada, y no es necesario instalar ningún otro controlador.
4. Siga las instrucciones de instalación que aparecerán en pantalla. 5. En algunos momentos de la instalación, es posible que el sistema le indique que el controlador que está instalando no ha pasado la prueba del logotipo de Windows. Seleccione “Continuar” para proseguir con la instalación. 6. Pulse “Finalizar” para concluir la instalación. 7. Conecte su nuevo dispositivo MIDI a un puerto USB disponible en su computadora y encienda la unidad. 8.
Trigger Finger Procedura di installazione Installazione di base In virtù della compatibilità nativa, Trigger Finger si rivela estremamente semplice da installare, sia sotto Windows XP che Mac OS X: Collegate Trigger Finger ad una porta USB del vostro computer utilizzando il cavo USB incluso nella confezione e niente di più! Potete effettuare il collegamento sia a computer acceso che spento, senza dover installare nessun ulteriore driver.
4. Seguire le istruzioni del programma di installazione sullo schermo. 5. In vari punti del processo di installazione potrebbe essere segnalato che il driver in installazione non ha superato il test del logo di Windows. Premere “Continuare” per procedere con l’installazione. 6. Fate clic su “Fine” una volta terminata l’installazione. 7. Collegare il nuovo controller MIDI ad una porta USB disponibile mediante il cavo in dotazione e accenderlo. 8.
Trigger Finger インストール方法 基本インストール方法 Trigger Fingerは、クラスコンプライアントなためWindows XPとMac OS Xでは、ドライバをインストー ルする必要がなくインストールに手間がかかりません: 付属のUSBケーブルを使ってTrigger Fingerとコンピュータを接続すれば、インストールは完了です。 接続時にコンピュータの電源はON/OFFどちらでも構いませんしドライバをインストールする必要も ありません。 Windows用マルチクライアント・ドライバのインストール Trigger Fingerは、クラスコンプライアントなため設定も接続も簡単ですが、Windowsのクラス・ドライ バは常に1つのアプリケーションまたは1つのプログラムでしかTrigger Fingerを使うことはできません。 Trigger Fingerをホスト・アプリケーションとだけコミュニケートさせる場合にはクラス・ドライバを使 うことに問題はありません。 しかしながら、同時に複数のアプリケーションで使う場合やアプリケーションがReWireされている場 Liveをホスト・アプ
4. 画面の指示に従いドライバのインストールを進めます。 5. インストール中に「ロゴテストに合格していません」というメッセージが表示されますが、「続 ける」をクリックして先に進みます。 「完了」をクリックしてインストールを終了します。 付属のUSBケーブルを使用してMIDIコントローラをコンピュータのUSB端子へ接続します。 Windowsが起動すると新しいMIDIコントローラがコンピュータにより検知され、「新しいハード ウエアの検出ウイザード」が開始します。コンピュータにService Pack 2がインストールされて いる場合、インターネットでドライバを検索するかどうか尋ねられまので、検索しない方を選択 して「次へ」をクリックします。以下の画面が表示されます。 6. 7. 8. 9. 「ソフトウエアを自動的にインストールする」を選択し「次へ」をクリックします。 10.
M80010QS