
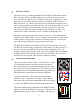
User Manual


3
Getting Started - An introduction to the BEE III
This step-by-step guide will help you get started using the BEE III and show you
how to operate it in all of its different modes. Working through this tutorial will
take less than an hour, and it will teach you everything that is necessary to take full
advantage of the BEE III's capabilities. It will take much less time for you to learn
the BEE III's functions with this tutorial than it will if you try to figure them out on
your own.
This guide assumes that you are familiar with basic radar operation. It will also be
beneficial if you have experience operating other radar units.
We encourage the customer to copy these pages out and use them as a checklist for
training. Checkboxes are provided to keep track of your progress.
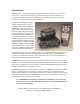
Install the BEE III
Install the BEE III unit in the vehicle in accordance with the instructions
supplied with the radar’s mounting brackets.
Care should be exercised to ensure that none of the radar components or cables
are placed in the vehicle’s airbag deployment zones. Otherwise, the radar may
become detached during the explosive deployment of the airbag and become a
dangerous projectile that could seriously injure the occupants of the vehicle.
If you have any questions regarding the proper installation of the BEE III,
please contact MPH. If you have any questions regarding the airbag
deployment zone of your particular vehicle, we suggest that you contact the
vehicle’s manufacturer.
Turn the BEE III on
Press and release the Power button on the readout unit. This will cause the
BEE III to power up. When first turned on, the BEE III will start up in the
mode in which it was turned off, except that the unit will always power up in
standby with the range set to maximum. Selected antenna bands are displayed
for both front and rear antennas.