
Installation Guide


M-ROCK P-Series / MSI
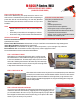
MSI POST/COLUMN SURROUND INSTALLATION GUIDE
Read the instructions and become familiar with the stone
• Watch the Installation video at www.m-rockstone.com
• Ensure that you have all the parts, fasteners, and tools that
you will need.
• We are here to help. Just call customer service 866-896-7625.
COLUMN STONE
Each column stone is custom designed for installation right out of
the box.
STEP 1:
Wrap your column in 2 layers of 30# felt. Install a starter strip on each side
of the post. Each starter strip should be installed with two screws drilled through
the channel.
STEP 2:
There are 4 different shaped stones. Lock shape 1 onto the starter strip followed in sequence
by shapes 2, 3, and 4. DO NOT screw any of the sections to the post until all four are in place.
Each section of the rst level will require one screw. Do not over tighten the screws; only
tighten until snug or until no visible gap in corners.
STEP 3:
Rotate 1/4 turn and repeat Step 2 by stacking the next row directly on top of the rst row and continue with
each additional row. As you are working up the post, other necessary adjustments may need to be made.
STEP 4:
Cutting may be necessary to nish the top row. If you have to make any cuts, do not cut the bottom
section of the rail on the stone so that it can still be locked into place. Make your cut and set the stone into
place to assure the t. Once you are condent that your t is correct, use a quality Construction Adhesive.
Apply the desired amount to the top and back section and along each vertical butt joint, ensuring that the
stone is locked into place.
COLUMN CAP
Designed for the 6”x 6” post surround system. To top/cap your post. It is designed with a 2” over hang to cover
the last row of post surround and the “pyramid” design is for both function and look. Attach your Pyramid Post
Cap with a quality Construction Adhesive.
COLUMN TRIM
These trims allow your post to continue up and it is designed specifically for our MSI 6”x 6” Post Surrounds.The
trim ring comes in two pieces and will need to be installed with a quality Construction Adhesive, leaving a 1/8” or
¼” gap between the top of the post and your trim. Apply the Construction Adhesive along the bottom groove and
where the two pieces will meet. Caulking around the Post Trim Ring may be needed.
Channel
Supplies needed:
• Drill and appropriate driver
• Screws (1¼ min.) Galvanized
or dipped in exterior coating
• Recommended 30# Felt
moisture barrier
• Polyurethane Construction
Adhesive
• Masonry, circular or table saw
with diamond blade