INSTALLATION INSTRUCTIONS GUIDE D’INSTALLATION GUÍA DE INSTALACIÓN FRAMED TUB / SHOWER DOOR PORTE DE DOUCHE / BAIN DOUCHE AVEC CADRE PUERTA DE DUCHA / BAÑERA DUCHA CON MARCO MODEL • MODÈLE • MODELO 104011 ● 104012 ● 104017 ● 104018 104180 ● 104181 ● 105410 ● 105412 ● 105413 805410 ● 804011 ● 805412 ● 805413 Read all instructions carefully before proceeding. Lire toutes les instructions attentivement avant de commencer l’installation.
Before you begin • Avant de commencer • Antes de Comenzar Carefully read all instructions beginning the installation. before Lire toutes les instructions attentivement avant de commencer l’installation. Lea detenidamente todas las instrucciones antes de comenzar la instalación. Consult local building codes to ensure that the installation complies with standards in your area. Consulter les codes de construction locaux pour assurer une installation conforme aux normes.
General considerations • Règles générales • Reglas Generales Framing Construction de la structure Construcción de la Estructura DO NOT DO ANY FRAMING WORK UNTIL YOU HAVE RECEIVED THE UNIT. The framing structure must be measured against the unit to ensure a proper fit. NE PAS CONSTRUIRE LA STRUCTURE AVANT D’AVOIR REÇU L’UNITÉ. Afin d’assurer une installation appropriée, on doit vérifier les dimensions de la structure à partir de celles de l’unité. NO CONSTRUYA LA ESTRUCTURA ANTES DE RECIBIR LA UNIDAD.
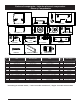
Parts and components • Liste des pièces et composantes • Piezas y Componentes 7 8 1 9 12 11 8 9 3 12 3 10 15 4 16 14 5 13 6 2 4
Parts and components • Liste des pièces et composantes • Piezas y Componentes 10081196-xxx-xxx 1 2 10081118-xxx-xxx 10015922-xxx-xxx 3 9/16" 10075037 10 14 7 10075893 1 1/4" 11 10005747 10075027 8 10075075 12 15 10041235-xxx-610 16 10075848 6 10075859 13 7/16" 9 10075840 10048763-xxx # Part Nom de la pièce Pieza 1 2 3 *4 Header E-Z Kleen track Wall channel Outer glass panel Linteau Rail E-Z Kleen Montant mural Panneau de verre extérieur Soporte Riel E-Z Kleen Canal de par
Tools and supplies required • Outils et matériel requis • Herramientas y Materiales Necesarios Level Niveau Nivel Pencil Crayon Lápiz Silicone sealant Silicone Sellador de silicona Electric drill Perceuse électrique Taladro eléctrico ⅛" and ¼" ceramic drill bit Mèche à céramique de ⅛" et ¼" Broca para cerámica de ⅛" y ¼" Square Équerre Escuadra Security equipment Équipement de sécurité Equipamiento de seguridad Measuring tape Ruban à mesurer Cinta métrica Screwdriver Tournevis Destornillador Hacks
HELPFUL HINTS / TROUBLE SHOOTING - ONLY THE TRACK AND HEADER WILL NEED TO BE CUT. DO NOT CUT WALL CHANNELS. - BE CERTAIN THE WALL CHANNELS “SIT” ON THE LEGS OF THE TRACK, REFER TO STEP 4, SKETCH 4A. - THE INNER GLASS PANEL MUST BE PLUMB TO THE WALL NEAR THE SHOWER HEAD, REFER TO STEP 8. - THE OUTER GLASS PANEL MUST BE PLUMB TO THE WALL OPPOSITE THE SHOWER HEAD, REFER TO STEP 8.
STEP ÉTAPE ETAPA 1 WARNING: SAFETY GLASSES SHOULD BE WORN AT ALL TIMES. AVERTISSEMENT: PORTER À TOUT MOMENT DES LUNETTES DE PROTECTION. ADVERTENCIA: SE DEBERÁN UTILIZAR ANTEOJOS DE SEGURIDAD EN TODO MOMENTO. Determine if your Tub / Shower Enclosure ledge is level & walls are plumb. If they are out of level / plumb, by more than 1/2", stop and call Customer Service. Vérifier que le rebord de votre Enceinte de baignoire/douche est de niveau et que les murs sont d’aplomb.
STEP ÉTAPE ETAPA 2 Measure the finished wall-to-wall distance, dimension “D”, in the center of the Tub / Shower Enclosure ledge. Mesurer la distance finale mur à mur, dimension “D”, au centre du rebord de l’Enceinte de baignoire/douche. Mida la distancia final de pared a pared, medición “D”, en el centro del borde de la Mampara de Ducha / Bañera. If a steel tape is used, be sure to add the width of the case to the measurement.
STEP ÉTAPE ETAPA 3 Locate the Track in the center of the Tub / Shower Enclosure ledge. Maintain a uniform gap, at each end, between the end of the Track and the wall. Situer le Rail au centre du rebord de l’Enceinte de baignoire/douche, en conservant un écart égal à chaque extrémité, entre le bout du Rail et le mur. Coloque el Carril en el centro del borde de la Mampara de Ducha / Bañera. Mantenga un espacio uniforme, en cada terminal, entre las terminales del Carril y la pared.
STEP ÉTAPE ETAPA 4 Carefully position the Wall Channel by sliding it down, around Track and “sitting” on top of the Track’s legs, as shown in STEP 4A. Glisser avec précaution le montant mural vers le bas autour du Rail, en chevauchant les bords du Rail tel qu’illustré dans la ÉTAPE 4A. Be careful not to move the temporary position of the Track. Use a level to plumb the Wall Channel, as shown in STEP 4B. Attention de ne pas déplacer la position temporaire du Rail.
STEP ÉTAPE ETAPA 5 After drilling, clean the Tub / Shower Enclosure ledge and the Wall Channel areas thoroughly. This will assure proper adhesion of the Silicone Sealant. Après le perçage, nettoyer à fond les zones du rebord de l’Enceinte de baignoire/douche et des montants pour assurer l’adhésion optimale du Produit de calfeutrage (silicone). Luego de perforar, limpie profundamente el borde de la Mampara de Ducha / Bañera y los Canales de Pared.
STEP ÉTAPE ETAPA 6 Measure the finished wall-to-wall distance, dimension “H”, at the top of the Wall Channels. Mesurer la distance finale mur à mur, dimension “H”, en haut des Montants muraux. Mida la distancia final de pared a pared (medición “H”), en la parte de arriba de los Canales de Pared. Please note, that if a steel tape is used, be sure to add the width of the case to the measurement. Remarque: Si un ruban métallique est utilisé, ne pas oublier d’ajouter à la mesure la largeur du boîtier.
Please note, when installing the Shoulder Screws, DO NOT use a power screwdriver, use a #2 phillips head screw driver, DO NOT OVER TIGHTEN. Remarque: Pour monter les Vis à épaulement, NE PAS utiliser le tournevis mécanique mais le tournevis Phillips n°2; NE PAS TROP SERRER. Tenga presente que al instalar los Tornillos de Tope, NO DEBE usar un destornillador eléctrico; utilice un destornilador #2 tipo Phillips; NO SOBREAJUSTE.
STEP ÉTAPE ETAPA 7 NOTE: The towel bar should be installed on the first panel (exterior of the bath). If there is two towel bars, install the second one on the second panel (interior of the bath). NOTE: Vous devez installer une barre à serviettes sur le premier panneau (extérieur du bain). S'il y a une deuxième barre à serviettes, installez-la sur le deuxième panneau (à l'intérieur du bain). NOTA: La barra de toalla se debe instalar en el primer panel (el exterior del baño).
STEP ÉTAPE ETAPA 8 Install Rollers as shown. Installer les Rouleaux tel qu’illustré. Instalar rodillos como se indica. Please note, the Spacer Nut, on the Roller, is mounted AGAINST the Glass Panels. Remarque: L’Écrou d’espacement sur le Rouleau est monté CONTRE les Panneaux de verre. Tenga en cuenta que la Tuerca Espaciadora, sobre el Rodillo, está montada CONTRA los Paneles de Vidrio. Initially, install the Roller in the second to top Roller mounting hole.
STEP ÉTAPE ETAPA 9 WARNING: DO NOT LIFT GLASS PANELS BY THE TOWEL BARS. ATTENTION: NE PAS SOULEVER LES PANNEAUX DE VERRE PAR LES PORTE-SERVIETTE. ADVERTENCIA: NO LEVANTE LOS PANELES DE VIDRIO DE LOS TOALLEROS. Install the Inner Glass Panel first. With the Rollers facing toward the Tub, HOLD THE GLASS PANELS BY BOTH SIDES and lift up into the underside of the Header. Installer d’abord le Panneau de verre interne.
STEP ÉTAPE ETAPA 10 Apply Silicone Sealant as shown. Appliquer le silicone tel qu’illustré. Apply to the Wall / Wall Channel “seam” and be certain to add Silicone to both ends of the Track where it meets the Wall Channel. Appliquer à la jointure entre le mur et le Montant mural et s’assurer d’ajouter du silicone aux deux extrémités du Rail à l’endroit où il contacte le Montant mural. Silicone Silicona 18 Aplique Sellador de Silicona como se indica.
LIMITED WARRANTY GARANTIE LIMITÉE GARANTÍA LIMITADA MAAX Bath Inc. (hereafter “MAAX”) offers an express limited warranty on each of its products. This warranty extends only to the original owner/end-user for personal household use. For commercial uses, additional limitations apply. MAAX Bath Inc. (ci-après “MAAX”) offre une garantie limitée expresse sur chacun de ses produits. Cette garantie s’adresse uniquement au propriétaire/utilisateur original pour un usage personnel domestique.
www.maax.com Technical Services / Service technique / Servicio técnico T. 1 877 GET-MAAX (1 877 438-6229) F. 1 888 361-2045 © 2008 MAAX Bath Inc.