
Installation Guide


6
1
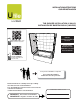
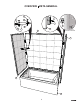
STEP Building the structure
Build a structure based on the dimensions in the chart
below.
IF STRUCTURE IS ALREADY BUILT CHECK THAT
IT RESPECTS THE DIMENSIONS BELOW
Verify the wall studs are square, plumb and the
fl ooring is perfectly level.
6"
6"
C
For a worry free installation follow
all instructions and check them off
as you go.
A
B
C
D
Top view of structure
1.1
Check me!
1.2
Check me!
1.3
Check me!
D
COMPATIBLE BATHTUBS No A B C D
COCOON 6030 IFS 105822
Between
60" - 60 1/4"
31 1/2"
min.
14 1/8" 9 3/8"
BROME 105821
Between
60" - 60 1/4"
31 1/2"
min.
14 1/8" 9 3/8"
EXHIBIT 6030 (IFS) 105519 59 3/4"
30"
min.
14" 10"
EXHIBIT 6030 (IFS) AFR 105511 59 3/4"
30"
min.
14" 10"
NEW TOWN 6030 IFS 105454
Between
60" - 60 1/4"
31 1/2"
min.
14" 10 1/8"
RUBIX 6030 105815 59 3/4"
30"
min.
18 3/8" 15"
RUBIX 6030 AFR 105816 59 3/4"
30"
min.
20 3/8" 15"
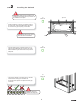
Leveling the fl oor is
critical for wall alignment
Quick tip
For leveling the fl oor use self-leveling
mortar.
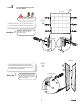
Cut out an approximate 6" x 6" opening around
the drain center outlined by measurements C and
D. See image to the right and the chart above. We
recommend that a plumber completes the drain pipe
connection.
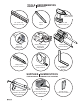
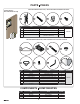
Before starting make sure to have all
parts and components refer to page 4.