installation instructions Guide d’installation Guía DE instalación For right and left side door installation (RIGHT side shown) Pour installation de porte côté droit et gauche (côté DROIT ILLUSTRÉ) Para la instalación de la puerta del lado derecho e izquierdo (se muestra INSTALACIÓN AL LADO DERECHO) MODEL • MODÈLE • MODELO 139395 • 139396 • 138998 • 138996 • 138997 • 139398 Read all instructions carefully before proceeding. Lire toutes les instructions attentivement avant de commencer l’installation.
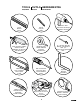
PARTS AND COMPONENTS PIÈCES PIEZAS ET COMPOSANTES * With RETURN PANEL OPTION Y COMPONENTES 7 8 * Avec L'OPTION PANNEU DE RETOUR 17 29 * Con OPCIÓN PANEL DE RETORNO 16 15 * 31 12 11 * 29 9 10 13 14 8 1 7 18 2 33 *32 * 30 5 28 4 15 3 6 1 34 2
PARTS AND COMPONENTS PIÈCES ** 5 3 PIEZAS ET COMPOSANTES Y COMPONENTES 6 7 4 8 9 7b 10 11 12 12b 13 14 15 ** 16 17 21 22 27 20a ** 18 19 20 20b 23 28 24 25 26 30 * 31 * 32 33 34 * According to selected model.
PARTS AND COMPONENTS PIÈCES ET COMPOSANTES PIEZAS Y COMPONENTES XXX 084=Chrome, Cromo 305=Brushed nickel, Nickel brossé, Níquel cepillado 173=Dark bronze, Bronze foncé, Bronce oscuro DOOR | PORTE | PUERTA # Part Nom de la pièce Pieza Qt Cant.
TOOLS OUTILS HERRAMIENTAS REQUIRED REQUIS Necesarias Electric drill Perceuse électrique Taladro eléctrico Level Niveau Nivel Pencil Crayon Lápiz Clear silicone sealant Silicone claire Sellador de silicona transparente Masking tape Ruban adhésif Cinta de emmascarar ¼" ceramic drill bit Mèche à céramique de ¼ po.
BEFORE AVANT YOU BEGIN DE COMMENCER ANTES DE Comenzar A two person installation is recommended. Une installation par deux personnes est recommandé. Se recomienda realizar la instalación entre dos personas. A. Before beginning the installation, make sure that the door fits within the shower enclosure. To do so, measure the height, width and depth of the shower enclosure, and compare these measures to those of the door and panels. B.
installation | Instalación 1 Images are based on a right side door installation. ces images sont basées sur une installation de porte à droite. Estas imágenes se basan en la instalación de la puerta al lado derecho. STEP ÉTAPE ETAPA B A. Position and level the wall jamb (7) [fixed panel side] 1½" from the edge of the inside edge of the shower base. B. Mark the fastening holes. C. Drill the wall covering. [For ceramics always use a ceramics 1/4" drill bit]. D.
installation | Instalación 2 a 7 STEP ÉTAPE ETAPA INSIDE INTÉRIEUR INTERIOR A. Insert the fixed panel (2) in the wall jamb (7). B. Level and square the fixed panel (2). [For leveling, use wedge spacers (26) as needed] C. From the inside of the shower, insert the sealing gasket (8) between the fixed panel (2) and the wall jamb (7). D. Use the insertion tool (24) to completely insert the gasket (8). 2 A. Inserer le panneau fixe (2) dans le montant mural (7). B.
installation | Instalación 3 a STEP ÉTAPE ETAPA 7 A. From inside the shower, use the drilling template (25) as shown and mark the holes to be drilled. B. Drill the wall covering. [For ceramics always use a ceramics 1/4" drill bit].(29). C. Fill the holes with a generous amoutn of silicone. D. Install a wall fastener (9) with the provided screws (19). INSIDE INTÉRIEUR INTERIOR 25 A. De l'intérieur de la douche, utiliser le gabarit de perçage (25) tel que démontré afin de marquer les trous à percer. B.
STEP ÉTAPE ETAPA installation | Instalación 4 A. Position and level the wall jamb (7) [return panel side] 1½" from the edge of the inside edge of the shower base. B. Mark the fastening holes. C. Drill the wall covering. [For ceramics always use a ceramics 1/4" drill bit]. D. Fill the holes with a generous amount of silicone and apply silicone behind the wall jamb (7) and / or use wall anchors (21). E. Fasten the wall jamb (7) with the provided pvc washer (33) and1 5/8" screws (20a). A.
STEP ÉTAPE ETAPA installation | Instalación 5 a 7 INSIDE INTÉRIEUR INTERIOR A. Insert the return panel (29) in the wall jamb (7). B. Level and square the return panel (29). [For leveling, use wedge spacers (26) as needed] C. From the inside of the shower, insert the sealing gasket (8) between the return panel (29) and the wall jamb (7). D. Use the insertion tool (24) to completely insert the gasket (8). 29 A. Inserer le panneau de retour (29) dans le montant mural (7). B.
STEP ÉTAPE ETAPA installation | Instalación 6 A A. Slide the support bracket (9) on the support bar (10) against the wall and around the wall fastener. B. Temporarily install the support bar (10) to the fixed panel (2) using a panel fastener (12) and a support bracket (9) on the panel side using the allen key 3mm (22). [Do not over tighten the panel fastener] C. Measure the distance return panel (29) to wall at the to and substract 1 3/8".
7 installation | Instalación STEP ÉTAPE ETAPA A. Insert the magnetic jamb (30) on the return panel (29). B. Install the corner bracket (31) on the return panel (29) with the provided screws and the allen key 4.5mm as shown. TOP VIEW VUE SUPÉRIEURE VISTA SUPERIOR 30 A 29 A. Insérer le montant magnétique (30) dans le panneau de retour (29). B. Installer le support en coin (31) sur le panneau de retour (29) avec les vis fournies et la clé allen 4.5mm tel qu'illustré. A.
installation | Instalación 8 Images are based on a right side door installation. STEP ÉTAPE ETAPA Ces images sont basées sur une installation de porte à droite. Estas imágenes se basan en la instalación de la puerta al lado derecho. A. Position and level the wall jamb (7) [fixed panel side] 1½" from the edge of the inside edge of the shower base. B. Mark the fastening holes. C. Drill the wall covering. [For ceramics always use a ceramics 1/4" drill bit]. D.
installation | Instalación STEP ÉTAPE ETAPA 9 A. Insert the fixed panel (2) in the wall jamb (7). B. Level and square the fixed panel (2). [For leveling, use wedge spacers (26) as needed] C. From the inside of the shower, insert the sealing gasket (8) between the fixed panel (2) and the wall jamb (7). D. Use the insertion tool (24) to completely insert the gasket (8). A 7 INSIDE INTÉRIEUR INTERIOR A. Inserer le panneau fixe (2) dans le montant mural (7). B.
STEP ÉTAPE ETAPA installation | Instalación 10 A A. From inside the shower, use the drilling template (25) as shown and mark the holes to be drilled. B. Drill the wall covering. [For ceramics always use a ceramics 1/4" drill bit]. C. Fill the holes with a generous amount of silicone. D. Install a wall fastener (9) with the provided screws (19). 7 INSIDE INTÉRIEUR INTERIOR 25 A. De l'intérieur de la douche, utiliser le gabarit de perçage (25) tel que démontré afin de marquer les trous à percer. B.
STEP ÉTAPE ETAPA installation | Instalación 11 4 Cut opposite the holes for panel assembly. A. Measure the distance wall-to-wall at the top of the alcove and subtract 1 3/8". Cut the support bar (10), based on this measure. [Opposite the holes for fixed panel assembly] B. From the panel fastener assemblies (12), install both nuts in the support bar (10) as shown. C. Apply a piece of masking tape on the half moon inserts (12b) for them to hold in place when the bar is installed.
STEP ÉTAPE ETAPA 5 12 installation | Instalación A. Unscrew the set screw as shown. B. Insert the door bumper (11) on the support bar (10) and fasten with the provided screw using the Allen key. C. Assemble the door bumper (11) with the set screw using the Allen key (22). There is an adjustment as possible on the door stop. We recommend to make the adjustment at the end of the installation if necessary. * A. Dévisser la vis à pression tel que démontré. B.
STEP ÉTAPE ETAPA installation | Instalación 13 * A. Slide the support brackets (9) on the support bar (10). For the installation with return panel install the corner support bracket (31). [See Step 3] To level the door adjust the return panel to the interior or the exterior. B. Temporarily install the support bar (10) to the fixed panel (2) using a panel fastener (12) and a support bracket (9) on the panel side. [Do not over tighten the panel fastener] C.
STEP ÉTAPE ETAPA installation | Instalación 14 7 A. Position a wall fastener (9) on the marks drawn on the wall and insert a wall fastener (9) in the support. B. Use the wall fastener (9) as a template and mark the drilling holes on the wall. C. Drill the wall covering. [For ceramics always use a ceramics 1/4" drill bit]. D. Fill the holes with a generous amount of silicone. E. Install a wall fastener (9) with the provided screws (20). A 9 9 A.
STEP ÉTAPE ETAPA 8 15 installation | Instalación A. Place the door (1) temporarily and safely on a wall inside the shower over cardboard. B. Install the rollers (13) on the door (1) in the top holes as shown. [Do not over tighten the rollers] A A. Appuyer la porte (1) temporairement et sécuritairement contre le mur à l’intérieur de la douche sur un carton. B. Installer les roulettes (13) sur la porte (1) dans les trous supérieurs tel que démontré. [Ne pas trop serrer les roulettes]. 13 A.
STEP ÉTAPE ETAPA 9 16 installation | Instalación 22 A. Install the support bar (10) sliding the support brackets (9) on the wall fasteners. Use the Allen key 3mm (22) to tighten the first set screws on the support bracket. B. Fasten the second set screws on the support bracket (9) using the allen key 3 mm (22). Fasten the fixations (12) using the allen key 3 mm to make a u-turn. A A. Installer la barre de soutien (10) en glissant les supports (9) sur les fixations murales.
STEP ÉTAPE ETAPA 17 10 installation | Instalación A. Apply silicone sealant under the door guide (4). B. Place and level (with wedge spacers (26) if necessary) the door guide (4) at the base of the fixed panel (2) and tape the door guide in place until 24 hours after the installation is completed. C. Install the cap (7b) on the wall jamb (7). A. Appliquer du silicone sous le guide de porte (4). B.
STEP ÉTAPE ETAPA installation | Instalación 11 18 A. Insert the bottom sealing gasket (28) on the bottom of the door (1). B. Install the door (1) on the support bar (10). [Make sure the rollers (13) are well seated on the bar] C. Insert the bottom of the door (1) in the door guide (4). [Make sure the door remains as deeply as possible in the guide when adjusting the rollers during the next step] B 13 A. Insérer le joint d'étanchéité inférieur (28) au bas de la porte (1) B.
STEP ÉTAPE ETAPA installation | Instalación 19 12 A. From inside the shower, close the door (1) against the wall. Adjust the excentric part of the roller assemblies (13) so the magnetic door jamb (15) square againts the wall. B. Fasten both rollers (13) in position using the assembly wrenches (23) on the excentric parts to maintain the adjustment and on the nuts to tighten as much as possible. C. Install the anti-jump stopper (14) as shown and the finishing caps on the rollers (13). D.
STEP ÉTAPE ETAPA installation | Instalación 20 13 15 A A. Close the door (1) and trace a line on the wall along the magnetic door jamb (15). B. Position the wall channel (17) next to the traced line and mark the holes to be drilled. C. Drill the wall covering on the markings. [For ceramics always use a ceramics 1/4" drill bit.] D. Fill the holes with a generous amount of silicone and / or use wall anchors (21). E. Fasten the wall channel (17) with the provided screws (20 b). A.
STEP ÉTAPE ETAPA 21 14 installation | Instalación A. Install the adjustable magnetic jamb (16) on the wall channel (17). B. Install the side sealing gaskets (6) on the edges of the door (1) and the fixed panel (2) as shown and cut under the support bar (10). A 17 16 A. Installer le montant magnétique de porte (16) sur le profilé mural (17). B. Installer les joints d'étanchéité de côté (6) sur les rebords de la porte (1) et du panneau fixe (2) tel que démontré et couper sous la barre de soutien (10).
STEP ÉTAPE ETAPA 22 15 installation | Instalación A. Install the handle (18) on the door (1) as shown using a flat screwdriver and the 2mm Allen key (22). 18 A. Installer la poignée (18) sur la porte (1) tel que démontré avec un tournevis plate et la clé Allen 2mm (22). A A. Instalar el tirador (18) en la puerta (1) como se muestra en la ilustración, usando un destornillador plano y la llave Allen de 2 mm (22).
STEP ÉTAPE ETAPA installation | Instalación 23 A. Measure the distance between the wall and the door guide (4) at the base of the alcove. Cut the threshold (3) based on this measure. [If the total width of the enclosure is between 46 1/4" and 47" for a 48" model or between 58 1/4" and 59" for a 60" model, threshold will not be cut] B. Apply silicone sealant under the door threshold (3). C. Insert the threshold (3) in the door guide (4) and install the threshold parallel to the base. D.
STEP ÉTAPE ETAPA 24 17 installation | Instalación A. From outside the shower, apply silicone sealant between the wall jamb (7) [fixed panel side] and the wall, between the fixed panel (2) and the base, and on the door guide (4). B. OPTIONAL STEP: In case you need to change the door magnet, intert on the bottom of the magnetic door jamb (15) the magnet cap (34) with a rubber hammer. A.
LIMITED WARRANTY Garantie limitée Garantía limitada MAAX Bath Inc. (hereafter “MAAX”) offers an express limited warranty on each of its products. This warranty extends only to the original owner/end-user for personal household use. For commercial uses, additional limitations apply. MAAX Bath Inc. (ci-après “MAAX”) offre une garantie limitée expresse sur chacun de ses produits. Cette garantie s’adresse uniquement au propriétaire/utilisateur original pour un usage personnel domestique.
www.maax.com Technical Services / Service technique / Servicio técnico T. 1 877 GET-MAAX (1 877 438-6229) F. 1 877 636-6250 © 2008 MAAX Bath Inc.