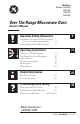
000 Watts Models: JVM1630 JVM1635 JVM1620 JVM1625 Over The Range Microwave Oven Owner’s Manual Important Safety Information Precautions to Avoid Possible Exposure to Excessive Microwave Energy Special Notes About Microwaving 2 2 6 Operating Instructions Features of Your Microwave The Controls on Your Microwave Time Features Quick Touch Features Auto Feature Other Features 11 11 12 15 21 23 24 Helpful Information Microwave Terms Care and Cleaning 27 27 28 If Something Goes Wrong 33 Before You Call
IMPORTANT SAFETY INFORMATION READ ALL SAFETY INFORMATION BEFORE USING FOR YOUR SAFETY PRECAUTIONS TO AVOID POSSIBLE EXPOSURE TO EXCESSIVE MICROWAVE ENERGY For your safety the information in this manual must be followed to minimize the risk of fire or explosion or to prevent property damage, personal injury or loss of life. 2 Do Not Attempt to operate this oven with the door open since open-door operation can result in harmful exposure to microwave energy.
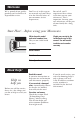
Welcome We’re proud of our quality products and we believe in dependable service. You’ll see it in this easy-touse manual and you’ll hear it in the friendly voices of our consumer service department. Best of all, you’ll experience these values each time you use your microwave. That’s important, because your new microwave will be part of your family for a long time. Start Here!…Before using your Microwave Write down the model and serial numbers here. They are on a label inside the oven.
IMPORTANT SAFETY INFORMATION READ ALL SAFETY INFORMATION BEFORE USING WARNING To reduce the risk of fire, burns, electric shock, injury to persons or exposure to excessive microwave energy when using your appliance, follow basic precautions, including the following sections. PRECAUTIONS TO AVOID POSSIBLE EXPOSURE TO EXCESSIVE MICROWAVE ENERGY (a) Do not attempt to operate this oven with the door open since this operation can result in harmful exposure to microwave energy.
i) Do not overcook food. Carefully attend appliance if paper, plastic or other combustible materials are placed inside the oven while cooking. ii) Remove wire twist-ties and metal handles from paper or plastic con-tainers/bags before placing them in the oven. iii) If materials inside the oven ignite, keep the oven door closed. Turn the oven off and unplug the appliance. Disconnect the power cord, shut off power at the fuse or circuit breaker panel. iv) Do not use the oven for storage purposes.
IMPORTANT SAFETY INFORMATION SPECIAL NOTES ABOUT MICROWAVING ARCING If you see arcing, press the CLEAR/OFFpad and correct the problem. Arcing is the microwave term for sparks in the oven. Arcing is caused by: • Metal or foil touching the side of the oven. • Foil not molded to food (upturned edges act like antennas). • Metal, such as twist-ties, poultry pins, or goldrimmed dishes, in the microwave. • Recycled paper towels containing small metal pieces being used in the microwave.
SAFETY FACT SUPERHEATED WATER Liquids, such as water, coffee or tea, are able to be overheated beyond the boiling point without appearing to be boiling. Visible bubbling or boiling when the container is removed from the microwave oven is not always present. THIS COULD RESULT IN VERY HOT LIQUIDS SUDDENLY BOILING OVER WHEN THE CONTAINER IS DISTURBED OR A SPOON OR OTHER UTENSIL IS INSERTED INTO THE LIQUID. • Avoid heating baby food in glass jars, even with the lid off.
IMPORTANT SAFETY INFORMATION SPECIAL NOTES ABOUT MICROWAVING MICROWAVESAFE COOKWARE Make sure all cookware used in your microwave oven is suitable for microwaving. Most glass casseroles, cooking dishes, measuring cups, custard cups, pottery or china dinnerware which does not have metallic trim or glaze with a metallic sheen can be used. Some cookware is labeled “suitable for microwaving.” How to test for a microwave-safe dish.
• Use foil only as directed in this manual. TV dinners may be microwaved in foil trays less than 3/4” (1.9 cm) high; remove the top foil cover and return the tray to the box. When using foil in the microwave oven, keep the foil at least 1” (2.5 cm) away from the sides of the oven. • Plastic cookware – Plastic cookware designed for microwave cooking is very useful, but should be used carefully.
IMPORTANT SAFETY INFORMATION GROUNDING INSTRUCTIONS/OPTIONAL KITS GROUNDING INSTRUCTIONS Ensure proper ground exists before use. WARNING Improper use of the grounding plug can result in a risk of electric shock. This appliance must be grounded. In the event of an electrical short circuit, grounding reduces the risk of electric shock by providing an escape wire for the electric current. 10 This appliance is equipped with a power cord having a grounding wire with a grounding plug.
Operating Instructions Features of Your Microwave (Throughout this manual, features and appearance may vary from your model.) Features 3 2 4 1 5 6 7 6 5 1000 Watts 1 Door Handle. Pull to open the door. The door must be securely latched for the microwave to operate. 2 Door Latches. 3 Window with Metal Shield. Screen allows cooking to be viewed while keeping microwaves confined in the oven. 4 Touch Control Panel. You must set the clock before using the microwave. 5 Cooktop Lights.
Quick Start The Controls on Your Microwave Oven (Throughout this manual, features and appearance may vary from your model.) You can microwave by time or with the convenience features. 1 Time Features Time Cooking Press TIME COOK (Press once or twice) DEFROST AUTO/TIME (Press once or twice) EXPRESS COOK POWER LEVEL ADD 30 SEC 12 Enter Amount of cooking time. Amount of defrosting weight or time. Starts immediately! Power level 1–10.
2 Quick Touch Features Table A Press POPCORN Press once Press twice Press 3 times BAKED POTATO Press once Press twice Press 3 times BEVERAGE Press once Press twice Press 3 times REHEAT Press once Press twice Press 3 times Enter Start Press START. 1 (1.75 oz./50 g) 2 (3.0 oz./85 g) 3 (3.5 oz./100 g) Press START. 1 (7.1 oz./201 g) 2 (14.2 oz./402 g) 3 (21.3 oz./604 g) Press START. 1 2 3 Press START. 1 (8 oz./227 g) 2 (16 oz./454 g) 3 (24 oz.
Operating Instructions Changing Power Levels How to Change the Power Level The power level may be entered or changed immediately after entering the feature time for TIME COOK. The power level may also be changed during time countdown. 1 2 3 4 Press TIME COOK. Enter cooking time. Press POWER LEVEL. Select desired power level 1–10. 5 Press START. 14 Variable power levels add microwave flexibility to microwave cooking. The power levels on the microwave oven can be compared to the surface units on a range.
Time Features Time Cook 1 Press TIME COOK. 2 Enter cooking time. 3 Change power level if you don’t want full power. (Press POWER LEVEL. Select a desired power level 1–10.) 4 Press START. Time Cook I Allows you to microwave for any time up to 99 minutes and 99 seconds. Time Cook II Lets you change power levels automatically during cooking. Here’s how to do it: Power 10 (High) is automatically set, but you may change it for more flexibility. 1 Press TIME COOK.
Operating Instructions Cooking Guide for Time Cook I & II NOTE: Use power level High (10) unless otherwise noted. Vegetable Amount Time Asparagus (fresh spears) 1 lb. (454 g) (frozen spears) 10-oz (283 g) package 6 to 9 min., In 1½-qt. (1.5 L) glass baking dish, Med-High (7) place ¼ cup (60 mL) water. 5 to 7 min. In 1-qt. (1 L) casserole. Beans (fresh green) 1 lb. (454 g) cut in half 9 to 10 min. (frozen green) 10-oz (283 g) package 6 to 8 min.
Vegetable Amount Time Comments Corn (frozen kernel) 10-oz (283 g) package 5 to 7 min. In 1-qt. (1 L) casserole, place 2 tablespoons (30 mL) water. Corn on the cob (fresh) 1 to 5 ears 3 to 4 min. per ear 1 ear 2 to 6 ears 5 to 6 min. 3 to 4 min. per ear In 2-qt. (2 L) oblong glass baking dish, place corn. If corn is in husk, use no water; if corn has been husked, add ¼ cup (60 mL) water. Rearrange after half of time. Place in 2-qt. (2 L) oblong glass baking dish. Cover with vented plastic wrap.
Operating Instructions Time Features Time Defrost Allows you to defrost for the length of time you select. See the Defrosting Guide for suggested times. 1 Press DEFROST AUTO/TIME twice. 2 Enter defrosting time. 3 Press START. 4 Turn food over when the oven signals. 5 Press START. (Auto Defrost explained in the section on Quick Touch Features.) Power 3 is automatically set, but you may change this for more flexibility.
Defrosting Guide Food Time Breads, Cakes Bread, buns or rolls (1 piece) Sweet rolls approx. 12 oz (340 g) 1 min. 3 to 5 min. Fish and Seafood 6 to 8 min. Fillets, frozen 1 lb. (454 g) Shellfish, small pieces 1 lb. (454 g) 5 to 7 min. Fruit Plastic pouch – 1 to 2 10-oz (283 g) package Place block in casserole. Turn over and break up after half the time. 3 to 6 min. Meat Bacon 1 lb. (454 g) 2 to 5 min. Franks 1 lb. (454 g) 2 to 5 min. Ground meat 1 lb.
Operating Instructions Time Features Express Cook This is a quick way to set cooking time for 1–6 minutes. Press one of the Express Cook pads (from 1 to 6) for 1 to 6 minutes of cooking at power level 10. For example, press the 2 pad for 2 minutes of cooking time. The power level can be changed as time is counting down. Press POWER LEVEL and enter 1-10. Add 30 Seconds You can use this feature two ways: • It will add 30 seconds to the time counting down each time the pad is pressed.
Quick Touch Features Beverage 1. The Beverage feature heats 1 to 3 servings of any beverage. 2 Press BEVERAGE. The oven starts immediately. The serving size is automatically set at 1, but but you may change it for more flexibility (see Table A). Drinks heated with the Beverage feature may be very hot. Remove the container with care. 3 Press START. Popcorn How to Use the Popcorn Feature 1 Follow package instructions, using Time Cook if the package is less than 1.75 ounces (50 g) or larger than 3.
Operating Instructions Quick Touch Features Reheat 1 The Reheat feature heats 1 to 3 servings food (8 Oz). 3 Press START. 2 Press REHEAT. The serving size is automatically set at 1, but you may change it for more flexibility (see table A). Baked Potato 1 The Potato feature heats 1 to 3 servings of any potato. 2 Press BAKED POTATO. The serving size is automatically set at 1, but you may change it for more flexibility (see table A). 22 3 Press START.
Auto Feature Auto Defrost 1 Press DEFROST AUTO/TIME once. 2 Using the Conversion Guide at right, enter food weight. For example, press pads 1 and 2 for 1.2 pounds (1 pound, 3 ounces/544 g). 3 Press START. (Time Defrost is explained in the Time Features section.) • Remove meat from package and place on microwave-safe dish. The Defrost Auto/Time feature gives you two ways to defrost frozen foods. Press DEFROST AUTO/TIME once for Auto Defrost or twice for Time Defrost.
Operating Instructions Other Features Cooking Complete Reminder To remind you that you have food in the oven, the oven will beep five times. Clock Press to enter the time of day or to check the time of day while microwaving. 24 1 Press CLOCK. 2 Press CLOCK to select AM or PM. 3 Enter time of day. 4 Press CLOCK.
Timer On/Off 1 Press TIMER ON/OFF. 2 Enter time you want. 3 Press TIMER ON/OFF to start. When time is up, the oven will signal and display “OFF”. To turn off the timer signal, press TIMER ON/OFF. NOTE: The timer indicator will be lit while the timer is operating. Start/Pause In addition to starting many functions, START/PAUSE allows you to stop cooking without opening the door or clearing the display.
Operating Instructions Other Features Child Lock-Out You may lock the control panel to prevent the microwave from being accidentally started or used by children. To lock or unlock the controls, press and hold CLEAR/OFFfor about three seconds. When the control panel is locked, a lock symbol will be displayed. The vent fan removes steam and other vapors from surface cooking. Press VENT FAN once for high fan speed, twice for low fan speed or a third time to turn the fan off.
Helpful Information Microwave Terms Term Definition Arcing Arcing is the microwave term for sparks in the oven. Arcing is caused by: • metal or foil touching the side of the oven. • foil that is not molded to food (upturned edges act like antennas). • metal such as twist ties, poultry pins, gold-rimmed dishes. • recycled paper towels containing small metal pieces. Covering Covers hold in moisture, allow for more even heating and reduce cooking time.
Helpful Information Care and Cleaning Helpful Hints Open the over door a few minutes after cooking to air out the inside. An occasional thorough wiping with a solution of baking soda and water keeps the inside fresh. NOTE: Be certain the power is off before cleaning any part of this oven. Walls, Floor, Inside Window, Metal and Plastic Parts on the Door Removable Turntable and Turntable Support How to Clean the Inside Some spatters can be removed with a paper towel, others may require a damp cloth.
How to Clean the Outside Do not use cleaners containing ammonia or alcohol on the microwave oven. Ammonia or alcohol can damage the appearance of the microwave. Outer Case Bottom Clean the outside of the microwave with a sudsy cloth. Rinse and then dry. Wipe the window clean with a damp cloth. Control Panel and Door Wipe with a damp cloth. Dry thoroughly. Do not use cleaning sprays, large amounts of soap and water, abrasives or sharp objects on the panel – they can damage it.
Helpful Information Light Bulb Replacement Cooktop Lights Replace the burned-out bulb with a 40-watt incandescent bulb (WB36X10003), available from your local parts store. 1 To replace the bulb(s), first disconnect the power at the main fuse or circuit breaker panel or pull the plug. 2 Remove the screw at the front of the light cover and lower the cover. 3 Be sure the bulb(s) to be replaced are cool before removing. After breaking the adhesive seal, remove the bulb by gently turning. 4 Replace the screw.
The Exhaust Feature The Vent Fan Charcoal Filter (on some models) The vent fan has 2 metal reusable grease filters. Models that recirculate air back into the room also use a charcoal filter. The metal filters trap grease released by foods on the cooktop. They also prevent flames from foods on the cooktop from damaging the inside of the microwave. For this reason, the filters must ALWAYS be in place when the hood is used. The grease filters should be cleaned once a month, or as needed.
Helpful Information Charcoal Filter (on some models) The charcoal filter cannot be cleaned. It must be replaced. If the model is not vented to the outside, the air will be recirculated through a disposable charcoal filter that helps remove smoke and odors. The charcoal filter should be replaced when it is noticeably dirty or discolored (usually after 6 to 12 months, depending on hood usage). When installing the charcoal filter, disconnect power at the main fuse or circuit breaker panel or pull the plug.
If Something Goes Wrong Before You Call For Service Problem Possible Cause What to Do Oven will not start A fuse in your home may be blown or the circuit breaker tripped. • Replace fuse or reset circuit breaker. Power surge. • Unplug the microwave oven, then plug it back in. Plug not fully inserted into wall outlet. • Make sure the 3-prong plug on the oven is fully inserted into wall outlet.
If Something Goes Wrong Things That Are Normal • Steam or vapor escaping from around the door. • Light reflection around door or outer case. • Dimming oven light and change in the blower sound at power levels other than high. • Dull thumping sound while oven is operating. 34 • TV-radio interference might be noticed while using the microwave. Similar to the interference caused by other small appliances, it does not indicate a problem with the microwave.
GE MICROWAVE OVEN WARRANTY Staple your receipt here. Proof of the original purchase date is needed to obtain service under the warranty. All warranty service provided by our Factory Service Centers, or an authorized Customer Care® technician during normal working hours. For service, call 1-800-561-3344. For The Period Of: Mabe Will Replace: One Year From the date of the original purchase Any part of the microwave oven which fails due to a defect in materials or workmanship.
Service Telephone Numbers. In-Home Repair Service 1-800-561-3344 Expert Mabe repair service is only a phone call away. Product Satisfaction If you are not satisfied with the service you receive from Mabe, follow these steps. First, contact the people who serviced your appliance. Next, if you are still not pleased, write all the details– including your phone number–to: Manager, Consumer Relations, Mabe Canada Inc., Suite 310, 1 Factory Lane, Moncton, NB E1C 9M3.