
Installation Guide
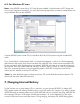

6.2. For Windows PC user:
Note: If the WIFIHDD comes with a 2.5” hard drive pre-installed, it should contain a NTFS format and
mount in My Computer automatically. You may skip formatting steps below, proceed to create folders and
copy multimedia files into the WIFIHDD.
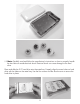
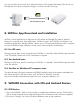
Connect WIFIHDD (status: Power Off) to a Windows XP/Vista/7/8 Computer using the included USB
cable.
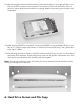
select the new disk volume, click Action from Menu bar, select All Tasks, choose Format and select NTFS
format to proceed. When disk formatting is completed, WIFIHDD will mount as an external hard drive in
the computer. User may create folders per file type, i.e. Movie, Music or Photo, etc. and copy multimedia
transfer process, Hard Drive activity LED will flash.
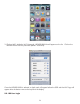
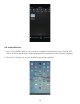
*Note: For video playback support, please consult your iOS and Android devices User's Manual. iOS
devices will play mp4 video file format only.
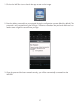
7. Charging Internal Battery
For the first time use, or when battery LED is in red color, you must charge WIFIHDD. To charge WIFI-
HDD, please use the USB cable (included) to plug it into a USB wall or car charger. If you want to charge
WIFIHDD through a computer, please turn on both WIFIHDD and your computer, then plug WIFIHDD into
the computer’s USB port. A full charge will take approximately 3 to 5 hours depending on the output
current of USB power source and other factors. During charging, the battery LED will be flashing green,
14