PORTABLE RECORDING PREAMP with 96kHz FIREWIRE INTERFACE O W N E R ’ S M A N U A L
ONYX Satellite Important Safety Instructions 1. Read these instructions. 13. Unplug this apparatus during lightning storms or when unused for long periods of time. 2. Keep these instructions. 14. Refer all servicing to qualified service personnel.
Owner’s Manual Table of Contents Introduction.................................................................................................................................. 5 Onyx Satellite Features.........................................................................................................................................................6 Getting Started............................................................................................................................
ONYX Satellite 18. Line Input 1 Select Switch.........................................................................................................................................20 19. Line Input 2 Select Switch.........................................................................................................................................20 20. Built-in Talkback Mic...................................................................................................................................
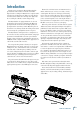
Thank you for choosing the Mackie Onyx Satellite professional audio interface for studio and mobile digital audio recording. The Onyx Series computer audio interfaces are designed for the digital era and offer the newest features and latest technologies for digital studio recording in a durable, road-worthy package. The Onyx Satellite is equipped with two of our new premium precision-engineered studio-grade Onyx mic preamps.
ONYX Satellite HOW TO USE THIS MANUAL ARCANE MYSTERIES ILLUMINATED We know that many of you can’t wait to get your new Onyx Satellite computer interface hooked up, and you’re probably not going to read the manual first (sigh!). So the first section after this introduction is a Quick-Start Guide called “Getting Started” to help you get the Onyx Satellite set up fast so you can start using it right away.
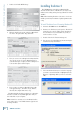
4. You may get a “Security Warning” about running the installer. It’s okay. Click “Run.” READ THIS PAGE!! Even if you’re one of those people who never reads manuals, all we ask is that you read these next few pages (through page 12) now before you begin using the Onyx Satellite. You’ll be glad you did! If you are using the Onyx Satellite with a PC running Windows XP®, you need to install the Windows drivers first.
ONYX Satellite 3. Double-click “Audio MIDI Setup.” Installing Tracktion 2 The CD-ROM that came with your Onyx Satellite also has the full version of Tracktion 2, our easy-to-use multitrack recording and sequencing software for the PC and Mac. Note: After installing Tracktion 2, be sure to check our website periodically for software updates (www.mackie. com). To install Tracktion 2 on a PC running Windows XP: 1. Insert the CD-ROM into the CD-ROM drive. 4.
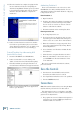
. Next you are asked to select the Start Menu Folder where you would like the Tracktion shortcuts installed. We recommend you use the default location used by the installer, but you can choose a different location if you want by clicking the Browse button. Then click “Next.” Owner’s Manual 6. The Tracktion Setup Wizard opens. Click “Next” to continue. 7. Next you will see the Tracktion License Agreement. Read through the text and click “I accept the agreement.” Click “Next” to continue. 10.
ONYX Satellite 12. When the installer has completed copying the files into the destination folder, the “Completing the Tracktion Setup Wizard” window opens. If you want to launch Tracktion right away, click the “Launch Tracktion” box. Click “Finish” to complete the installation. Authorizing Tracktion 2 There is an authorization code on the sleeve of the CD-ROM that came with your Onyx Satellite. You can authorize the software from within Tracktion or by going to http://my.mackie.com. From Tracktion 2: 1.
Connect the FireWire connector from the Onyx Satellite to the FireWire connector on your computer. Set the Sample Rate and Latency 3. If you are using the AC adapter with your Onyx Satellite, turn on the Power switch. On a PC: Note: The Onyx Satellite is equipped with a 6-pin FireWire connector and comes with a 6-pin to 6-pin FireWire cable.
ONYX Satellite application; in other words, the closer to zero delay you will experience while recording. However, a low latency setting requires more resources from your computer, so you need to find a happy balance between finding the lowest latency you can attain before the computer begins to have trouble routing and recording audio (e.g., dropouts, pops, distorted audio).
Headphones For Musicians (From Pod) Owner’s Manual Hookup Diagrams Electric Guitar Home Studio Recording Powered Studio Monitors (Main) Keyboard or other line-level stereo input Stereo Guitar Effects Condenser Microphone CR OUT 2/R A (BAL/UNBAL) 4 2 INPUT OUTPUTS 1/L 3 2 LINE LINE 1 INPUT 2 YX ON MIC P R LINE LINE 1 1 YX ON E MIC P R E B 2/R 1/L 5 6 INSERT INSERT (TIP=SEND RING=RETURN) (TIP=SEND RING=RETURN) Electric Guitar (to Instrument Input) Bass Guitar (to Instrum
ONYX Satellite Left and Right Front Left and Right Rear Video Deck 2 Video Deck 1 Condenser Microphone CR OUT 2/R A INPUT OUTPUTS 1/L 4 (BAL/UNBAL) 3 2 LINE LINE 1 2 INPUT 2 LINE LINE B 2/R 1/L 6 5 INSERT (TIP=SEND RING=RETURN) INSERT (TIP=SEND RING=RETURN) Digital Audio Workstation Subwoofer Center This illustrates a 5.1 surround sound setup using two video decks connected to Line 1 and 2 on Inputs 1 and 2.
Headphones For Engineer (Front Panel) Owner’s Manual Condenser Microphones in X-Y Configuration for stereo recording of a choral group or jazz combo CTRL RM L POWER FW T59052 ON YX MIC PRE 2 ON 1 YX MIC PRE DATE CODE TO DOCK R (BAL/UNBAL) This illustrates how to use the Satellite Pod to make a live stereo recording using an X-Y microphone placement. The recording is made to two tracks in the DAW software on the laptop.
ONYX Satellite Television Left and Right Powered Speakers L/R Audio Out L/R Audio Out CR OUT 2/R A INPUT OUTPUTS 1/L 4 (BAL/UNBAL) 3 2 LINE LINE 2 1 INPUT 2 LINE LINE Dock MP3 Player 1 1 YX MIC PR E ON YX MIC PR E ON B 2/R 1/L 6 5 INSERT (TIP=SEND RING=RETURN) INSERT (TIP=SEND RING=RETURN) For some just starting out with their own home studio, it may be necessary to use the home stereo speakers for monitors.
Pod Front Panel The Onyx Satellite is uniquely designed to be set up in your studio with all the inputs and outputs connected, and allows you to remove the pod from the base station for portable use in the field. The pod provides two Neutrik combination Mic/Line inputs with independent Gain controls, a global 48V phantom power switch, stereo line-level control room outputs, two stereo headphone jacks with independent level controls (one shared with the control room outputs), and a FireWire connector.
ONYX Satellite 5. FireWire Indicator 8. PHONES 2 Level This LED illuminates when a valid FireWire connection is made between the Onyx Satellite and a computer. This knob adjusts the signal level at the PHONES 2 jack [9] on the front panel. It ranges from off (∞) to maximum gain (MAX). 6. 48V Phantom Power Switch and Indicator Most professional condenser microphones require phantom power, which is a low-current DC voltage delivered to the microphone on pins 2 and 3 of the XLR microphone connector.
10. MIC/Line Inputs These are Neutrik combo connectors, which accept balanced microphone inputs from an XLR connector, or balanced line-level or instrument inputs from a 1/4" TRS connector. The microphone preamps feature our new Onyx design, with higher fidelity and headroom rivaling any standalone mic preamp on the market today. The FireWire interface provides two inputs to your DAW software application (inputs 1-2).
ONYX Satellite Base Station Front Panel 16. MIC Input Select Switch When the pod is connected to the base station, some additional features become available above and beyond those that are present when using the pod by itself. Press this button to select the XLR Mic input as the input source for the channel.
This is where the built-in talkback microphone is located. This is an omni-directional dynamic microphone, so it will pick up your voice from anywhere in front of the unit. In addition, the talkback signal is routed through a compressor, which allows the talkback signal to maintain a constant volume regardless of how far you are from the Onyx Satellite (within reason). 21. TALKBACK LEVEL Control Use this knob to adjust the level of the talkback signal.
ONYX Satellite 26. A/B Select Switch 28. Power Switch This switch determines which pair of control room outputs is currently active. Only one pair of control room outputs provides an output signal at any one time. This allows you to have two sets of monitors connected to the Onyx Satellite so you can make quick A/B comparisons between them to make sure your mix sounds good on both pairs of monitor speakers. This switch turns the power on and off to the Onyx Satellite.
33. Instrument Input 30. MIC Input This is a 1/4" TS connector that accepts an unbalanced instrument-level input signal from a high-impedance instrument like a guitar. This is a female XLR connector, which accept balanced microphone inputs from almost any type of microphone. The microphone preamps feature our new Onyx design, with higher fidelity and headroom rivaling any standalone mic preamp on the market today. 34. INSERT Jacks These 1/4" TRS jacks provide a send and return point for channels 1-2.
ONYX Satellite Besides being used for inserting external devices, these jacks can also be used as channel direct outputs (post-GAIN). This is an unbalanced direct out. Here are three ways you can use the INSERT jacks: MONO PLUG Channel Insert jack Direct out with no signal interruption to master. Insert only to first “click.” MONO PLUG Channel Insert jack Direct out with signal interruption to master. Insert all the way in to the second “click.
Warranty Service • Is the signal source turned up? Make sure the signal level from the selected input source is high enough to light up some of the INPUT meter [2] LEDs for that channel. • If the pod is docked to the base station, make sure the Input Select switches [16-19] are in the right position. • If the Instrument Input [17] is selected, make sure the Instrument button [3] is pushed in on the pod. These may sound obvious to you, but here are some things you can check. Read on.
ONYX Satellite • In Tracktion, be sure the correct inputs are selected and the tracks are armed. • Restart your Onyx Satellite and computer. • Reinstall the drivers from the CD (PC only). Glitchy/Distorted Audio into your Computer • Increase the buffer size. This can be done in the Onyx Satellite Control Panel or in your DAW application. Repair Service for Mackie products is available at a factoryauthorized service center.
XLR Connectors Channels 1-4 accept 3-pin male XLR connectors on the Neutrik combo inputs. They are wired as follows, according to standards specified by the AES (Audio Engineering Society). 2 SHIELD HOT COLD SHIELD 1/4" TS Phone Plugs and Jacks “TS” stands for Tip-Sleeve, the two connection points available on a mono 1/4" phone jack or plug. They are used for unbalanced signals like the high-impedance instrument inputs on the Onyx Satellite.
ONYX Satellite • When connecting an unbalanced output to a balanced input, be sure that the signal high (hot) connections are wired to each other. The unbalanced ground (earth) connection should be wired to the low (cold) and the ground (earth) connections of the balanced input.
Owner’s Manual FireWire Connection The Onyx Satellite is equipped with a 6-pin FireWire connector and comes with a 6-pin to 6-pin FireWire cable. This works with Macintosh laptops and desktops, and most PC desktops with a built-in FireWire connector or with a PCI or PCMCIA FireWire card added. Many laptop PCs have a 4-pin FireWire connector. If this is the case, you will need to use the 6-pin to 4-pin FireWire adapter included with your Onyx Satellite.
ONYX Satellite Appendix C: Technical Info Onyx Satellite Specifications Frequency Response @48 kHz 20 Hz to 20 kHz, ±1 dB @96 kHz 20 Hz to 40 kHz, ±1 dB Distortion (THD & IMD) Mic Input to Line Output (@ +4 dBu output): THD+N: < 0.02%, 20 Hz to 20 kHz BW, 1 kHz input @ +4 dBu, preamp at unity gain Dynamic Range (A-weighted, typical) 103 dB (Mic In to Line Out) Noise Signal-to-Noise (A-weighted, typical): >103 dB (ref. +0 dBu, Mic In to Line Out, Gain @ unity) Equivalent Input Noise (E.I.N.
Owner’s Manual Onyx Satellite Dimensions 8.0 in/203 mm 30 2.1 in/ 53 mm 20 40 -10 CTRL RM/ PHONES 1 30 OL U 20 U 60 +40dB -40 GAIN U -20dB 2.1 in/ 53 mm 40 -20 -20dB 1 PHONES 2 POWER U 2 48V 60 +40dB OO MAX MAX OO GAIN 4.1 in/ 104 mm WEIGHT 1.8 lb/ 0.8 kg 3.2 in/ 81 mm 5.3 in/ 135 mm CR OUT 2/R INPUT OUTPUTS 1/L A (BAL/UNBAL) 4 3 2 LINE LINE 2 INPUT 1 2 LINE 1 1 LINE YX MIC PR E ON YX MIC PR E ON B 2/R 1/L 6 5 INSERT 4.4 in/ 112 mm WEIGHT 7.
ONYX Satellite 1 1 1 1 Instrument Line 2 Line 1 Mic Channel 2 Phantom Instrument Line 2 Line 1 Mic Channel 1 Phantom Line Mic Channel 2 Phantom Line Mic Channel 1 Phantom 48V 3 2 3 2 3 2 3 2 Phantom Talkback Mic Mic/Line Instrument Control Logic Signal Internal switches. Down when dock is detected.
Owner’s Manual 30 20 OL U 40 -10 CTRL RM/ PHONES 1 30 20 U 40 -20 U -20dB 60 +40dB GAIN -40 U -20dB 1 PHONES 2 POWER 60 2 48V +40dB OO MAX MAX OO GAIN CTRL RM L POWER FW T59052 ON YX MIC PRE 2 ON YX MIC PRE 1 DATE CODE TO DOCK R (BAL/UNBAL) Owner’s Manual 33
ONYX Satellite 30 20 U 40 -10 CTRL RM/ PHONES 1 30 OL 20 U 40 -20 U -20dB 60 +40dB -40 GAIN U -20dB 1 2 OO MAX 1 TALKBACK TO PHONES 2 CONTROL ROOM TO DAW OO DAW INPUTS A B SOURCE MAX CR OUT A 4 (BAL/UNBAL) INPUT 3 2 LINE LINE 1 2 INPUT 2 YX ON MIC P R LINE 34 ONYX Satellite 1/L 6 5 INSERT (TIP=SEND RING=RETURN) LINE 1 YX ON E B 2/R ON LEVEL OUTPUTS 1/L 1-2 1-6 MAX OO LEVEL 2/R MAX OO GAIN 2 MIC 2 48V 60 +40dB 1 MIC 1 PHONES 2 POWER
Please keep your sales receipt in a safe place. A. LOUD Technologies Inc. warrants all materials, workmanship and proper operation of this product for a period of one year from the original date of purchase. If any defects are found in the materials or workmanship or if the product fails to function properly during the applicable warranty period, LOUD Technologies, at its option, will repair or replace the product. This warranty applies only to equipment sold and delivered within the U.S.
16220 Wood-Red Road NE • Woodinville, WA 98072 • USA United States and Canada: 800.898.3211 Europe, Asia, Central and South America: 425.487.4333 Middle East and Africa: 31.20.654.4000 Fax: 425.487.4337 • www.mackie.com E-mail: sales@mackie.