
DIGITAL AUDIO HARD DISK RECORDER Operation Guide SDR24/96 Operation Guide

21
Operation Guide
Operation Guide
SDR24/96 Operation
Now that you’ve finished installing and configuring the SDR24/96, you’re almost
ready to start your first Project. We still want you to read this entire guide, but we
already hear some of you shuffling and muttering. Okay, okay, okay... for the
terminally impatient, read this chapter, then you can go out and play with your friends.
This section explains all you need to know to run a basic recording session:
opening and creating Projects, operating the Transport, setting levels, and
recording and overdubbing tracks. After you’re done recording, you will learn how
to back up your project to Mackie Media M•90, Mackie Media PROJECT drives,
and an external drive via the USB port.
Project Management
The SDR24/96 organizes audio files and session information into folders called
Projects. When the SDR24/96 boots up, it automatically opens the default Startup
Project.
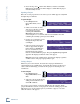
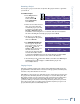
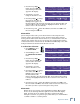
At this point, you should see the name of
the Startup Project in the LCD display.
The display also indicates the amount of
time that is available on the selected hard
drive, based on the current sample rate, sample size, and number of armed tracks.
If no tracks are armed, it displays the amount of time available for 24-track
recording.
Creating a New Project
Now that you have a few basics down, you’re ready to start recording. First, you’ll
need to create a new Project. Typically a Project is a song, radio spot, or sound
effects stem for a 10-minute film reel, but it could also be a live concert or an
entire symphony.
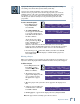
To create a new Project:
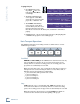
1. Press PROJECT, then select
New.
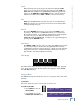
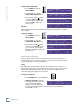
2. If there is more than one hard
drive, choose the drive you want to
create the Project on by selecting
either Internal or External from the
Select Drive screen using the << / >>
buttons. The selection defaults to the drive containing the currently open
Project. Select Next.
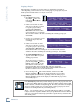
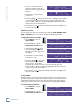
3. The NEW PROJECT NAME screen
appears. Press New to accept the
default project name, which is
Project#1. Each time a new project
is created, the project number is incremented by one (i.e., Project#2,
Project#3, etc.)
To give the project a unique name,
press the Page Right
button. A
blinking cursor appears over the first
character of the name. Use the
increment (Inc) and decrement (Dec) buttons to change the highlighted
character. It scrolls through a modified ASCII character set. Use the >>
button to move to the next character.
Note:
The maxi-
mum length of a
project name is 20
characters. Projects
with longer names
cannot be opened
or selected.
PROJECT: Startup
AVAIL: 02:25:40 on EXT
PROJECT FILES MENU >
New Open Save SaveAs
NEW PROJECT NAME: >
New Cancel
SELECT DRIVE: Internal
<< >> Next
< Project#1
<< >> Inc Dec
PROJECT