
User guide


23
Engaging learners through interactive presentations: Using Adobe Presenter (Breeze)
Educational Technology Team
email: edtech@groups.nus.edu.sg
Centre for Development of Teaching and Learning
To publish presentations to the
Adobe Presenter server, you must
have an Adobe Presenter user
account.
Publishing your presentation
Publishing a presentation to the Adobe Presenter server will enable you to view your presentation online.
But it is always a good idea to preview your presentation before publishing to the server.
1. To preview, select Preview from the Presentation tab of the Adobe
Presenter menu.
2. To publish, select Publish from the Presentation tab of the Adobe
Presenter menu.
3. You can choose to publish locally to a folder on your computer (either as a CD package or a .zip
archive), locally as a PDF file or directly to the Breeze server.
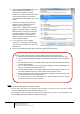
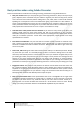
4. To upload and save the presentation directly to the Server,
use the Adobe Connect tab in the Publish Presentation
Dialog box. In the Output options, uncheck the Upload
Source presentation with assets (as this will increase the
time needed to upload the presentation)
5. Select a format that you want and then click on Publish.
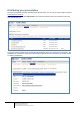
6. Complete the Content Information including a Proper Title, a preferred URL and a brief summary
of what the presentation is about.
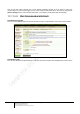
7. Use the Set Permissions screen to make the presentation be available to the public by using the
Customize button and choosing Yes for the Allow Public Viewing option and then select the Next
button.
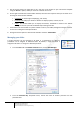
8. This will automatically upload the presentation file and a window with the information on the URL
for viewing will be displayed. Click on the link to view your presentation.
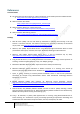
Browser
Tablet
Both
Do not select this
option
You can use Chrome
browser or download
Adobe Presenter Viewer
app to view it on iPad