
Specifications


Change the Stage size 109
4. Ensure that you have Snap to Guides turned on by selecting View >
Snapping > Snap to Guides.
5. In the Tools panel, click the Selection tool.
6. On the Stage, click inside the upper-left corner of the blue text border
and drag it to the intersection of the two guides.
A small circle appears in the upper-left corner of the text border when
you drag near the corner of the text border. The circle indicates that
snapping is engaged.
7. If you want to remove the guides, select View > Guides > Clear Guides.
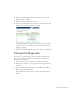
Change the Stage size
The Stage size of your document is 750 x 500 pixels. You’ll change the
Stage size to 640 x 480, a common size that supports a wide variety of
screen sizes and resolutions.
1. Click in a blank area of the workspace to deselect the text block.
2. In the Property inspector, you see properties for the entire document.
Click Size.
3. In the Document Properties dialog box, enter 640 for the width and
480 for the height, and click OK.
The document size changes, but the objects on the Stage remain the
same size.