
Specifications
Importing graphics 33
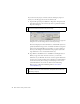
3. Click OK when you finish entering the new dimensions to return to the
authoring environment.
When you return to the authoring environment, notice how the
dimensions of your document change. You can also change the current
document's background color and frame rate directly in the Property
inspector, without going to the Document Properties dialog box. You'll
find information about frame rate in Part 2 of this tutorial, “Basic
Tasks: Creating a banner, Part 2” on page 43.
4. Select File > Save to save the document before you proceed to the next
section (“Importing graphics”).
Importing graphics
When you work with Flash, you'll often import assets into a document.
Perhaps you have a company logo, or graphics that a designer has provided
for your work. You can import a variety of assets into Flash, including
sound, video, bitmap images, and other graphic formats (such as PNG,
JPEG, AI, and PSD).
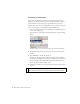
Imported graphics are stored in the document's library. The library stores
both the assets that you import into the document, and symbols that you
create within Flash. A symbol is a vector graphic, button, font, component,
or movie clip that you create once and can reuse multiple times.
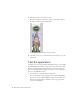
So you don’t have to draw your own graphics in Flash, you can import an
image of a pre-drawn gnome from the tutorial source file. Before you
proceed, make sure that you save the source files for this tutorial as
described in “Open the finished FLA file”, and save the images to the same
directory as your banner.fla file.
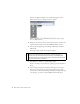
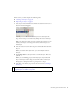
1. Select File > Import > Import to Library to import an image into the
current document.