
Specifications


Summary 41
2. Click the close button of the window that contains the SWF file to
return to the authoring environment.
Find the folder on your hard disk where you saved banner.fla at the
beginning of this tutorial in “Creating a new document”.
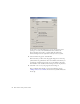
When you open this folder, you should see an additional SWF file
called banner.swf. This is the compiled version of the banner.fla file.
When you want to create a finished version of your file to upload,
you'll want to make additional publish settings in Flash before you
compile your SWF file. You'll look at these settings in Part 3 (“Basic
Tasks: Creating a banner, Part 3” on page 63) of this tutorial.
Summary
Congratulations for completing your first step of creating a banner in
Flash. You used the Flash authoring tool to create a new document, add
assets, and manipulate the file using a variety of tools.
In a very short period of time, you learned how to use the Flash workspace
to accomplish the following tasks:
■ Set up a FLA file.
■ Imported assets into the FLA file.
■ Arrange assets in a FLA file.
■ Create and modify layers.
■ Tes t a S W F f i l e .
You're on your way to creating a banner in Flash so you can embed it in an
HTML page using Dreamweaver. In the next two parts of this tutorial, you
will create and modify symbols, create an animation, add some simple
ActionScript for a button that opens a web page, and add the banner to a
website.
To continue building this application, go to the next part of this tutorial:
“Basic Tasks: Creating a banner, Part 2” on page 43.
NOTE
If you want to compare your results to the tutorial source file, open the
banner1_complete.fla from the FlashBanner/Part1 folder that you saved on
your hard disk in “Open the authoring document” on page 163.