
User Guide

Creating a project 141
Creating a project
This section describes how to create a project.
To create a project:
1 Select Project > New Project.
2 Complete the New Project dialog box, as follows:
• Project Name Enter a descriptive name that you want to display on the
Projects resource tab, in the projects drop-down list.
• Location of project file Browse to the directory in which you want to store
the project (APF) file. This is usually the project root folder.
If you need to create this folder, create it in Windows Explorer.
• Add all subfolders (Optional) Select this option to include every folder
below the project root.
• Files types (Optional) Select All files or, to limit the types of files that are
included in your project, select a list of file types from the drop-down list.
If you do not see the list of file types that you need, enter the file extensions
for the file types to include, separated by a semicolon; for example
htm;html;gif;jpg;jpeg;png.
3Click OK.
HomeSite+ for Dreamweaver MX creates the project APF file in the directory that you
specified.
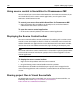
Populating a project
Once you have created a project, you can add folders and files to it.
You can add any type of folder and any file to the project root. Within folders, you
must add folders and files as described in the following table:
For more information, see “About project folders” on page 138.
In this type of folder... You can add this type of folder... And these files...
Virtual Virtual Any
Manual-include
(physical)
• Virtual
• Physical, if it is a subdirectory
of the manual-include directory
Files in manual-include
directory or one of its
subdirectories
Auto-include (physical) None None