
User Guide


162 Chapter 11 Deploying Files
Performing a custom deployment
This section describes the advanced method of deployment that offers maximum
flexibility and functionality. This method involves building an absolute path for the
product to deploy the files. This absolute path is comprised of three parts:
Server + Project Path + Folder Level
To build this deployment path, and to deploy, you must do the following steps:
1 Select the folders and files to deploy.
2 Add deployment servers.
3 Run the Deployment Wizard, with or without scripts.
The rest of this section describes each of these steps.
Selecting folders and files to deploy
You can deploy a whole project or select specific files to deploy.
Setting project-level deployment
To set the deployment for a project, enter an absolute path for the location.
Note
The Relative to the Parent Folder Deployment Location option is not available at the
project level because the project folder functions as the root, and it has no parents.
The Do Not Deploy option is not available at the project level, because then no files
would be deployed.
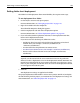
To set deployment for a project:
1 On the Projects resource tab, open a project.
For more information, see “Managing project files” on page 145.
2 Right-click the project root and select Properties.
The Edit Project Properties dialog box appears.
3 In the Deployment Path box, browse to the location to which you must deploy, or
enter the absolute path.
For more information, see “About deployment options” on page 164.
4Click OK.