PR O C E E D CDD Compact Disc Drive
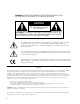
WARNING: TO REDUCE THE RISK OF FIRE OR ELECTRIC SHOCK, DO NOT EXPOSE THIS APPLIANCE TO RAIN OR MOISTURE. CAUTION RISK OF ELECTRIC SHOCK DO NOT OPEN CAUTION: TO REDUCE THE RISK OF ELECTRICAL SHOCK, DO NOT REMOVE COVER. NO USER-SERVICEABLE PARTS INSIDE. REFER SERVICING TO QUALIFIED PERSONNEL.
Important Safety Instructions Please read all instructions and precautions carefully and completely before operating your Proceed component. 1. ALWAYS disconnect your entire system from the AC mains before connecting or disconnecting any cables, or when cleaning any component. 2. This product is equipped with a three-conductor AC mains power cord which includes an earth ground connection. To prevent shock hazard, all three connections must ALWAYS be used.
Table of Contents Unpacking and Placement ....................................................................... 6 Unpacking the CDD .......................................................................................... 6 Remove the Transport Screws .......................................................................... 6 Placement of the CDD ..................................................................................... 6 Operating Voltage & Frequency ........................................
Programming the CDD ............................................................................. 29 Introduction to Playlists .................................................................................... 29 Assembling a Playlist ........................................................................................ 29 Programming by Omission .............................................................................. 29 Reviewing a Playlist ........................................................
Unpacking and Placement Unpacking the CDD Important! Remove the Transport Screws Warning! Placement of the CDD Unpack your CDD Compact Disc Drive and remove all accessories from the carton. Keep all packing materials for future transport of your CDD. Shipping your new component in anything other than its purpose-designed packing material may result in damage that is not covered by the warranty. Place the CDD Compact Disc Drive upside-down on a soft, clean surface.
Operating Voltage & Frequency The CDD Compact Disc Drive is set at the factory (internally) for 100V, 120V, 200V, 220V, or 240V AC mains operation as appropriate for the country in which it is to be sold. (230V/50Hz only in European Union countries, in compliance with CE regulations.) Make sure that the label on the rear panel of the CDD (beside the AC input receptacle) indicates the correct AC operating voltage for your location. Attempting to operate the CDD at an incorrect voltage can damage the unit.
A Quick Start… We recognize that many people are understandably eager to begin listening to their new components, and that reading the manual is often done (if at all) at a later time—perhaps while listening to music with the new product itself. We strongly recommend that you read this manual thoroughly, as the CDD Compact Disc Drive incorporates many unusual features that enhance its operation.
Warm up/break-in period 6 SELECT THE INPUTS YOU ARE USING ON YOUR DIGITAL PROCESSOR AND PREAMPLIFIER Take care that a Tape Monitor switch does not override your selection of the digital processor’s input on your preamplifier, or you will be struck by how “quiet” your new digital source is.… 7 LOAD A DISC IN THE DRAWER AND PRESS PLAY; SLOWLY RAISE THE VOLUME ON YOUR PREAMPLIFIER Congratulations! You should now be able to enjoy your favorite music while reading the rest of this manual.
Special Design Features Congratulations on your purchase of the CDD Compact Disc Drive. The Madrigal design team is confident you will enjoy the outstanding performance of the CDD for many years. In case you are interested in technical details, what follows is a brief outline of some of the key technologies in your new transport.
rior performance. (The ST output is a dealer-installable option to accommodate those digital processors on which ST is the best-sounding input.) All digital interfaces have been carefully optimized to deliver the finest performance each interface standard allows. As a direct result, the CDD performs optimally with any digital processor, without having to resort to techniques which would limit its compatibility to other Proceed products.
1 2 3 4 5 6 7 8 c d d 9 track/index display power program– program+ prev/rew play/pause next/f.fwd stop/drawer repeat time remaining disc on disc random program track PR O C E E D 10 11 12 13 14 15 Front Panel, CDD 1 POWER & POWER LED Assuming that the CDD’s power cord is connected to AC power, pressing this latching power button connects the CDD to the AC mains and turns on the unit.
3 PREV/REW BUTTON Pressing this button momentarily will return you to the beginning of the current track. Pressing it repeatedly will move you backward through the available tracks, one at a time. Pressing and holding this button will instead perform a reduced-volume reverse scan of the music, reminiscent of the audible rewind function found on many cassette decks. This scanning mode allows you to quickly find a particular point within a track.
7 TIME INDICATOR The time section of the display can be set to display any of the following four indications of time in minutes and seconds: time elapsed in track, time elapsed on disc, time remaining on disc, time remaining on track. These four options are accessed by pressing the display button to the right of the display (see 9, below), which cycles through the four modes of time display, using the time on disc and time remaining LEDs to indicate which mode is chosen at any moment.
If the CDD senses an obstruction during opening of the drawer mechanism, it will attempt to re-close. If successful, it will read the disc’s table of contents and display the disc’s number of tracks and total time (followed by the playlist’s track and time information, if one exists). If for any reason the drawer does not close fully, it will stop where it is and wait for your intervention. After removing the obstruction, press the stop/drawer button again to close the drawer normally.
13 TIME ON DISC AND TIME REMAINING LED INDICATORS These LEDs are used to indicate which of the four available display modes the CDD is in.
1 2 3 4 spdif st 5 6 digital outputs aes/ebu ~ ac mains spdif/bnc PR O C E E D c d d R remote IR b y M A D R I G A L A U D I O L A B O R AT O R I E S please see bottom panel for voltage and other information Rear Panel, CDD 1 AES/EBU DIGITAL OUTPUT This output provides the digital audio signal (DAS) via cables equipped with XLR-type connectors to the digital audio processor.
2 S/PDIF (BNC) ELECTRICAL DIGITAL OUTPUT This output provides the digital audio signal (DAS) via cables equipped with BNC-type connectors to the digital processor. This output conforms to the Sony/Philips Digital Interface Standard (S/PDIF), which calls for a 75Ω transmission of the DAS. Use a digital interconnecting cable specifically designed for the 75Ω S/PDIF standard, such as Madrigal MDC-2 cable, when using this output.
The specifications for this IR input call for a triggering voltage of 5-12 volts at no more than 100 milliamperes of current, with the tip of the 1⁄8" miniplug having positive polarity, as below: – + IR input tip polarity 5-12 volts @ less than 100 mA If you would like more information on the possibility of using an infrared repeater with your CDD, please contact your Proceed dealer. 6 AC POWER INPUT This input accepts AC power from the AC mains (via the supplied AC cable).
Remote Control, CDD 1 ■/dwr / / 1 2 3 4 5 6 prog+ 7 8 9 prog– 0 time index / 1 IR TRANSMITTER WINDOW The CDD’s Remote Control sends infrared (IR) commands through its projection lens, and the CDD receives IR commands through its Remote sensor window. (See “Front Panel, CDD”). If either of these lenses is obstructed, no IR commands can be received by the CDD. If you notice IR performance deteriorating, you may want to clean these lenses with a soft cloth and some glass cleaner.
3 NUMERIC KEYPAD The numbers 0, 1, 2, 3, 4, 5, 6, 7, 8, and 9 may be used to directly access individual track numbers of discs played by the CDD. For example, to go directly to track 13, press 1 followed by 3, and then press play. You do not have to add a 0 before a single-digit track number: 7, followed by play, will take you directly to track number 7. (In fact, if the CDD is already in play, simply pressing the number button will be sufficient.
repeat: Press once to enter disc repeat mode (repeating the entire disc, or an entire playlist if one is entered). This action will illuminate the disc repeat LED. Press a second time to enter the track repeat mode (repeating a single track ad nauseam). A third press will cycle you back to normal operation, as will pressing stop. rpt a/b: Press once to establish a beginning point (point A) for an endless playback loop.
6 Conditions that Affect IR Performance BATTERY COMPARTMENT The two AA batteries used by the Remote Control must be placed inside the compartment on the back of the remote’s housing (near the bottom). Carefully remove the battery compartment cover and insert the batteries, being careful to orient them as indicated inside the battery compartment. Then replace the cover, clicking it into place.
If the requirements of your installation preclude a clean line of sight between the CDD and your listening position, you may want to consider using an infrared repeater to route the remote control’s commands directly to the CDD, using the external ir input on the rear panel. (See item #3 in Rear Panel, CDD.) Please ask your dealer for more information on third-party IR repeaters.
Setup and Installation Caution! Connecting AC Mains For your protection, review “Important Safety Instructions” before you install your CDD. Plug the female end of the AC power cord into the appropriate socket on the rear panel of the CDD, being certain to seat it firmly, all the way into the receptacle. Double-check to make sure that the voltage indicated on your CDD corresponds to the normal voltage for your country.
Basic Operation Before operating your CDD, take a minute to become familiar with its controls and their locations. (See “Front Panel” and “Remote Control.”) Loading a CD To load a CD: 1. Enable the CDD’s controls by pressing standby if in standby. 2. Press stop/drawer to open the drawer. 3. Place a CD into the recess of the drawer, label side up. Handle the CD by the outer edges and center hole only. 4. Press stop/drawer. Playing a CD To play all tracks on the CD, press the play/pause button.
As soon as you release the button, play resumes. If you search past the beginning or end of a track, the laser pickup will move on to the previous (or next) track. If you try to search forward past the end of a CD or program, the laser pickup will stop at the end of the last track. If you try to search backward past the beginning of a CD or program, the laser pickup will stop at the beginning of the first track of the disc (or playlist).
Track repeat takes priority over other functions such as next and previous. To return to normal operation, press repeat again. A-B Repeat To repeat (continuously) a specific phrase or passage on a CD (when learning how to play a favorite solo, for example), press rpt a/b on the remote at the beginning of the passage you would like to repeat. The display will blink while continuing to play to indicate that the CDD is waiting for you to define the end of your A–B loop.
Programming the CDD Introduction to Playlists Rather than playing an entire CD, you may choose to play only certain selections. To do this, you create a “playlist” for that particular CD. It may be used immediately upon being created, and will remain in memory until replaced by a different playlist. Before using your CDD’s programming features, become familiar with its controls and their locations, as well as their basic functions.
remaining in the playlist. This next track will be shown with the green program LED lit to indicate that it is still in the playlist. 4. Using next and previous, move to any other tracks you would prefer to skip, pressing program – to eliminate each track from the playlist. Once you are in the program mode, the green program LED will illuminate to indicate a track is in the playlist, and extinguish for any track omitted from the playlist. Reviewing a Playlist To review your playlist before playing it: 1.
Using Learning Remote Controls The CDD includes both an infrared receiver and an infrared transmitter. With this capability, it can “teach” a learning remote control any commands that might be needed for remote operation. Specifically, the CDD can send all of the necessary IR commands from its display window, enabling you to teach a learning remote any or all of its pre-programmed commands, as well as some optional special commands that are available to solve specific installation-related problems.
3 REPEAT THE PROCESS OF “TEACHING” NEW COMMANDS TO THE VARIOUS BUTTONS ON YOUR REMOTE CONTROL UNTIL ALL APPROPRIATE OR DESIRED FRONT PANEL COMMANDS HAVE BEEN LEARNED BY YOUR REMOTE 4 WHEN FINISHED, EXIT THE TEACH IR MODE BY ALLOWING THE CDD TO “TIMEOUT” You may wish to teach your remote control some of the CDD’s special commands (those for which there is no corresponding front panel button); in this case, you should go directly to the next section.
no button is pushed for more than ten seconds, the CDD will “time out” and return to normal operation.
Troubleshooting In general, refer any service problems to your Proceed dealer. Before contacting your dealer, however, check to see if the problem is listed here. If it is, try the suggested solutions. If none of these solves the problem, contact your Proceed dealer. 34 1. THE CDD WON’T FUNCTION, AND THE DISPLAY IS DARK. ✓ The CDD isn’t plugged into the AC mains or the main power switch isn’t turned on. ✓ The wall socket, adapter, or extension cord is faulty.
Care and Maintenance To remove dust from the cabinet of the CDD, use a feather duster. To remove dirt and fingerprints, we recommend isopropyl alcohol and a soft cloth. Caution! Always apply the isopropyl alcohol to the soft cloth and then wipe the CDD with the dampened cloth. Never pour or spray even small amounts of any liquid directly on the CDD, as doing so may allow the liquid to reach the circuitry inside the unit.
U.S. and Canadian Warranty 90-Day Limited Warranty This Proceed® product is warranted to be free from defects in material and workmanship under normal use for a period of ninety (90) days from the date of purchase. To extend the warranty of this Proceed product, return the warranty registration card along with a copy of the original receipt of purchase to Madrigal Audio Laboratories, Inc., P. O. Box 781, Middletown, CT 06457.
Obtaining Service We take great pride in our dealers. Experience, dedication, and integrity make these professionals ideally suited to assist with our customers’ service needs. If your Proceed component must be serviced, please contact your dealer. Your dealer will then decide whether the problem can be remedied locally, or whether to contact Madrigal for further service information or parts, or to obtain a Return Authorization.
Specifications The correlation between published specifications and sonic quality is unreliable. A list of numbers reveals virtually nothing. All technical measurements must be subject to qualitative as well as quantitative interpretation. Measurements of the CDD yield excellent results by any standards. However, only those specifications that apply to its actual operation are included here.
Dimensions 17.25" 43.8cm c d d track/index display power program– 3.5" 8.9cm program+ prev/rew play/pause next/f.fwd stop/drawer repeat time remaining disc on disc random program track PR O C E E D 14.25" 36.2cm 2.00" 5.1 cm 1.00" 2.54cm 12.27" 31.2cm 13.25" 33.7cm 0.98" 2.49cm 13.25" 13.25" 33.7cm 3.5" 8.9cm 0.98" 2.
Madrigal Audio Laboratories, Inc. 2081 South Main Street, P.O. Box 781 Middletown, Connecticut 06457 USA Telephone: (860) 346-0896 Fax: (860) 346-1540 http://www.madrigal.com/ PR O C E E D R is a registered trademark of Madrigal Audio Laboratories, Inc. a Harman International company 630161-3 © 2/1997 Madrigal Audio Laboratories, Inc. All rights reserved. Printed in U.S.A.