
Owner`s manual

52
nal going into the ADC). You should also probably save this new setting as the
default setting for that input, which will save you from running into this problem
again—unless you later play something that is even louder. (In which case, you
simply repeat the process outlined below.)
1 TURN THE MASTER VOLUME CONTROL ON THE AVP2 DOWN
When the analog to digital converter clips, it distorts the waveform much as
a power amplifier does when it clips. This is both unpleasant to hear and
potentially dangerous to speakers at high volumes. Turn the volume down
to a quiet, but still audible level just to be on the safe side, but so you can
still hear what you are doing.
2 PLAY THE LOUDEST SELECTION YOU CAN FIND ON THE ANALOG
SOURCE IN QUESTION
Mind you, you are not playing this “loud section” loudly: keep it quiet, but
play the biggest musical crescendo or movie explosion available on the
source at hand.
3 PRESS INPUT LEVEL ON THE FRONT PANEL OF THE AVP2 AND RAISE/
LOWER THE INPUT LEVEL WITH THE VOLUME KNOB UNTIL THE DISPLAY
JUST READS “ADC CLIPPING”; THEN LOWER THE INPUT LEVEL BY 1-2 DB.
The goal here is to give yourself just a little “headroom” in case the next
recording you play is a bit louder than the one you are using for this ad-
justment. Note that some source components may have lower-than-normal
output voltages, in which case you will end up “turning up” the input level
setting to compensate.
4 CONTINUE TO MONITOR THE RECORDING THROUGH ONE OR TWO
MORE LOUD PASSAGES TO ENSURE THAT THE ADC DOES NOT CLIP;
SAVE THE NEW DEFAULT VALUE BY PRESSING AND HOLDING THE INPUT
LEVEL BUTTON
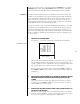
When you press and hold the
input level button on the AVP2, the current
value for the input level adjustment is automatically entered as the default
input level setting for the currently selected analog source. (You can check
this for yourself by going into the define button menu for that input, and
checking the analog connection.) Whenever you select this input in the fu-
ture, this setting will be loaded for you to protect against harsh-sounding
ADC overload.
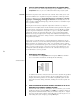
set more buttons When you are all done defining how you want to us the nine input buttons on
the AVP2, you may discover that you have some input connectors on the rear that
are as yet unused. Since different people require different complements of con-
nectors; we provide some redundant ones to ensure that everyone was likely to
have what they needed. As a result, the AVP2 has nine input buttons, but fifteen
audio inputs (eight analog pairs plus seven digital inputs of various types).
If you have additional sources beyond the nine most commonly used ones that
you would also like to have as part of your AVP2-based system, you can access
“virtual input buttons” via the more button (and by cycling through the defined
inputs on the remote control).