
Owner's Manual


Magellan eXplorist Waypoints
Magellan eXplorist 510 / 610 / 710 User Manual 18
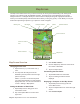
description for the waypoint. Tap on the Back
icon when done.
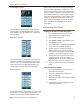
Location: Tap on the Location button. Tap
on the Primary or Secondary coordinates
elds. Tap on the coordinated to be changed
and use the keyboard to enter the new values.
Media: Tap on the Media button. Tap on the
Options Menu icon and select Add Media.
Use the Media Menu to create or select an
existing media item to add to the waypoint.
Options: Tap on the Options button. Use the
Prole drop-down menu to select the prole
desired for this waypoint. Tap on Settings to
change the values for the prole.
Go to a Waypoint from the Waypoint
Description
1. Access the Waypoint list.
2. Tap on the name of the waypoint to be routed
to.
3. Tap on the orange Go icon at the bottom of the
display.
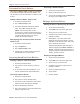
Viewing the Waypoint on the Map
1. Access the Waypoint list.
2. Tap on the name of the waypoint to be viewed.
3. The Waypoint Description page is displayed.
4. Tap on the View on Map icon at the bottom of
the display. The waypoint is displayed with a
projected route from your current position to
the waypoint.
Go to a Waypoint While Viewing on the Map
1. Access the Waypoint list.
2. Tap on the name of the waypoint to be routed
to.
3. Tap on the View on Map icon at the bottom of
the display.
4. Tap on the orange Go icon to begin the route.
Marking a Waypoint as a Favorite
1. Access the Waypoint list.
2. Tap on the name of the waypoint to be added
to your Favorites list.
3. Tap on the Options Menu icon.
4. Select Favorite.
5. The Waypoint Description page is displayed
with a yellow star added to the icon in the
upper left corner indicating that this waypoint is
part of your favorites.
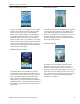
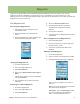
Waypoints and the Map Screen
Waypoints can be viewed on the Map screen using
the default icon or the icon you select while editing
the waypoint.
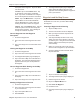
Creating a Waypoint while Panning
1. Tap on the Map screen.
2. The Four Corner Menu screen is displayed.
3. Slide your nger across the map area of the
Four Corner Menu.
4. This will put the Map into Pan mode. Keep
sliding your nger in the direction of the map
you want to go to. Using the zoom buttons will
assist in getting to the desired point quickly
and accurately.
5. When you can see the point on the map you
want to create a waypoint for, tap that location.
6. A popup is displayed with information about
the point selected.
7. Tap on the left side of the popup.
8. The Waypoint Description page is displayed.
9. Edit the waypoint as needed.
10. Tap on the Options Menu icon.
11. Select Save as Waypoint.
12. Conrm the save.
13. The Waypoint Description page is displayed
again.