eXploristGC_MC(1Apr10).
IMPORTANT SAFETY WARNINGS The Magellan eXplorist GC receiver is a navigation aid designed to assist you in arriving at your selected destination. When using the Magellan eXplorist GC receiver, these safety rules must be followed to prevent accidents that can result in injury or death to yourself or others: IN THE INTERESTS OF SAFETY, DO NOT USE THIS NAVIGATION DEVICE WHILE DRIVING A VEHICLE. This device is not a car navigation system. Please do not use the Magellan eXplorist GC receiver while driving.
Federal Communication Commission Interference Statement This equipment has been tested and found to comply with the limits for a Class B digital device, pursuant to Part 15 of the FCC Rules. These limits are designed to provide reasonable protection against harmful interference in a residential installation. This equipment generates, uses and can radiate radio frequency energy and, if not installed and used in accordance with the instructions, may cause harmful interference to radio communications.
IMPORTANT NOTE: IC Radiation Exposure Statement: This equipment complies with IC radiation exposure limits set forth for an uncontrolled environment. End users must follow the specific operating instructions for satisfying RF exposure compliance. This transmitter must not be co-located or operating in conjunction with any other antenna or transmitter. The information provided in this document is subject to change without notice.
Table of Contents Magellan eXplorist GC Receiver .............................................................. 1 Replacing the Batteries ........................................................................................... 1 Maintenance ............................................................................................................. 2 Magellan eXplorist GC Screens ............................................................... 3 Status Bar ................................................
Editing the Navigation Fields .............................................................................. 12 Changing the Number of Navigation Fields ....................................................... 12 Selecting Heading Up or North Up ..................................................................... 12 Viewing the Details of Your Destination Waypoint ............................................. 12 Viewing Waypoint Description ...................................................................
Settings ................................................................................................................. 19 Brightness and Volume Options ........................................................................ 19 Adjusting Brightness .......................................................................................... 19 Setting the Backlight Timer ................................................................................ 19 Adjusting Brightness ................................
Compass Options ................................................................................................ 24 Selecting the Compass Graphic ......................................................................... 24 Background Options ............................................................................................ 24 Selecting the Background Display ...................................................................... 24 Navigation Options ................................................
Geocaching FAQs ................................................................................................ 28 Viewing Geocaching FAQs ................................................................................ 28 Product Demo ....................................................................................................... 28 Playing the Product Demo ................................................................................. 28 Satellite Status .........................................
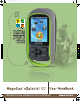
Magellan eXplorist GC Receiver The Magellan eXplorist GC receiver puts all of the controls at your fingertips not just for ease-of-use, but for comfort while searching for those hidden treasures. A The Power button (A) is located in the upper right of the receiver and is specially designed to avoid accidental power on of the receiver. The BACK button (B) is used to exit the currently displayed screen and go to the previous screen.
Make sure that the seal around the battery door is clean and free of debris before replacing the door. Replace the battery door by first aligning the hinge points at the bottom and then swinging the battery door down until it is in place. Turn the battery door retaining screw 1/4 turn clockwise to lock it in place and the Magellan eXplorist GC receiver is ready to go. Maintenance The only maintenance required is to clean the screen with a soft cloth occasionally.
Magellan eXplorist GC Screens Status Bar The Status bar appears on every screen in the receiver and provides information on the ‘inner workings’ of the Magellan eXplorist GC receiver. Battery Life All green indicates full battery life. Backlight Status Backlight is on when light bulb icon is displayed. (Having the backlight off will increase the battery life significantly.) Time of Day Displayed in 12-hour AM/PM or 24hour Military time.
The Map Screen Current Location . Normally the Map screen will display your current location against a map background. Your current location is displayed as an arrow pointing in the direction of your current heading or last heading if you are standing still. Pan Mode.
The Dashboard The Dashboard can be used for navigating or accessing more information about your current trip. The Screen is split into two regions, the top displays information about your current route and the bottom provides customizable Nav Fields. The following items describe the elements of the Dashboard and ways to customize the screen. Mini Compass. The Mini Compass works just like the regular Compass displaying the cardinal points as well as the direction of your destination while routing.
Under the header bar is a details section that uses star ratings to indicate difficulty and terrain and a bar graph for size. To the right is the Geocache ID (GCID) identifier number and the date it was hidden. Scroll and highlight the buttons below to access additional information about the geocache. Press ENTER to view the details. At the bottom of the page are two transparent indicators.
Icons Geocache Found Not Found Favorite Not Attempted Needs Maintenance Associated Waypoints Travel Bug Pictures Description Hints Recent Logs 7
Navigating the Magellan eXplorist GC Receiver In this chapter you will be asked to press ENTER. This is done by pressing down on the joystick. The Main Menu The Main Menu screen provides access to the five functional areas of the eXplorist GC receiver. These are: Geocaches - View, sort & search, and activate routes to the geocaches loaded onto the receiver.
Zooming In and Zooming Out Pressing ZOOM- (zoom out) or ZOOM+ (zoom in) changes the map scale, which allows you to see greater detail at your cursor or displays more of the map. The Magellan eXplorist GC receiver also has a feature that is called Auto Zoom. When Auto Zoom is turned on and you are travelling to a geocache or a waypoint, the map scale is automatically set to the scale that will display your current position as well as your destination. (This feature can be turned on or off in Map Options.
Go To a Waypoint while Panning 1. Pan the cursor until it is over a displayed waypoint. 2. Press MENU. 3. Select GO from the Options menu. Map Screen Options Menu The Map Options Menu is accessed by pressing the MENU button while viewing the map. There are two formats for this menu; routing and not routing. They are slightly different as when you are routing there are functions you need at your fingertips that are not needed during non-routing situations.
Additional Options Menu Items while Routing Description View the Description field for the waypoint or geocache. Recent Logs View geocache recent logs. Hints View hints for the geocache. Cancel Route Cancel the route and return to the Map screen. View Dashboard Display the Dashboard. Main Menu Access the Main Menu. Found Flag the geocache as being found. Not Found Flag the geocache as being not found. Need Maintenance Flag the geocache as being in need of maintenance and add comments.
Pausing Trip: If you want to pause the trip to temporarily stop recording, press MENU and highlight ‘Pause Trip’. Press ENTER. Resume Trip: After pausing the trip, you can turn trip recording back on by pressing MENU and selecting ‘Resume Trip’. Ending Trip: When you have come to the end point of your trip, press MENU and select ‘Stop and Save Trip’. (If you have track turned off in Tools, stopping the trip also stops recording your track.
3. The Waypoint Details screen is displayed for your destination waypoint. 4. Press BACK to return to the Map screen. Viewing Waypoint Description This is available only while travelling on a route to a waypoint or geocache. 1. Press MENU. 2. Highlight ‘Description’ and press ENTER. 3. The description (if any) for your destination waypoint is displayed. 4. Press BACK to return to the Map screen. Canceling a Route This is available only while travelling on a route to a waypoint or geocache. 1. Press MENU. 2.
Setting Destination Geocache as Found or Not Found This is available only while travelling on a route to a geocache. 1. Press MENU. 2. Highlight ‘Found’ or ‘Not Found’ and press ENTER. 3. You will be asked if you add comments. Select Yes or No. 4. The route to the geocache is cancelled and you are returned to the Map screen. Entering ‘Needs Maintenance’ Note to Destination Geocache This is available only while travelling on a route to a geocache. 1. Press MENU. 2.
4. Use the joystick to select the desired option and press ENTER. 5. Pressing BACK returns you to the Map screen. Selecting the Current Location Icon 1. Press MENU. 2. Highlight ‘Map Options’ and press ENTER. 3. Highlight the Current Location Icon field and press ENTER. 4. Use the joystick to select ‘Smart Arrow’ or ‘Standard Arrow’ and press ENTER. 5. Pressing BACK returns you to the Map screen. Turning Quick Info Pop-up On/Off 1. Press MENU. 2. Highlight ‘Map Options’ and press ENTER. 3.
Going to a Geocache from the Geocache List 1. While viewing the Geocache List, move the joystick up or down to scroll through the list. 2. With the desired geocache selected, move the joystick to the right. 3. Your current position and the geocache chosen is displayed on the Map screen and a route is active. 1. Press MENU. 2. Select ‘Go’ from the Options menu. Geocache List Options Menu View Details Go to Geocache Details screen for the geocache selected.
Sorting Geocaches in the Geocache List 1. Press MENU and select ‘Sort & Search’ from the Options menu. 2. Use the joystick to highlight the “Sort By” button and press ENTER. 3. Use the joystick to highlight the criteria that you want the geocache list sorted by. 4. Press ENTER. 5. Press BACK. 6. Press BACK. 7. The Geocache List is displayed using the selected sort criteria. Selecting Geocaches Types 1. Press MENU and select ‘Sort & Search’ from the Options menu. 2.
Geocache Details Options Menu GO Go to Geocache or Waypoint Details screen for information on the geocache or waypoint. View Waypoints Displays a list of all the waypoints associated with this geocache. Found Flag the geocache as being found. Not Found Flag the geocache as being not found. Need Maintenance Flag the geocache as being in need of maintenance and add comments. Add a Field Note Add field notes to the geocache. Edit My Last Log Edit the log file.
Tools Only some of the functions found in Tools have Options menus. They will be noted here for reference. Accessing the Tools Options 1. Press BACK until the Main Menu is displayed. 2. Use the joystick (L/R) to highlight the ‘Tools’ icon. 3. Press ENTER. 4. Once the Tools menu is displayed, use the joystick (U/D) to select the desired option. Settings Brightness and Volume Options Adjusting Brightness 1. Access the Tools menu and select ‘Settings’. 2. Highlight ‘Brightness & Volume’ and press ENTER. 3.
Power Options Set Suspend Timer To help conserve battery life you can set a time duration that puts the receiver into suspend mode automatically if no keys have been pressed. During suspend mode the receiver is in power save mode but continues to log your track and compute your current position. 1. Access the Tools menu and select ‘Settings’. 2. Highlight ‘Power’ and press ENTER. 3. Highlight the ‘Active Suspend Timer’ field. 4. Use the joystick to select the desired time or ‘Never’. 5. Press BACK.
Selecting Time Format 1. Access the Tools menu and select ‘Settings’. 2. Highlight ‘Date & Time’ and press ENTER. 3. Use the joystick to select the time format. 4. Press ENTER. 5. Press BACK. Setting the Time Zone 1. Access the Tools menu and select ‘Settings’. 2. Highlight ‘Time Zone & DST’ and press ENTER. 3. Use the joystick to select the date format. 4. Press ENTER. 5. Press BACK. Turning Daylight Savings On/Off 1. Access the Tools menu and select ‘Settings’. 2. Highlight ‘Daylight Savings’. 3.
Selecting POI (Points of Interest) Icons to be Displayed You can select what format POI icons are displayed on the Map screen. 1. Access the Tools menu and select ‘Settings’. 2. Highlight ‘Map Options’ and press ENTER. 3. Highlight the POI Icons field and press ENTER. 4. Use the joystick to select the desired option and press ENTER. 5. Press BACK. Selecting Number of Fields to be Displayed on the Map Screen 1. Access the Tools menu and select ‘Settings’. 2. Highlight ‘Map Options’ and press ENTER. 3.
Track Options Turning Tracking On/Off You can turn tracking off but if you set the receiver to begin recording a trip, the track will be turned on until you stop the trip. 1. Access the Tools menu and select ‘Settings’. 2. Highlight ‘Track’ and press ENTER. 3. Highlight the ‘Tracking ON’ field. 4. Press ENTER to select on (checked) or off (unchecked). 5. Press BACK. Displaying the Track on the Map 1. Access the Tools menu and select ‘Settings’. 2. Highlight ‘Track’ and press ENTER. 3.
Selecting the Alarm Sound 1. Access the Tools menu and select ‘Settings’. 2. Highlight ‘Proximity Alarm’ and press ENTER. 3. Highlight the ‘Sound’ field and press ENTER. 4. Select the alarm sound desired. 5. Press BACK. Turning the GPS Alarm On/Off 1. Access the Tools menu and select ‘Settings’. 2. Highlight ‘Proximity Alarm’ and press ENTER. 3. Highlight the ‘GPS Fix’ field and press ENTER. 4. Select ON or OFF. 5. Press BACK.
Selecting the Map Datum 1. Access the Tools menu and select ‘Settings’. 2. Highlight ‘Navigation’ and press ENTER. 3. Highlight the ‘Map Datum’ field and press ENTER. 4. Use the joystick (L/R) to step through the various map datums. 5. Highlight the desired map datum and press ENTER. 6. Press BACK. Selecting the North Reference 1. Access the Tools menu and select ‘Settings’. 2. Highlight ‘Navigation’ and press ENTER. 3. Highlight the ‘North Reference’ field and press ENTER. 4.
Connectivity Options Setting the Connectivity Mode 1. Access the Tools menu and select ‘Settings’. 2. Highlight ‘Connectivity’ and press ENTER. 3. Highlight the ‘Mode’ field and press ENTER. 4. Use the joystick to select the mode to be used when connecting to a computer. Press ENTER. 5. Press BACK. Memory Options Viewing Memory Use 1. Access the Tools menu and select ‘Settings’. 2. Highlight ‘Memory’ and press ENTER. 3. The memory usage as well as the available memory for the receiver is displayed.
3. The product information is displayed. To view the EULA, highlight the EULA field and press ENTER. To view the copyright information, highlight the Copyright filed and press ENTER. Trip Summary Viewing the Last Trip Summary Page 1. Access the Tools menu and select ‘Trip Summary’. 2. Details of your last saved or current trip are displayed. 3. Press BACK. Stat Summary Viewing the Statistics Summary Page 1. Access the Tools menu and select ‘Stats’. 2. Your geocaching statistics are shown. 3.
9. Press MENU. 10. Select ‘Save’. Getting Started Viewing the Getting Started with Geocaching Page 1. Access the Tools menu and select ‘Getting Started’. 2. The “Getting Started with Geocaching” page is displayed. 3. Press BACK. Glossary of Terms Viewing the Glossary of Terms Page 1. Access the Tools menu and select ‘Getting Started’. 2. The “Glossary of Terms” page is displayed. 3. Press BACK. Geocaching Types Viewing the Geocaching Types Page 1. Access the Tools menu and select ‘Geocaching Types’. 2.
Satellite Status Viewing the Satellite Status Screen 1. Access the Tools menu and select ‘Satellite’. 2. The Satellite Status screen is displayed. 3. Press BACK when done. Screen Capture Turning Screen Capture On/Off 1. Access the Tools menu and select ‘Screen Capture’. 2. Highlight the ‘Screen Capture’ field and press ENTER. 3. Select ON or OFF. 4. Press BACK when done. Capturing Screens 1. Turn on screen capturing as described above. 2. Press the Power button to capture the screen.
Working with Geocaches The Magellan eXplorist GC receiver is designed to connect with millions of passionate adventure seekers at www.geocaching.com. Geocaching.com is the premier website for organizing the world’s geocaches. Whether you want to learn about geocaching, hide or seek a cache, log your experiences, or find out about a local geocaching event, Geocaching.
Installing Geocaches with ‘Send to GPS’ (Detail Page) 1. Go to www.geocaching.com on your browser. 2. Use the search tools on geocaching.com to view a list of geocaches. 3. In the row indicated above with the red box, click on the geocache name to open the geocache page. The ‘GPX eXchange File button is greyed out for non-premium users. 4. Select the “Send to GPS” button. 5. Select the Magellan tab in the “Send to GPS” window. 6.
Direct installation of the Magellan Communicator from www.magellangps.com 1. Go to www.magellangps.com and click on the “Products” tab. 2. Select “Maps & Software”. 3. In the software section, select “Magellan Communicator”. 4. On the Magellan Communicator page (www.magellangps.com/products/ map.asp?tab=0&PRODID=2301) select the Download button. 5. When the download is complete, run the Magellan Communicator file to install the drivers. (If you get a Security Warning, press ‘Run’ to continue.) 6.
8. Open the “MAGELLAN” device that has been installed on your computer. 9. Open the “Geocaches” folder in the MAGELLAN directory. 10. Drag the GPX file (GC1FGDZ.gpx in this example) to the Geocaches folder in your receiver. 11. The geocache (or geocaches) are loaded in your receiver and can be found from the Geocaches menu option in the Main Menu. (You need to disconnect or reboot the receiver to exit the “Connect to PC” screen.
3. After logging you in to geocaching.com, VantagePoint will get the pocket queries you have created and display them in the bottom window. 4. Check one or more of the pocket queries you want to install and press “Install”. The waypoints and geocaches will be sent to VantagePoint and selected for use by VantagePoint. 5. Connect your Magellan eXplorist GC receiver to your PC using a USB cable. 6. When prompted, select “Connect to PC”. 7. Click on the Sync Button in VantagePoint. 8.
need to make any additions or changes and then select the “Submit Log Entry” button. Continue doing this for the remainder of the logs uploaded. 13. It is suggested that now you go into the geocaches folder and delete (or move to your computer) the newlogs.txt file. The next time you create a log or field note, a new newlogs.txt file will be written to your receiver. Uploading Field Notes and Logs from VantagePoint 1. Launch VantagePoint software. 2.
Publishing Geocaches Using the Magellan eXplorist GC receiver you can create a geocache and submit it to geocaching.com using the Magellan VantagePoint software described under Installing Pocket Queries. Installing Geocaches to Geocaching.com with VantagePoint 1. Save a geocache to your GPS receiver. 2. Launch VantagePoint software on your PC. 3. Connect the GPS receiver and select “Connect to PC”. 4. VantagePoint will check the GPS receiver for new logs and geocaches. 5.
Glossary of Terms Archive Archiving a cache removes the listing from public view on Geocaching.com. This action is usually taken when a cache owner does not intend to replace a cache after it has been removed. As an alternative to archiving, the cache owner can temporarily disable their cache if they plan to provide maintenance on the cache or replace the container within one month.
Datum A datum is something used as a basis for calculating and measuring. In the case of GPS, datums are different calculations for determining longitude and latitude for a given location. Currently, Geocaching uses the WGS84 datum for all caches. Many maps still use NAD27, which can cause confusion if your GPS receiver is set to NAD27. Always check your GPS to ensure that WGS84 is the datum before entering a cache coordinate into your receiver. DNF Did Not Find.
GPS Adventures Maze Exhibit This is one of several unique cache types. An exhibit cache represents geocaching participation at the GPS Adventures Maze Exhibit. The GPS Adventures Maze is a traveling educational exhibit designed to teach people of all ages about navigation, GPS technology and geocaching. GPSr Slang for a GPS receiver. Equipment to receive GPS signals for use in navigation. GPX (GPS eXchange Format) A specific file format available when creating a Pocket Query.
Muggle A non-geocacher. Based on "Muggle" from the Harry Potter series, which is a non-magical person. Usually this term is used after a non geocacher looks puzzled after befriending a geocacher searching for a cache, or when a non-geocacher accidentally finds a cache. Geomuggles are mostly harmless. Multi-Cache (offset Cache) This is one of several cache types. A multi-cache ("multiple") involves two or more locations, the final location being a physical container.
Spoiler A spoiler is information that can give details away and ruin the experience of something. For example, telling someone the end of a movie before they see it. In geocaching, a spoiler gives away details of a cache location and can ruin the experience of the find. SWAG An acronym often referred to as standing for 'Stuff We All Get." It includes the trade items left in caches by geocachers. TFTC Thanks For The Cache.
WAAS WAAS stands for Wide Area Augmentation System, but that doesn't really describe what it is. Watch List A watchlist is a list of users that are watching a specific travel bug or cache. Each user receives a copy of each posted log via email. Waypoint A waypoint is a reference point for a physical location on Earth. Waypoints are defined by a set of coordinates that typically include longitude, latitude and sometimes altitude. Every geocache listed on our website is a waypoint. Geocaching.
Geocache Types Traditional Cache This is the original cache type consisting, at a bare minimum, a container and a log book. Normally you'll find a tupperware container, ammo box, or bucket filled with goodies, or smaller container ("micro cache") too small to contain items except for a log book. The coordinates listed on the traditional cache page are the exact location for the cache. The general rule of thumb is, "If you take an item, leave an item, and write in the logbook.
Event Cache Occasionally, local geocachers and geocaching organizations designate a time and location to meet and discuss geocaching. After the event the caches are archived. Mega-Event Cache A Mega-Event cache is similar to an Event Cache but it is much larger. In order to qualify as a Mega Event, the event cache must be attended by 500+ people. Typically, Mega Events are annual events and attract geocachers from all over the world.