Owner's Guide Manual Clean Gas Range with ElectronicControl For Freestanding and Slide-in Ranges TABLE OF CONTENTS IMPORTANT SAFETY INSTRUCTIONS CLOCK AND OVEN CONTROL ......... 1-4 .................. 5 USING THE COOKTOP ....................... Pilotless ignition system ....................... About the surface flame ........................ Conventional surface burners, if equipped ........ Sealed surface burners, if equipped ............. Lighting surface burners .......................
Read all instructions Thank You before using this appliance. for purchasing our cooking appliance. To help you obtain the maximum in cooking satisfaction, we offer these suggestions: Read this manual before using the appliance. []_= Review all safety and caution instructions. 0_ = Review the Troubleshooting Chart on pages 21 and 22 if service becomes necessary. Include the model and serial numbers of your appliance when requesting service.
IMPORTANT SAF_ INS_UC_S IN CASE OF :FIRE : The following instructions are based on safety considerations and must be strictly followed to eliminate the potential risks of fire, electric shock, or personal injury. Turn off appliance and ventilating hood to avoid spreading the flame. Extinguish flame then turn on hood to remove smoke and odor. Have your appliance installed and properly grounded by a qualified installer according to the installation instructions.
Avoidtouchingovenventareawhile oven is on and for several minutes after oven is turned off. Some parts of the vent and surrounding area become hot enough to cause burns. After oven is turned off, do not touch the oven vent or surrounding areas until they have had sufficient time to cool. WARNING: NEVER use appliance door or drawer, if equipped, as a step stool or seat as this may result in possible tipping of the appliance, damage to the appliance, and serious injury.
ISAFETYPRECAUTIONSi 7. IN CASEOF FIRE.DO: a. Turn off heat source and ventilation hood. b. Smother flames by: 1. Chemical fire extinguisher. 2. Baking soda. 3. Lid cover or cookie sheet. IMPORTANTPRECAUTIONS 9. DO NOT TOUCHBURNERSORGRATES: Even though they appear cool, they may be hot enough to cause burns (including areas surrounding heat source such as vents, top of oven door, oven window grates, etc.). NOTE:NEVERuse water on a grease fire. c. Leave burning utensil where it is sitting.
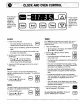
Press this pad to cancel all operations except the TIMER, The time of day will reappear in the display. [Bake] [Broil] [Clock] 1. Press the CLOCK pad. • The colon will flash for 30 seconds to indicate that the clock time may be set. • I Clock_ If the colon is not flashing, press the CLOCK pad again. • The clock time can not be set if the control is set 2. Set the correct time of day using the A • pads. If the • or • pad is not pressed within 30 seconds, the program will cancel.
..PORTANT • Be sure all surface burner controls are set in the OFF position prior to supplying gas to the appliance. When the appliance is first installed, the surface burners may be difficult to light due to air in the gas line. This may also occur ffthe appliance has been disconnected from the main gas supply or if it has not been used for several days or weeks. To remove the air in the gas line, hold a lighted match next to the burner head and turn the knob on.
Undernocircumstances arethesurfaceburner assemblies to betakenapartforcleaning.Thesurface burnerassemblycanberemovedtocleanthe burnerbox area. Freestanding Range Only: The two surface burner assemblies are secured in place during transportation with screws. Once the range is installed, these screws may be removed to allow quick and easy removal of the burner assemblies. The porcelain on the burner is durable but may gradually lose its shine due to usage and high temperatures.
MGHnNG _FACE BURNERS CAUTION: To prevent damage to the cooktop or pan, never operate surface burner without a pan in place, never allow a pan to boil dry and never operate a surface burner on HIGH for extended periods of time. To light surface burner: 1. Place a pan on the burner grate. NOTE: The burner flame may lift off the burner and a "roaring" sound may be heard if a pan is not placed on the grate before lighting the burner. 2. Push in and turn knob to the LITE position.
SELECTING F_E SIZE Use a HIGH flame setting to quickly bring liquids to a boil or to begin a cooking or canning operation. Then reduce to a lower setting to continue cooking. Never leave food unattended when using a HIGH flame setting. COOKWARE CONSIDERATIONS Cookware, including canning equipment which extends more than two inches beyond the grate, rests on two grates, or touches the cooktop may cause a build up of heat which may result in damage to the the burner grate, burner or cooktop.
Y iill ¸'II I:/I i¸¸ OVENBURNER Every oven has its own characteristics. You may find that the cooking times and temperatures you were accustomed to with your previous oven may need to be altered slightly with your new oven. It is normal to notice some differences between this oven and your previous oven. PILOTLESS IGNITION SYSTEM • With this type of ignition system, a glo bar will light the oven burner.
HOW TO SET OVEN 1. Press the BAKE pad. • 000 ° will appear in the display. • BAKE indicator will flash in the display. 2. Press the J, or • pad. Then press either pad until the desired oven temperature is displayed. o 350 ° will appear in the display when either pad is pressed once. • The oven temperature can be set from 170 ° to 550 °. • The BAKE indicator and 75 ° or the actual oven temperature, whichever is higher, will appear in the display.
iiiii , iiii! OVEN RACKS The oven rack is designed with a safety lock-stop position to keep the rack from accidently coming completely out of the oven when pulling the rack out to add or remove food. CAUTION: Do not attempt to change the rack positions when the oven is hot. I I rack straight in. Pull the rack out to the lock-stop position to be sure it is positioned correctly and then return it to its normal position. It is important that air can circulate freely within the oven and around the food.
' COliIIMON BAK|NG PROBLEMS _ND _ PROBLEM CAUSE Cakes are uneven. • Pans too close or touching each other or oven walls. • Batter uneven in pans. • Temperature set too low or baking time too short. • Oven not level. • Undermixing. • Too much liquid. ,, ,, Cake high in middle. ,, _,tEYH_ ,,, , ,,,,,............... • Temperature set too high. • Baking time too long. • Overmixing. • Too much flour. • Pans touching each other or oven walls. • Incorrect rack position.
I ¸ i i !ii!ii!!!/ BROILING To Set Oven To Broil: ....... 1. Press the BROIL pad. Broiling is a method of cooking tender meats by direct heat, The cooking time is determined by the distance between the meat and the oven burner, the desired degree of doneness and the thickness of the meat. Broiling • 000 will appear in the display. • BROIL indicator will flash in the display. 2.
ABOUT CLEANING PRODUCTS ...... Read and carefully follow the manufacturer's instructions. Test a small inconspicuous area using a very light pressure to see if the surface may scratch or discolor. This is particularly important for porcelain enamel, highly polished or shiny metal or plastic surfaces, and painted surfaces. Abrasive Scouring Pads - S.O.S., Brillo Steel Wool Soap, Scotch-Brite Pads. (Brand names for the above cleaning productsare registered trademarksof the respectivemanufacturers.
/,iiiii¸¸ iiiii!ii ' PARTS _ _CHART DIRECTIONS CLEANING AGENTS , Chrome drip bowls, if equipped CARE AND CLEANING , ,.......... , ,,,,,,,,,,,,,,, ,, , ,,, ..... , • Soap and water • Paste of baking soda and water ,,,, ..... Clean bowls after each use with soap and water. Remove stubborn stains with baking soda paste and plastic scouring pad. To prevent scratching the finish, do not use abrasive cleaning agents. Rinse, dry and replace.
CARE PARTS AND C_N_ CLEANING AGENTS Oven bottom CHART DIRECTIONS Proiect the p0'rcelain enamel oven bosom by (1) using large enough cookware to prevent boilovers; (2) placing a piece of aluminum foil, that is slightly larger than the cookware, on the lower rack. NEVER place foil directly on the oven bottom as foil may melt onto oven bottom. Protect oven bottom against acid spills (milk, cheese, tomato, lemon juice, etc.) or sugary spills (pie filling) as they may pit or discolor the oven bottom.
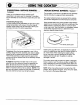
COOKTOP To prevent staining or discoloration, clean cooktop after each use. Wipe acid or sugar stains as soon as the cooktop has cooled as these stains may discolor or etch the porcelain. Freestanding ranges with conventional gas burners will feature a lift-up cooktop. The cooktop does NOT lift-up on these models: • Freestanding range with sealed burner. • Slide-in range with either conventional or sealed burners.
OVEN DOOR ' OVEN WINDOW Do not place excessive weight on an open oven door or stand on an open oven door as, in some cases, it could cause the range to tip over, break the door or cause serious injury to the user. To protect the oven door window: When opening the oven door, allow steam and hot air to escape before reaching in oven to check, add or remove food. 2. Do not hit the glass with pots, pans, furniture, toys, or other objects.
STORAGE DRAWER': The storage drawer at the bottom of the range is safe and convenient for storing metal and glass cookware. DO NOT store plastic, paperware, food or flammable material in this drawer. Remove drawer to clean under range. PROPORTIONAL VALVE ADJUSTMENT The LO setting should produce a stable flame when turning the knob from HI to LO. On conventional surface burners, the flame should be 1/8 inch or lower and must be stable on all ports on LO setting.
i i i, i ! , , PROBLEM CAUSE ,, ,, ,, ,,,,,,,,,,,,,,, , r ,,, Surface burner fails to light. , , , , CORRECTION , ,,,,, a. power supply not connected. b. clogged burner port(s). c. surface control not completely turned to the LITE position or turned too quickly from the LITE position. d. power failure (pilotless ignition). on sealed burner models: Burner willnot light if the ignitor is damaged, soiled, wet or if the port directly below the ignitor is blocked. f.
, TRouB HOOT -IG PROBLEM CHART CAUSE CORRECTION ,.,,,,, .,,,,,, .,,,,,.,,,,, Moisture condensation on oven window, if equipped, when oven is in use. Baking results are not satisfactory. • browning is too pale, too dark or is uneven. • food cooks unevenly. • food is underdone or overdone, a. it is normal for the window to fog during the first few minutes the oven is on. b. cloth saturated with water is used to clean the window. a. leave door ajar for one or two minutes to allow moisture to escape.
COOKING APPLIANCE WARRANTY FULL WARRANTY - Partsand Labor For one (1) year from the date of original purchase date, any part which fails in normal home use will be repaired or replaced free of charge, LIMITED WARRANTY - Partsonly For an additional four (4) years beyond the first year of the full warranty period - Parts listed below will be repaired or replaced free of charge for the part itself, with the owner paying all other costs, including labor, mileage, and transportation, Gas sealed surface bur
PART Broiler Pan & Rack CLEANING AGENT soap& water scour pad Control Knobs mild soap & water Grate Exterior (Porcelain enamel) Glass Metals _spap & water steel wool soap & water dry towel soap & water or glass cleaner soap & water chromecleaner INSTRUCTIONS remove the broil pan immediately after broiling, let cool slightly, sprinkle pan with soap and lay wet paper towel in it - let stand a few minutes wash - scour if necessary - dry. pull knobs off - wash gently and return to range do not soak.
CONSERVING ENERGY 1. Choosemediumweight metal cookware with flat bottoms,straightsides and fitted covers. 2. Thesize of the panshouldcompletelycovertheheatedportionofyoursurfaceelement.Ongas ranges, adjust your flame to pan size. 3. Preheatpans only when recommendedand then save energy by usingthe pan immediately. 4. Usethe least amountof liquidsor fats to shortencookingtime and retain the mostvitamins and minerals. 5. Start foodson higherheatthenturnthemdownor offduringtheremainderofthecookingtime. 6.
IMPROVE COOKING PERFORMANC I I II SURFACE COOKING COOKINGUTENSILS should be heavy gauge and lined with anothermetal. 1. Flat bottomutensils are the best and most efficient in using theheat from the cooktop (check for flatness by rotating a straight edge ruler on the bottom of the pan, checking for dips or uneveness as you rotate). Unevenutensilscauseslow uneven cooking. G/ass ceramic's chief advantage is its multiuses; it can go from freezer to top of range or oven to table. , . '.
SURFACE COOKING Bell- To cookfood over high heat in liquidin which bubblesrise constantlyto the surface and break. Braise-To cook foodover lowheat in a small amountof liquidin a coveredpan. (Foodmay or may not bebrownedfirst in a small amount of fat). C|ramllize - To stir in skillet over low heat until it melts and develops characteristic flavor and golden-brown color. Poach - To cook food simmering liquid. over low heat in Preesure-uok- To cook in steam under high pressure,usinga special saucepan.
! I BAKING I UTENSILS 1. Use the size utensil recommendedin the recipe- DONOToveror underfill theutensil. Always allow for expansion of foods or liquids. HOWTO MEASUREPANS Be sure your pans are the kind and size specified in the recipe. The size of some cookware is expressedin liquid measurement at its level full capacity.
I BAKING II RACKPOSITIONS HIGHEST 4th position MED.HI It is important to cook foods on the proper rack. 3rd position MED. LOW 2nd position * Checkrack position before any baking. LOWEST 1st position * Always changeracks while oven is cold, I"__ i TYPEOFBAKIN6 , i RACKPOSITION Angel food 3,4pos,t,o_ -4 __._ {1 REASON #1 Heat must be able to deflect to brown top. Biscuits,cookies 2 or 3 Middle positionallows for the most circulation and oven heating.
I I I II IIIIIIII IIIII I II I ! I II ROASTING CHARI IIIII IIIHIIIIII II IIIIIIII II _ I (OVENTEMPERATURE 325°) CUT APPROX. WEIGHT APPROX. MIN. PERLB. INTERNAL MEATTEMP. ,,,,, Rib 6 to 8 pounds 23-25 27-30 32-35 140Rare 160Med.
BROILING I ill I UTENSILS - Broilingpan and grid (includedin oven)and deep metal pan with rack. BROILINGMETHOD- Broiling is a method of cooking tender foods by direct heat under the burner. Generally, the distance between the meat and the burner and broiling time regulates degree of doneness. an excessiveamount of smoke,the rack has beenplacedtoo close to the broiler. C* do Any steak for broilingshould be at least _ inch thick.
BROILINGCHART I Thetimesgiveninthechartshouldbeusedonly asa guide.Increaseordecreasebroilingtimesto suit individualtaste for aloneness. THICKNESS & QUANTITY FOOD MIN.
II I COOKINGTERMS BAKINGPOWDER- A leavening agent which. makes foods rise when they are baked. It is a combination of baking soda, a dry acid or acid salt and starch or flour. The acid ingredient reacts with the baking soda to produce gas bubbles in the mixture. Doubleacting baking powder produces gas bubbles twice: first during mixing and second during baking.
IIIIIIIIIIIIIIII I TERMS DRAW- To remove entrails from, and clean, poultry or game. Drawn fish are whole fish that have beencleaned(eviscerated)but not boned. DOT - To scatter bits, as of butter or margarine, over surface of food. J then intoa choiceof sauces.Dessertfondues includechocolateorothersaucesfor dipping chunksof poundcakeor fruit. The term also denotesa bakedmaindish madewithcheese, milk and bread. GELATIN- Available as unflavoredand fruitflavored. They are not interchangeable.
I I I IIIII JllIIIIIIIIIIIIII III TERMS I IIIIIIIIIIIIIIIIIIIIIIII I HI III PIT - To remove seed from whole fruit. MARGARINE - Comes in several forms. Regular margarine with 80 percent fat is interchangeable with butter in recipes. SCORE- 1. To cut shallow slits in surface of food to increase tenderness or to prevent fat covering from curling. 2. To decorate. MARINADE -A seasonedliquid,in whichfoodis soaked to enhanceflavor.
EQUIVALENTMEASURES Dash 2 to 3 drops or less than 1/8 teaspoon 1 tablespoon 3 teaspoons 1/4 cup 4 tablespoons 1/3 cup 5 tablespoons plus 1 teaspoon 1/2 cup 8 tablespoons i 1 cup 16 tablespoons ii, 1 pint 2 cups ! quart 4 cups 1 gallon 4 quarts I peck 8 quarts ,,,,,,,,,,,,,, 1 bushel 4 pecks 1 pound 16 ounces BAKINGPAN EQUIVALENTS 4 - CUP BAKINGDISH: 9 inch pie plate 9 x 1¼ inch layer cake pan 7% x 3% x 21/, inch loaf pan 6 - CUP BAKINGDISH: 8 or 9 x 11h inch layer cake pan 10 inch
I IIIIIIIIIIIIII IIIIIIIIII IIIIIIII IIIIIII I II I CAUSE & CORRECTION i iiiiiiii PROBLEM CAUSE BROWNIN6: 1. Dented or warped pan. Uneven bottom browning 2. Oven not preheated. Too brown on bottom Too brown on top. Crack on top. CORRECTION iiii,,,z 1. Use even bottomed pan. 2. Preheat to desired temp. before adding food. 3. Range not level. 3. Adjust leg levelers (see Use and Care). 1. Check for correct rack posi1. Improper rack placement. tion before starting while oven is cold. 2.
PROBLEM Fallen CAUSE CORRECTION 1. Ovendooropenedtoo soon. 1. Check food only after the shortest recommended baking time. Oven temperature too low. 2. Check recipe for correct oven temperature. Old or too little baking 3. Use standard measuring utensils. powder. 4. Too much batter or too little 4. Use correct pan size. pan. 5. Too much or too little liquid. 5. Use standard measuring utensils. 6. Under baked. 6. Check food after shortest recommendedbaking time. , . i, ,,,, Flat 1.
PROeLEM Uneven top CORRECTION CAUSE roll IW ill 1. Pans touchingwails or other 1. Pans should not be closer than 11hto 2 inches. pans. 2. Oven temperature too low, 2, Check recipe for correct oven temperature 3. Adjust leg levelers (consult 3, Range not level. Use and Care Manual). 4. Use standard measuring 4. Too much liquid. utensils. 5. Check food after shortest 5. Underbaking. recommendedbaking time, 6. Undermixing. 6. Check recipe. 1. Check foods after shortest 1.
SERVICING BEFORE YOUCALLA SERVICE TECHNICIAN CHECKTHEFOLLOWING SOMEORNONEOF YOURRANGEOPERATES: Is your range plug disconnected from the electrical outlet? Are your house fuses blown? Is your circuit breaker tripped? is the range plug loose or improperly plugged? ELEMENTWON'THEAT:ISURFACEUNITS ONLY) Are your elements properly in place? Are element prongs bent or dirty? BAKED600DS NOTTURNINGOUT: Are your racks properly in place and in correct position for what you are baking? Is your range level? (Check leg l