
Instructions / Assembly

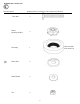
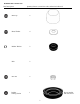
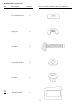
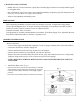
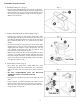
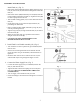
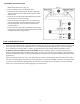
Table Of Contents

ASSEMBLE INSTRUCTIONS
7
Install Tank (A), (Fig. 5)
• Place brass washer (HH) followed by rubber washer (II) onto
bolt (JJ). Insert bolt (JJ) with washers through hole inside the
tank (A).
• Place brass washer (HH) followed by hex nut (KK) onto bolt
(JJ) protruding from bottom of tank (A). Tighten hex nut (KK)
to create a proper and secure seal.
• Attach rubber sealing gasket (LL) to center drain hole under
tank (A).
• Gently place tank (A) on toilet bowl (B) with bolts (JJ)
protruding out underneath.
• Place oval metal washer (MM) followed by wing nut (NN)
onto the protruding bolt (JJ).
• Tighten wing nut (NN) enough so that the tank (A) sits flat on
the toilet bowl (B).
• Make sure the toilet tank (A) is parallel to the wall and
straight on the toilet bowl (B).
• CAUTION: DO NOT OVERTIGHTEN NUTS.
SEVERE DAMAGE MAY OCCUR.
5. Install Tank Lever Handle Assembly (D), (Fig. 6)
• Turn clockwise to remove plastic nut (pre-assembled) from
the lever arm.
• Insert lever arm through the hole on the left side of tank.
Screw the plastic nut (pre-assembled) counterclockwise to
tighten it.
• Hook the chain onto the lever. With the lever at rest, the
chain should only be long enough for flapper to close.
6. Connect the Water Supply Line, (Fig. 7)
• Connect the water supply line (not included) between the
tank (A) and shut-off valve.
• Tighten the tank connection coupling nut % turn beyond
hand tight. (DO NOT OVERTIGHTEN THE TANK
CONNECTION.)
• Turn on supply valve and allow tank (A) to fill.
• Check for leakage at all connections and tighten or correct as
needed.
Fig. 5
Fig. 6
Fig. 7