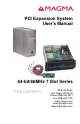
PCI Expansion System User's Manual 64-bit/66MHz 7 Slot Series PRELIMINARY 9918 Via Pasar San Diego, CA 92126 Phone (858) 530-2511 Fax (858) 530-2733 www.magma.com sales@magma.com support@magma.
Copyright © 2003 MAGMA This publication is protected by Federal Copyright Law, with all rights reserved. No part of this publication may be copied, photocopied, reproduced, stored in a retrieval system, translated, transmitted or transcribed, in any form or by any means manual, electric, electronic, electro-magnetic, mechanical, optical or otherwise, in whole or in part without prior written consent from MAGMA.
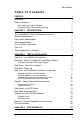
M A G M A Table of Contents PREFACE I Advisories Safety Instructions i ii When Working Inside a Computer Protecting Against Electrostatic Discharge CHAPTER 1 ii iii INTRODUCTION 1 The 64-bit/66MHz 7 Slot PCI Expansion System General Specifications Rack-mount Specifications Tower Specifications Pre-Installation Information Parts List Tools Required for Installation 1 1 1 1 2 2 3 CHAPTER 2 4 INSTALLATION GUIDE Step One: Install 64-Bit Host Interface Step Two: Attach PCI Expansion and Power Cabl
M A G M A Bus Hierarchy CHAPTER 4 27 WARRANTY & TECH SUPPORT 28 Product Warranty 30 Day Money Back Guarantee Free Technical Assistance Warranty & Repair in Seven Days Returns for Repair/Replacement/Credit Out of Warranty Repair Advanced Replacement Service Contacting Technical Support Frequently Asked Questions Returning Merchandise to MAGMA 28 28 28 28 28 29 29 30 30 31 APPENDIX A 32 COMPLIANCE FCC Class A Notice CE Certification Safety Standards Declaration of Conformity ii Table of Contents 3
M A G M A Preface Advisories Three types of advisories are used throughout this manual to provide helpful information or to alert you to the potential for hardware damage or personal injury. They are Notes, Cautions, and Warnings. The following is an example of each type of advisory. Use caution when servicing any electrical component. NOTE An amplifying or explanatory comment related to procedural steps or text.
M A G M A Safety Instructions WARNING The Tower PCI Expansion System is to be installed on desktop or tabletops only. The unit will become unstable if operated as a floor standing unit and unintentional force is applied to the top of the unit. Before handling the MAGMA PCI Expansion System, read the following instructions and safety guidelines to prevent damage to the product and to ensure your own personal safety.
M A G M A 2. Disconnect the computer and peripherals from their power sources to prevent electric shock or system board damage. 3. Follow the guidelines provided in “Regulatory Compliance Statements” on the following page. 4. Disconnect any telephone or telecommunications lines from the computer.
M A G M A proper ESD procedure, which can include wrist straps and smocks, when servicing equipment. You can also take the following steps to prevent damage from electrostatic discharge (ESD): iv ♦ When unpacking a static-sensitive component from its shipping carton, do not remove the component’s anti-static packaging material until you are ready to install the component in a computer. Just before unwrapping the anti-static packaging, be sure you are at an ESD workstation or grounded.
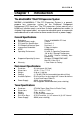
M A G M A Chapter 1 Introduction The 64-bit/66MHz 7 Slot PCI Expansion System MAGMA's 64-bit/66MHz 7 Slot PCI Expansion System is a generalpurpose bus expansion system for the Peripheral Component Interconnect (PCI) local bus. The PCI expansion system consists of a 64/66 host interface card, a set of four 3–meter expansion bus cables (a shielded, high-speed cable), an expansion daughter card, an expansion motherboard and a rack-mount or tower enclosure with a power supply.
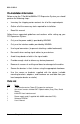
M A G M A Pre-Installation Information Before using the 7 Slot 64-bit/66MHz PCI Expansion System you should perform the following steps: • Inventory the shipping carton contents for all of the required parts • Gather all of the necessary tools required for installation • Read this manual Follow these suggested guidelines and cautions while setting up your PCI Expansion System: • Only use the power cable(s) provided by MAGMA • Only use the interface cables provided by MAGMA • Use keyed connectors
M A G M A NOTE The PCI Expansion System is shipped with many parts packaged in a separate box within the larger box that the expansion system is shipped in.
M A G M A Chapter 2 Installation Guide The following steps will guide you in completing the installation of your new 64-bit/66MHz 7 Slot PCI Expansion System. Electrostatic Discharge (ESD) Warning All PCI cards are susceptible to electrostatic discharge. When moving PCI cards, it is best to carry the cards in anti-static packaging. If you need to set a PCI card down, be sure to place it inside or on top of an anti-static surface. For more information, see “Protecting Against Electrostatic Discharge”.
M A G M A the card into any available PCI slot and securing it with a retaining screw. Step Two: Attach PCI Expansion and Power Cable(s) A set of four 3-meter shielded, high-speed cables are included with your PCI Expansion System.
M A G M A NOTE If at all possible, plug all power cords from the PCI Expansion System and your host computer into a shared power strip, preferably one that has surge and noise suppression circuitry built into it. Step Three: Recheck Installation Check your installation before powering up the PCI Expansion System for the first time.
M A G M A There may also be an On/Off switch on the power supply, located in the back of the expansion system. Make sure the power supply switch is in the ‘On’ position before powering up. When powering up, pay close attention to the eight LEDs on the 64-bit Host Interface and the eight LEDs on the rear panel of the expansion system. All LEDs must be solid green before the system will function properly.
M A G M A Windows XP Driver Install/Verification The following dialog will appear the first time you boot your computer with the PCI Expansion System installed: Insert the CDROM that was included with your expansion system into the CDROM drive of your computer. Choose Install the software automatically (Recommended), then click Next. The following dialog should appear: Click Finish.
M A G M A Choose Install the software automatically (Recommended), then click Next. Your computer should automatically find the appropriate driver and display the following dialog: The following dialog should appear: Click Finish. Now you should see a yellow call-out box appear in the lower right hand corner of your screen that reads, "Your new hardware is installed and ready to be used.
M A G M A Device Manager under the PCI Bus that the expansion system is installed on. á Æ Æ Æ Æ Æ Æ Go to: Start Control Panel System (use Classic View) Hardware Device Manager Choose ‘View devices by connection’ locate the PCI Bus that the expansion system is connected to. Your Device Manager should look similar to the following: PCI device installation is now complete. Continue to Step Six, page 23.
M A G M A Windows 2000 Driver Install/Verification The following dialog will appear the first time you boot your computer with the PCI Expansion System installed: Click Next. The following dialog will appear: Choose Search for a suitable driver for my device (recommended), then click Next.
M A G M A Insert the CDROM that was included with your expansion system into the CDROM drive of your computer. Make sure CD-ROM drives is checked, then click Next. Your computer should automatically find the appropriate driver and display the following dialog: Click Next.
M A G M A Click Finish, but you're not finished installing the expansion system yet. You have only installed half of the expansion system bridge devices. You can verify this by going to the Device Manager to see the bridges that you have just installed: á Æ Æ Æ Æ Æ Æ Æ Go to: Start Settings Control Panel System Hardware Device Manager Choose ‘View devices by connection locate the PCI Bus that the expansion system is connected to.
M A G M A Although you were not prompted to do so, you must restart your computer in order for your computer to see the PCI slots in the expansion system. á Æ Æ Go to: Start Shut Down down menu click OK. Æ Choose ‘Restart’ from the drop After restarting, your computer should automatically find the next PCI bridge device.
M A G M A PCI device installation is now complete. Continue to Step Six, page 23.
M A G M A Windows ME Automatic Installation/Verification The required software for the 64-bit/66MHz PCI Expansion System is included with the Windows ME operating system. However, you should follow the installation instructions below carefully. The following dialog will appear the first time you boot your computer with the PCI Expansion System installed: Choose Automatic search for a better driver (Recommended), then click Next. The following dialog will appear: Click Finish.
M A G M A Choose Automatic search for a better driver (Recommended), then click Next. The following dialog will appear again: Click Finish.
M A G M A Choose Automatic search for a better driver (Recommended), then click Next. The following dialog will appear, but don’t worry this is normal. Click Finish. Even though Windows ME was unable to locate the software for the last device installed. Everything should still work properly. To verify installation, go to Device Manager. á Æ Settings Æ Control Panel Æ Æ View devices by type Start Manager System Æ Device Under Other devices, there should be two PCI Bridges.
M A G M A normal. Your device manager should now look similar to the following: Now go down to System devices, you should see two PCI standard PCI-to-PCI bridges. These devices should not have ‘Question Marks’ or ‘Exclamation Marks’ in front of them.
M A G M A PCI device installation is now complete. Continue to Step Six, page 23.
M A G M A Mac OS Automatic Installation/Verification Mac OS X When using Mac OS X no additional software or drivers are needed. The operating system should automatically recognize the PCI Expansion System. To verify installation, go to Apple System Profiler. Apple Menu Æ About This Mac Æ More Info Æ Devices You should see a pci-bridge device listed under PCI as shown below: Any PCI Cards that you install in the expansion system will appear behind the pci-bridge device. Continue to Step Six, page 23.
M A G M A Launch the MagmaSlots application by double-clicking its icon. It is recommended that you launch MagmaSlots from a location on your desktop. A console window similar to the one shown below should appear: If you see this entry, it means that your computer has recognized the MAGMA expansion system.
M A G M A Step Six: Power Down and Remove Cover It is recommended that you first shut down the host computer correctly and then power down the expansion system to avoid ‘computer lock-up’. Rack-mount Enclosure Four screws retain the cover on the Rack-mount enclosure. They are located on the rear of the unit along top edge of the top cover. Slide cover back about 1 inch to disengage and remove straight up. Tower Enclosure Two screws retain the cover on the Tower enclosure.
M A G M A you pull up gently on the card. To keep the cards in place, secure them in the enclosure with their retaining screws (supplied with the PCI Expansion System). Take care when routing cables within the PCI expansion system in order to avoid damaging the signal cables (especially unshielded flat ribbon cables) or the power cables for internally installed devices. Be sure to leave enough "slack" in the cables to allow you to easily remove them if necessary to service the device(s).
M A G M A Step Nine: Install PCI Card Software NOTE Prior to installing the MAGMA PCI Expansion System, you should be familiar with the installation procedures for the PCI cards that you are installing in the expansion system. Some PCI card manufacturers recommend that you install their software driver(s) prior to installing the hardware. If this is the case, you should install their driver before you connect and power up the expansion chassis.
M A G M A Mac OS 9: You need to use a utility provided by MAGMA called MagmaSlots. MagmaSlots is available for download at www.magma.com/support/support.htm. Step Ten: System Should Be Up and Running Your system should now be up and running. If you are having trouble with the system, turn off the host computer and the expansion system, then check that all cards are seated in the slot properly and all cables are connected securely.
M A G M A Chapter 3 Bus Hierarchy Bus Hierarchy The following figure is representative of the PCI Bus hierarchy for the 64-bit/66MHz 7 Slot PCI Expansion System. This figure pictorially conveys the overall PCI bus topology of the system. The key point in the following figure of the 7 Slot Topology is the connecting cables between the Host Interface and the Expansion Backplane is actually a PCI bus itself. In general, we do not know what the actual Bus numbers are.
M A G M A Chapter 4 Warranty & Tech Support Product Warranty MAGMA PCI Expansion Systems carry a one-year warranty against defects in materials or workmanship from the date of shipment to the original purchaser. Any products found to be defective in material or workmanship will be repaired or replaced promptly. Please Note: Products that have been modified will not be covered under this warranty.
M A G M A guarantee, you will need to package the product in a manner similar to the manner in which it was received from our plant. MAGMA cannot be responsible for any physical damage to the product or component pieces of the product (such as the host or expansion interfaces for PCI expansion systems) that are damaged due to inadequate packing. Physical damage sustained in such a situation will be repaired at the owner's expense in accordance with Out of Warranty Procedures.
M A G M A The item must be returned to MAGMA with all parts and components that were shipped with it, in undamaged condition. The Customer shall be responsible for missing components and/or systems or components that are returned and are found to be physically damaged. Non-Returned Advanced Replacements: Advanced Replacements that are not returned within 30 days of replacement shipment will automatically be charged to the securing credit card.
M A G M A Returning Merchandise to MAGMA If factory service is required, a Service Representative will give you a Return Merchandise Authorization (RMA) number. Put this number and your return address on the shipping label when you return the item(s) for service. MAGMA will return any product that is not accompanied by an RMA number. Please note that MAGMA WILL NOT accept COD packages, so be sure to return the product freight and duties-paid.
M A G M A APPENDIX A Compliance FCC Class A Notice Note - This equipment has been tested and found to comply with the limits for a Class A digital device, pursuant to Part 15 of the FCC Rules. These limits are designed to provide reasonable protection against harmful interference when the equipment is operated in a commercial environment.
M A G M A Declaration of Conformity Manufacturer’s Name: Manufacturer’s Address: MAGMA, Inc. A Mobility Electronics, Inc.
Manual P/N 09-09905-01-A