32MF301B 19MF301B /CD TV Thank you for choosing Gradas aide Need help fast? Read your Owner's Manual first for quick tips that make using your Magnavox product more enjoyable. If you have read your instructions and still need assistance, www.magnavox.comlsupport or call with Manuel number) du Propri_talre d'astuces regorgent destin6es _ simphfier pas _ r_soudre votre probt_me, vous pouvez acceder Magnavox.
Registering your model with MAGNAVOX makes you eligible for all of the valuable benefits listed below, so don't miss out. Complete and return your Product Registration Card at once, or register online at www.magnavox.comlsupport to ensure: Know these safety symbols A This "bolt of lightning" indicates uninsulated material within your unit may cause an electrical shock. For the safety of everyone in your household, please do not remove product covering.
IMPORTANT SAFETY Read before INSTRUCTIONS operating equipment 1, Read theseinstructions, _. Keep these 3, 4, Heed al warnings, Follow a nstructions, S. Do not use this apparatus nea_-wate_ excessve 6. F. Clean only wth a dry coth. Do not beck any of the vent at op opep n£s, Instal n acco/dapce with the manufactulor's instruct ons, which could ultimately overtul-n the p_x_duct, & Do not nstsll near any heat sources such as radiators I6.
FCC WARNING This apparatus may generate or use radio frequency energy. Changes or modifications to this apparatus may cause harmful unless the modifications are expressly approved in the manual. The user could lose the authority to operate this apparatus unauthorized change or modification RADIO-TV interference if an is made. INTERFERENCE This apparatus has been tested and found to comply with the limits for a Class B digital device, pursuant to Part 15 of the FCC Rules.
Congratulations on your purchase! As you enjoy your new product, please keep these safety tips in mind: THE ISSUE • [he t-ome ti_ealerenle a nr<-entexper ence s a growh'g rend and large flat panel displays are popular purchases However, flal panel displays are not always suppored on the proper stonds or inslalled accord ng to the manufacturer'srecommendalions • Flat panel displays that are inappropriately s tuated on dressers,bookcases, shelves,desks, speakers, chestsor carts may fall over and cause injury
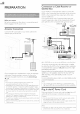
INTRODUCTION Features DTV/TV/CATV You cars use your remote contro to seect channels whch are broadcast in dgiM format and convent ona ar,aog format.
Supplied Accessories Owner's Manual Quick Start Guide Registration card Attaching the Base You must the attach unit, Be sure the direction, 1 base to the unt and rear of the front At least 2_people Check the text bolCom base match the are requ red for these "FRONT" to ensure to have it as a table w_th "an ow" t is being installed steps, on the n the top proper Base's correct direct on, Spread a thck and soft cloth over a table as shown at step 2, Place the man unit face
Remote Control Function ,,,_ p.11 (_(power) Press to turn the 3o completely power unit on and go into standby turn off the unit, you must mode. unplug 1 2 SAP ,,i_ p.13 2 3 3 SOURCE ,,i_ p.12 4 FREEZE Press to freeze film.p.12 S OK 6 A/V/_/I_(cursor) iiiii_ p,11 7 BACK IIII1_ 8 VOL 9 PREV CH screen image. llllI_ p.11 _ +/- p.14 IIII_p.13 IIII_ Press to return to previously wewed p,12 channel. 10 SLEEP 11 FORMAT IlII_ p.
Control Panel 1 VOLUME +/,,_ p.13 Press to adjust the volume up/down or move rigbt (+)/left (-) through the main menu terns, 2 CHANNEL +/,,,,_ p.12 Press to select channels or move up (+)/down through the main menu items, 3 MENU ,,,_ p.15 4 SOURCE ,,,,,_ p.12 (-) :2i !iq 5 (!) POWER ,,,,,_ p.11 Press to turn the unit on and go into standby mode. [o completely turn off the unit, you must unplug the AC power cord.
Connection to Cable Receiver or Satellite Box PREPARATION Use an HDbql or ComponentV ComponentV deo input HDPll or the ComponentV deo output if/ou Be sure your Delore antenna plu,_gng connect connect you connect: or other In the AC device _ower s connected properl/ cables to connect or the race ver/satellite Before deo HDMI the unit to the jacks of the cable box.
4 Use _1/1_ to select the desired location setting, then press OK, Initial Setup 7his section which wili guide you through ndudes selecting and autoprogram, v ewabie Before Hake 1 which tally setting on screen menu scans and memorizes you begin: sure the After unt is connected It may take first time. • [Initial Setup] menu unt is turned on.
WATCHING Note • [No Signal] broadcast • TV w+l appear on the lV screen after the subchannel s ovr,_: [Audio only program] roceive orgy sound message sgna, w appeal- or_ theTV scroen, wher_ you
TV Screen Information You can d splaythe nformation In the digital mode, for the current program 1 currently such as the off the gGdes selected audio the ECO channel mode detailed on the broadcast air channel or other You can turn TV screen, ng nformat such as program on ttle on ECO Press ECO power and once Node to conserve to turn powen on ECO Node and reduce offECO Node. consumption. Press ECO again to turn are displayed.
12!i USING FUNCTIONS Ibis section describes d splayed when ]be main menu tbe overview of the main S menu i__ '!, iii! you press MENU, consists of the function sett ng tems below, :2; 1 Use A/V Press MENU to display the main menu. to select a desired press OK to determine menu and an _tem, then the setting.
Before you begin: You must Otherwise, n [Location], the settings after the 1 Before set [Home] unit goes nto Use i,/y ,,B p.23 you adjusted standby to select the win not be memorized mode. after the item you want to adjus%then press 1 following items, 2 Smart Picture i/Y unit goes Use des red sett ng, then [Standard], [Sports], Brightness, Contrast, Color Temperature You can only adjust the [Personal] Adjust in [Smart [Movie], Color, Use press OK.
TV Speakers Select the amplifier Autoprogram aucto output s HDbql an HDbq volume cable link function A/• speakers, sound operations option, then by such as unit's remote is set to [On]. desired or not. If your ble and connected by usng ths Control] to select the unit's compa£ to this unit, some up can be changed Make sure [fun-Link Use from the control.
Channel List The channels channels [hose 1 2 Antenna Confirmation selected here can be skipped when selecting the using CH +/-. channels can s_LIIbe selected with Use A/V to select [Channel Use A/V to select the channel the List],then Number buttons. press OK, you want to remove, then [hs funct on lets you check the digital sgnal strength of each channel. 1 Use _- Use the Number channel for which press OK, A/V to select [Antenna], buttons then or CH +/- press OK.
Closed Caption Note • [Digital Caption Service] that you can swtch the broddcast descr pt orL You can view closed captioning (CC) forTY programs, movies and news, Closed caption refers to text of dialog or descript ons displayed on screen, Use A/• d ff_,rs depending on to select [Closed Caption], then press OK, See the following description for setting each item, ::iiiil {iq You can change A B C _/_ ..... .....
2O No_e Closed capt on will not be displayed when you are using an HDNI connect on. To show the closed caption on your 1V screen, broadcast signal must contain the closed caption data, A B c Not all TV pr%rams and commercials hdve the closed caption or all types of the closed caption, Captions nd texts may not exactly match theTV voice, Changing channels may delay the closed caption for a f_,w seconds.
2 iiii!,!'_! Use i/V to select the desired repeatedly to swrtch between rating, then [View] i7 press OK and [Block], Sub Rating Rating Category FV Fantasy V olence V V olence S Se×ual Situation L Coarse Language D Su%estive Dialo£ Rating T_Y7 T_NA T_14 T_PG Category X Mature aud ence ony NC-I 7 No one under I £ admitted R Restr tied; under 17 requu es accompany % parent or adut £uardian PG-I 3 Unsu tab e for chil@ en under 13 PG Parental £u dance su££ested G Genera NR
Clock, ECO You can turn on ECO Node to conserve Use poweK Phase _1/1_ to adjust and [Phase] 1 Use A/V _- Use A/• to select [ECO],then [Clock] setting sett ng to mprove Cursor press OK, to select the desred mode, then press OK, the to stab lize the clarity of the • PC screen PC screen. Cursor Clock to decrease sr,ttir_£ to increase Phase vaue vaue • sett r_£ On Off Nov • You must set [Home] in [Location]. ,,_ p.
Auto TVOn This untwillturnonwhen thepower onsgnal issent fi'om your connected funLink device. Use •/• toselect thedesired sett ng, then press OK. On Ths unit turns on autom_Jt ca ywhen you turn on your- connected fun Link dev ce. Off Ths un_ Stays in standby mode even f you turn on your connected fun Lnk device. Device i_i;ilfl E-Sticker When you select (Electronic [Location] Sticker) to [Retail] store, E St cker s displayed.
Item Detail Press 1 to dispay f'e d€,ta s beow, [Name], [Album], [Date], [Size] and [Next]. {1_ This unt can play picture Use the USB storage (jPEG) device and video that contains (Motion those jPEG) [Hes, More Detail Press 1 agan to remove file details. FJes. Press 4 or OK to start the sde show, While the slide show is on, the following 1 Insert the USB storage this untThe 2 main Use A/y ]he h ghlghted storage device menu nto appears to select [USB] the automat tally.
CONNECTING No_e DEVICES The unit recognizes only a USB storage dev ce, Do not use a USB hub or an extension cabe to connect an external hard ds]< drve to the unit, (Not supported,) A USB stol ge devce is alwd)'S nserted to ths unit d rectly.
i 26 Composite NoEe Use an HDHI cable wth the HDbl] !ego (a cert tied HDNI cable), Hgf, Speed HDNI cable s recommended for the better compatibility, For HDMI connection (use HDMI Input jack) Ths unit accepts ony signals n cornp ante wth connechon for wdeo connected devices unit's Composite Audio The unt accepts 480,480p, 720p, I080 and 1080p 24/30/60Hz of video s £r,als,and 32kHz, 44.1 kHz and 481
PC Connection This unt USB Storage Device is equpped unit to your wth a PC PC, you can use this unt Use aVGA cable stereo plug conversion min nputjack, for th sVideo lfyou connect ths as a PC montor: connection unt offers (Motion and t requires cable forAnalogAud 7hs a o signal as well. Insert jPEG) easy playback of p cture the USB stora;_e devce below, [USB] (}PEG) and video files. nto the USB term hal shown ulll. p.
i 28 USEFULTIPS FAQ I_,i,l@l'_|,JI iri_lFi,i,i_l Check the antenna or cable connect on to the man unt, Check the batteries of the remote centre. Check #there s an obstacle between the infrared sensor window and the remote control, %st the signal output use [IR Signal Check], m_ p.30 If okay, then poss ble nfi-ared sensor troube, My remote control does not work.
Ii_'l ulii mm;_RiT_ai, _1| I I Check if the power is on, Check if the correct nput mode is selected. Check whether a the cabes to the unit arc, connected to the con ect output jack of your devce kr, Biu rdy/DVD I c'co_den L!! :q Vew other 1V channels.
3O INFORMATION Glossary Maintenance ATSC Acronym that stapds fer Adv riced 1. evision Systoms Committee the r,dme of the di£td bl_adcdst ng standards. Aspect dnd Wpe The wdth of a TV screen m ative to its he gl,t.
General Specifications TV format Closed Other /v,TSC/NTgObq Caption IV standard Terminals system Antenna Input Audio Input §15i 22/FCC (d gital CC) §q5,1 q 9 / FCC (analog CC) Channel coverage Terrestrial DTV Analog UHF 14-51 (NTSC) VHF 2-13 UHF 14-69 CATV (each channel has e.
117' ( ) WARRANTY COVERAGE: This warranty below. obligation WHO IS COVERED: This product warranty or a part that has been modified without written company permission, or (d) if any serial number has been removed or defaced, or (e) product, accessories or consumables sold "AS IS" without warranty of any kind by including refurbished product sold "AS IS" by some retailers.