Introduction Owner's Manual Connections Basic Setup H2160MW9 A HDD & DVD PLAYER / RECORDER WITH DIGITAL TUNER THANK YOU FOR CHOOSING MAGNAVOX. Recording NEED HELP FAST? READ YOUR QUICK GUIDE AND/OR OWNER'S MANUAL FIRST FOR QUICK TIPS THAT MAKE USING YOUR MAGNAVOX PRODUCT MORE ENJOYABLE. IF YOU HAVE READ YOUR INSTRUCTIONS AND STILL NEED ASSISTANCE, YOU MAY ACCESS OUR ONLINE HELP AT HTTP://WWW.MAGNAVOX.COM/SUPPORT OR CALL 1-800-605-8610 WHILE WITH YOUR PRODUCT.
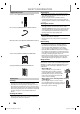
4. Prepare 1 After all the connections are complete, connect the AC power cord. 2 Insert two Size AA (R6) batteries. 5. Record If you are recording to the HDD, press [HDD] first, then proceed to step 2. If you are recording to a disc, press [DVD] first. info For more info, please contact 1-800-605-8610 or visit : http://www.magnavox.com/support Manual a recordable disc (refer to page 1 Insert 27 in the Owner's Manual on how to insert a disc).
2. Select Best Video Audio the appropriate connection Progressive-compatible HDMI cable Your TV High Definition TV HDMI IN 3. Connect HDMI Cable IN VIDEO VIDEO IN OUT L Your TV Y L OUT R ANTENNA R IN AUDIO IN (L1) OUT S-VIDEO AUDIO OUT COAXIAL S-VIDEO HDMI cable sends both audio and video digital signals. (No additional audio connection is required.
SAFETY INFORMATION The model and serial numbers of this unit may be found on the cabinet. You should record and retain those numbers for future reference. Model No.: Serial No.: WARNING: TO REDUCE THE RISK OF FIRE OR ELECTRIC SHOCK, DO NOT EXPOSE THIS APPARATUS TO RAIN OR MOISTURE. APPARATUS SHALL NOT BE EXPOSED TO DRIPPING OR SPLASHING AND NO OBJECTS FILLED WITH LIQUIDS, SUCH AS VASES, SHALL BE PLACED ON THE APPARATUS.
SAFETY INFORMATION Introduction CAUTION: Danger of explosion if battery is incorrectly replaced. Replace only with the same or equivalent type. WARNING: Batteries (Battery pack or battery installed) shall not be exposed to excessive heat such as sunshine, fire, or the like. Connections LASER SAFETY This apparatus employs a laser. Only a qualified service person should remove the cover or attempt to service this apparatus, due to possible eye injury.
SAFETY INFORMATION Supplied Accessories remote control (NB820UD) with batteries (AAx2) Cleaning discs • When a disc becomes dirty, clean it with a cleaning cloth. Wipe the disc from the center to out. Do not wipe in a circular motion. • Do not use solvents such as benzine, thinner, commercially available cleaners, detergent, abrasive cleaning agents or antistatic spray intended for analog records.
SAFETY INFORMATION Introduction Trademark Information is trademark of Eastman Kodak Company. Connections HDMI, the HDMI logo and High-Definition Multimedia Interface are trademarks or registered trademarks of HDMI Licensing LLC. Manufactured under license from Dolby Laboratories. Dolby and the double-D symbol are trademarks of Dolby Laboratories.
CONTENTS Introduction Recording SAFETY INFORMATION . . . . . . . . . . . . . . . . . . . . . . . . . . . 2 FEATURES . . . . . . . . . . . . . . . . . . . . . . . . . . . . . . . . . . . . . . . 8 Symbols Used in this Owner's Manual . . . . . . . . . . . . . . .9 FUNCTIONAL OVERVIEW . . . . . . . . . . . . . . . . . . . . . . . . 10 Front Panel . . . . . . . . . . . . . . . . . . . . . . . . . . . . . . . . . . . . . . . 10 Rear Panel . . . . . . . . . . . . . . . . . . . . . . . . . . . . . . . . . . . .
CONTENTS Introduction Editing 64 66 66 67 80 80 81 81 82 82 84 85 86 87 88 89 90 92 93 94 95 96 97 98 Recording Function Setup Playback LIST OF SETTINGS . . . . . . . . . . . . . . . . . . . . . . . . . . . . . . . 99 SETUPS. . . . . . . . . . . . . . . . . . . . . . . . . . . . . . . . . . . . . . . . 102 Playback . . . . . . . . . . . . . . . . . . . . . . . . . . . . . . . . . . . . . . . . . 102 Display . . . . . . . . . . . . . . . . . . . . . . . . . . . . . . . . . . . . . . . . . . 106 Video .
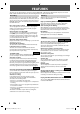
FEATURES This unit not only plays back the contents on internal HDD, DVD, or CD, but also offers features for you to record on HDD or DVD and edit them after that. The following features are offered with this unit. Recording This unit allows you to record on the HDD, a DVD+RW/RW (rewritable) and a DVD+R/-R (one-time write). You can choose any one for your convenience. Even if you choose DVD-RW/-R, these discs will automatically be recorded in the DVD+VR mode.
FEATURES Symbols Used in this Owner's Manual HDD Others Description refers to DVD+RW Description refers to DVD+R Description refers to DVD-RW Description refers to DVD-R For Playback only Description refers to DVD-video Description refers to audio CD Description refers to video CD with PBC function Description refers to video CD without PBC function Description refers to CD-RW/-R with MP3 files Description refers to CD-RW/-R with JPEG files (Kodak Picture CD files included) If you do not find any of the
FUNCTIONAL OVERVIEW Front Panel 1 2 3* 4 5 6 7 8* 9 10 H2160MW9 15 14 13 12 11 (*) The unit can also be turned on by pressing these buttons. 1. y STANDBY-ON button Press to turn on the unit, or to turn the unit to the standby mode. (To completely shut down the unit, you must unplug the AC power cord) 2. Disc tray Place a disc when opening the disc tray. 3. A OPEN/CLOSE button* Press to open or close the disc tray. 4. Display Refer to “Front Panel Display” on page 14. 5.
FUNCTIONAL OVERVIEW Introduction Rear Panel 1 2 4 3 VIDEO VIDEO IN OUT IN L 5 Y L Connections OUT R ANTENNA 12 AUDIO IN (L1) IN R S-VIDEO AUDIO OUT 11 10 9 OUT COAXIAL S-VIDEO 8 7 6 Recording 8. COMPONENT VIDEO OUTPUT jacks Use to connect a TV monitor with component video inputs with a component video cable. 9. AUDIO OUT jacks Use to connect a TV monitor, AV receiver or other device with an RCA audio cable. 10.
FUNCTIONAL OVERVIEW Remote Control Installing the Batteries in the Remote Control Install the batteries (AAx2) matching the polarity indicated inside battery compartment of the remote control. 1 Open the cover. 2 Insert batteries. Using a Remote Control Keep in mind the following when using the remote control: • Make sure that there are no obstacles between the remote control and the infrared sensor window on the unit.
FUNCTIONAL OVERVIEW Recording Playback Editing Function Setup Others Español EN E2S00UD_H2160MW9_EN_v1.indd 13 Basic Setup 18. OPEN/CLOSE A button* • Press to open or close the disc tray. 19. CHANNEL / buttons • Press to change the channel up and down. 20. CLEAR button • Press to clear the information once entered, to clear the marker settings, or to cancel the programming for CD, etc. 21. HDMI button • Press to set the HDMI connector’s video signal output mode. 22.
FUNCTIONAL OVERVIEW Front Panel Display 2 1 PM 3 DTV BS CS DR CD VCR DB HDD DVD 4 5 1. PM 4. Current status of the unit : Appears in the afternoon with the clock display. : Appears when playback is paused. 2. DTV : Appears when playing back an HDD or disc. : Appears when the channel is in DTV mode. : Appears when the timer programming or OTR has been set and is proceeding. : Flashes when timer programming was not executed because of some error. 3.
CONNECTION Introduction Read this first: 1) Disconnect the AC power cords of the devices from the AC outlet. 2) Make the connection as illustrated below. 3) After making all the connections, connect the AC power cords of the devices. Antenna Connection (Required) IN VIDEO VIDEO IN OUT RF coaxial cable Y L L Basic Setup rear of this unit OUT R ANTENNA AUDIO IN (L1) IN R S-VIDEO AUDIO OUT OUT COAXIAL S-VIDEO ANT.
CONNECTION Connecting to a TV Using Audio / Video Jacks RCA video cable VIDEO OUT VIDEO IN AUDIO IN L L RCA audio cable R R AUDIO OUT rear of this unit VIDEO VIDEO IN OUT IN L Y L OUT R ANTENNA AUDIO IN (L1) IN R S-VIDEO AUDIO OUT OUT COAXIAL ANT.
CONNECTION Introduction Connecting to a TV Using the S-Video Out Jack AUDIO IN VIDEO OUT L Connections RCA audio cable L R S-VIDEO IN S-video cable R OUT AUDIO OUT S-VIDEO ANT.
CONNECTION Connecting to a TV with an HDMI™ Compatible Port • HDMI outputs the video / audio signals without converting to analog signals. • No audio connection is required. HDMI IN HDMI cable HDMI OUT rear of this unit VIDEO VIDEO IN OUT IN L Y L OUT R ANTENNA AUDIO IN (L1) IN R S-VIDEO AUDIO OUT OUT COAXIAL S-VIDEO ANT.
CONNECTION Introduction Connecting to a Cable / Satellite Box RCA video cable RCA audio cable VIDEO IN R RCA audio cable cable/satellite box R IN S-VIDEO AUDIO OUT rear of this unit ANT.OUT ANT. IN ANT.
CONNECTION Connecting to a TV without Audio / Video Jacks VHF / UHF antenna rear of this unit IN VIDEO VIDEO IN OUT L Y L OUT R ANTENNA RF coaxial cable AUDIO IN (L1) IN IN OUT COAXIAL S-VIDEO VIDEO OUT or cable TV company R S-VIDEO AUDIO OUT RCA video cable L OUT R ANTENNA AUDIO OUT RCA audio cable ANT. IN rear of your RF modulator (not supplied) RF coaxial cable RF coaxial cable Set channel 3 or 4 ANT.
CONNECTION Introduction Digital Audio Connection Coaxial Cable Connection Dolby Digital decoder COAXIAL rear of this unit VIDEO VIDEO IN OUT IN L Y L Connections digital audio coaxial cable OUT R AUDIO IN (L1) ANTENNA COAXIAL R IN OUT S-VIDEO AUDIO OUT COAXIAL S-VIDEO digital audio coaxial input jack HDMI Audio Connection rear of this unit VIDEO VIDEO IN OUT IN HDMI IN Y L HDMI cable L OUT R ANTENNA AUDIO IN (L1) R IN S-VIDEO AUDIO OUT OUT COAXIAL S-VIDEO Basic Setup AV re
BEFORE YOU START After you have completed all the connections, you must find the viewing channel (external input channel) on your TV. Finding the Viewing Channel on Your TV STANDBY-ON DTV/TV SOURCE .@/: ABC DEF GHI JKL MNO PQRS TUV WXYZ SPACE CLEAR AUDIO REPEAT SETUP DISC MENU OPEN/ CLOSE CHANNEL HDMI TITLE 1 2 3 After you have made all the necessary connections, press [STANDBY-ON y] to turn on the unit. Turn on your TV.
BEFORE YOU START Guide to On-Screen Display / Menu The on-screen display changes in the following order as you press [DISPLAY]. DTV Program Guide DTV Program Guide (only in DTV mode) 69.
BEFORE YOU START HDD / DVD Information / Menu 6 1/ 5 7 1/ 5 0:01:00 / 1:23:45 DVD Video Title/File Name Information Title Name Information Title Name My Title CH 10 5 1 2 File Name Information File Name My File DVD SP(2Hr) 4 1h53m 3 * This is an example screen only for explanation. Displayed items may vary depending on the disc you insert. 1. Indicates the file type or a disc type and format mode. (DVD mode only) 2. Indicates a channel number or selected external input channel. 3.
BEFORE YOU START Press [SETUP] to display the main menu. Then use [K / L] to select a menu and press [OK] to display the menu. These menus provide entries to all main functions of the unit. General Setting Timer Programming Title List Disc Edit HDD Menu Dubbing DISC Playback Mode General Setting Parental Lock Disc Audio Disc Menu Language Audio Language Subtitle Language Angle Icon Still Mode Variable Skip / Replay Playback Playback Display Video Recording Clock Channel HDMI Reset All Editing 1.
BEFORE YOU START Disc Edit / HDD Menu / Dubbing / DISC Playback Mode Disc Edit 1 2 3 4 Edit Disc Name Erase Disc Make Edits Compatible Disc Protect OFF ON Disc Edit 1 2 3 4 Edit Disc Name Erase Disc Finalize Disc Protect OFF ON Disc Edit 1 3 2 4 3 Edit Disc Name Finalize Disc Protect OFF ON DISC Playback Mode 5 1 6 2 7 3 4 Random Play Program Play PBC (Video CD only)
BEFORE YOU START Introduction Switching HDD / DVD Mode Because this unit is a combination of HDD and DVD recorder, you must first select which component (output mode) you wish to operate. HDD mode DVD mode Press [HDD] to activate the HDD component. Press [DVD] to activate the DVD component. Connections H2160MW9 SOURCE STANDBY-ON DTV/TV .
INITIAL SETTING You need to follow these steps when you turn on this unit for the first time. SOURCE STANDBY-ON DTV/TV .@/: ABC DEF GHI JKL MNO PQRS TUV WXYZ SPACE CLEAR AUDIO REPEAT OPEN/ CLOSE CHANNEL 1 2 Follow the procedure in “Finding the Viewing Channel on Your TV” on page 22 to display “Initial Setup” menu. Use [K / L] to select your desired language, then press [OK].
CHANNEL SETTING Introduction If you have changed antenna connection, we recommend that you program available channels in your area with the following procedures. Auto Channel Scan ABC DEF GHI JKL MNO PQRS TUV WXYZ SPACE CLEAR AUDIO REPEAT SETUP DISC MENU CHANNEL HDMI TITLE RETURN DISPLAY V.REPLAY “General Setting” menu will appear. Use [K / L] to select “Channel”, then press [OK]. “Channel” menu will appear. Use [K / L] to select “Auto Channel Preset”, then press [OK].
CHANNEL SETTING Adding / Deleting Channels You may want to add or delete TV channels if your channel lineup changes or if you no longer watch some channels. Adding channel is only available for the analog TV channels. Make sure • You perform “Auto Channel Scan” before adding or deleting the channels. STANDBY-ON DTV/TV SOURCE .
CHANNEL SETTING 5 Manual Channel Preset 2 Add Delete 6 Recording CH Use [K / L] to select “Delete”, then press [OK]. Then select the next channel to delete. • If the setting is complete, press [RETURN] to activate “Manual Channel Preset”. Manual Channel Preset Your setting will be activated and it will automatically switch to the next channel so that you can continue adding or deleting channels.
SETTING THE CLOCK Set the clock before you try the timer programming. If a PBS (public broadcasting station) is available in your area, follow “Auto Clock Setting” below. If not, follow “Manual Clock Setting” on page 33. Auto Clock Setting This unit can set the time and date automatically by referring to a PBS station. Make sure • The antenna/cable TV connections are correct. • Channels are set. (Refer to page 29.
SETTING THE CLOCK “General Setting” menu will appear. Use [K / L] to select “Clock”, then press [OK]. “Clock” menu will appear. Use [K / L] to select calendar or time, then press [OK]. Clock Setting Use [K / L] to select “Clock”, then press [OK]. “Clock” menu will appear. Use [K / L] to select “Daylight Saving Time”, then press [OK]. Use [K / L] to select “ON (MAR NOV)”, “ON (APR - OCT)” or “OFF”, then press [OK]. Daylight Saving Time JAN / 01 / 2009 ( THU ) 12 : 00 AM Your setting will be activated.
TUNER SETTINGS Switching Analog Mode / Digital Mode You can easily switch the analog TV (NTSC) and digital TV (ATSC) with the remote control. Press [DTV/TV] on the remote control. • The analog mode and digital mode switch alternately. Channel Selection Select channels by using [CHANNEL / ] or [the Number buttons] found on remote control.
TUNER SETTINGS Selecting TV Audio Introduction This section describes how to switch the TV audio. When you record a TV program, only the audio selected here will be recorded. Digital TV ABC DEF GHI JKL MNO PQRS TUV WXYZ SPACE CLEAR AUDIO REPEAT SETUP CHANNEL HDMI TITLE OK RETURN DISPLAY V.SKIP • When you press [AUDIO], selected language will be displayed on the TV screen. • Every time you press [AUDIO], the language will be switched. e.g.
TUNER SETTINGS Selecting TV Audio (cont’d) Analog TV STANDBY-ON DTV/TV SOURCE .@/: ABC DEF GHI JKL MNO PQRS TUV WXYZ SPACE CLEAR AUDIO REPEAT SETUP DISC MENU OPEN/ CLOSE CHANNEL HDMI TITLE OK RETURN DISPLAY V.REPLAY 1 2 3 4 Press [SETUP] and use [K / L] to select “General Setting”, then press [OK]. “General Setting” menu will appear. Use [K / L] to select “Channel”, then press [OK]. “Channel” menu will appear. Use [K / L] to select “TV Audio Select”, then press [OK].
TUNER SETTINGS Introduction DTV Closed Caption Digital TV Digital TV has its own closed captions called DTV CC. Use this menu to change the settings for DTV CC. ABC DEF GHI JKL MNO PQRS TUV WXYZ SPACE CLEAR AUDIO REPEAT SETUP HDMI 4 Use [K / L] to select “Caption Service”, then press [OK]. 5 Use [K / L] to the desired DTV closed caption, then press [OK]. TITLE OK “General Setting” menu will appear. Use [K / L] to select “Display”, then press [OK].
TUNER SETTINGS Closed Caption Style Digital TV Digital TV can also change the style of its closed caption such as font, color or size, etc. SOURCE STANDBY-ON DTV/TV .@/: ABC DEF GHI JKL MNO PQRS TUV WXYZ SPACE CLEAR AUDIO REPEAT SETUP DISC MENU OPEN/ CLOSE CHANNEL HDMI 1 2 3 Press [SETUP] and use [K / L] to select “General Setting”, then press [OK]. 4 Use [K / L] to select “User Setting”, then press [OK]. 5 Use [K / L] to select “ON”, then press [OK].
TUNER SETTINGS Introduction 6 Use [K / L] to select the item and switch the setting for each item you want to set, then press [OK]. Edge type of the displayed caption can be switched as below. Edge Type • When “User Setting” is set to “ON”, you can set the following items. CC style set by “User Setting” will be displayed. • The setting description for each item is shown below. Font size of the displayed caption can be switched as below.
INFORMATION ON RECORDING Before you make a recording, read the following information. Recordable Discs Unrecordable Discs This unit can record to DVD+RW, DVD+R, DVD-RW and DVD-R. DVD+R/DVD-R can only be recorded to once. DVD+RW/ DVD-RW can be recorded to and erased many times. DVD-RW/-R will be recorded in the DVD+VR mode automatically in this unit. Logos Attributes • DVD-RW recorded in the mode other than +VR is not recordable on this unit unless you erase all contents in the disc (refer to page 96).
INFORMATION ON RECORDING About HDD Disc size 18 min SP 36 min SPP 45 min LP 54 min (good) EP 72 min SLP 108 min (poor) HQ 60 min (good) SP 120 min SPP 150 min LP 180 min EP 240 min SLP 360 min (poor) HQ 30 hrs (good) SP 60 hrs SPP 75 hrs LP 90 hrs EP 120 hrs SLP 180 hrs (poor) Playback • The recording time is only an estimate. The actual recording time may differ. • The audio and video quality gets poorer as the recording time becomes longer.
BEFORE RECORDING Make Recording Compatible Use this feature to make the unfinalized +VR mode discs recorded on other unit recordable on this unit. When you make an additional recording on this unit with “Make Recording Compatible” set to “ON”, the title menu is automatically converted to our style. 1) Press [SETUP] and use [K / L] to select “General Setting”, then press [OK]. “General Setting” menu will appear. 2) Use [K / L] to select “Recording”, then press [OK]. “Recording” menu will appear.
BASIC RECORDING & ONE-TOUCH TIMER RECORDING STANDBY-ON DTV/TV SOURCE DEF GHI JKL MNO PQRS TUV WXYZ SPACE CLEAR AUDIO REPEAT SETUP DISC MENU CHANNEL 1 Align the disc to the disc tray guide. HDMI * Make sure the disc is compatible with this unit. (Refer to page 40 for the list of compatible discs.) TITLE It may take a while to load the disc. Basic Setup ABC Insert a recordable disc (refer to page 27 on how to insert a disc). Connections .
BASIC RECORDING & ONE-TOUCH TIMER RECORDING 4 Press [REC] to start recording. “I HDD” or “I DVD” will be displayed for 4 seconds. e.g.) DVD I DVD SP(2Hr) 5 Press [STOP C] to stop recording. As for DVD recording, the title list will appear automatically after writing to a disc complete. (Refer to “Guide to a Title List” on page 80.) e.g.) DVD+R 2h00m Press [PAUSE F] to pause recording. Press [PAUSE F]] or [REC] again to restart recording. To set one-touch timer recording (OTR)...
AUTOSTART RECORDING DEF GHI JKL MNO PQRS TUV WXYZ SPACE CLEAR AUDIO REPEAT For how to playback the autostart recording, refer to “Playing Back the Autostart Recording” on page 75. CHANNEL Recording the Contents of the Autostart Recording SETUP DISC MENU HDMI 1 When watching TV program through this unit’s tuner, use [H], [E] or [V.REPLAY] to locate your desired point to start recording. • The autostart recording information will appear. Refer to page 23.
TIMER RECORDING You can program the unit to record up to 36 programs within a month in advance. Daily or weekly program recordings are also available. Before recording, make sure • Set the clock before setting a timer programming. • If you are recording to a disc, insert a recordable disc with enough recordable space. SOURCE STANDBY-ON DTV/TV Guide to Timer Programming Display 3 1 2 Timer Programming FEB/20/09 10:30 AM 69.
TIMER RECORDING Date FEB/20 CH DTV69. 1 Start 10 : 30AM REC To HDD 7 End --:-Mode SP End 11 : 30AM Mode SP SP End 11 : 30AM Mode SP SP 1h00m e.g.) digital mode Start 10 : 30AM REC To HDD End 11 : 30AM Mode SP SP e.g.) recording to DVD Start 10 : 30AM REC To DVD When “Auto” is selected as a recording mode, the unit calculates how much time is available on the disc and selects the best recording mode available automatically to complete recording the program. Date FEB/20 CH DTV69.
TIMER RECORDING How to select a channel number for the timer recording Analog TV For channel number 2-6 press, press [B] or [ • ] to decide the channels. For other channels (7-69), the channel will be decided as soon as you enter the channel number. Analog CATV For channel number 1-12 press, press [B] or [ • ] to decide the channels. For other channels (13125), the channel will be decided as soon as you enter the channel number.
TIMER RECORDING Connections Basic Setup Recording • If there is a power failure or this unit has been unplugged for more than 30 seconds, the clock setting and all timer programming will be lost. • When recording to a DVD, if a disc is not inserted, the unit will perform the alternate recording to the HDD (refer to page 47).
SPECIAL RECORDING Overwriting from the Beginning of the Title You can overwrite the existing title from the beginning. 1) Press [STANDBY-ON y]. Make sure that the TV input is set on the unit. 2) Load the disc that includes a title to be overwritten. It takes a while to display the title list. Title list will appear. If the title list does not appear, press [TITLE]. 3) Press [REC MODE] repeatedly to select a recording mode. Refer to “Recording Mode” on page 41.
SPECIAL RECORDING When you overwrite on the unnecessary title, there were various circumstances such as follows. Please note that following cases only describe the overwriting without any recording mode discrepancy. To avoid accidental deletion please check if there is no important title after the overwriting point. overwrite recording : A Connections When overwriting title is shorter than the existing title: (overwriting from the beginning of the title) 30 - 180 seconds will be cut off.
DUBBING Information on Dubbing You can dub the contents of the HDD to DVD or vice verse. Before you start dubbing, refer to pages 40-42 to see the recording compatibility. Guide to Dubbing Menu Display 1 2 3 HDD Recording Mode for Dubbing DVD ABCDE HQ (1Hr) (0:30:00) JAN/ 1/2009 Add Delete All Dubbing Start 3000 MB Dubbing List 1.ABCDE 2.JAN/ 4/09 1:00AM CH22 3.
DUBBING Introduction Settings for an External Device Connect the external device properly to the unit by using input jacks either L2 and L3 (Front) or L1 (Rear). When connecting an external device of monaural output to this unit, use AUDIO L jack of L2 (Front) or L1 (Rear). Use S-video or the RCA audio/video cables for this connection. When connecting a DVC (digital video camcorder), use DV-IN jack of L3 (Front).
DUBBING Recording from an External Device Before recording from an external device, refer to the instructions for the connection on page 53. SOURCE STANDBY-ON DTV/TV .@/: ABC DEF GHI JKL MNO PQRS TUV WXYZ SPACE CLEAR AUDIO REPEAT SETUP OPEN/ CLOSE CHANNEL If you are recording to the HDD, press [HDD] first, then proceed to step 2. If you are recording to a disc, press [DVD] first. 1 2 Insert a recordable disc (refer to page 27 on how to insert a disc).
DUBBING Introduction Information on DV Dubbing Guide to DV and On-Screen Display When the DVC is in video mode... 1 1/ 1 When the DVC is not in camera mode... 1/ 1 1/ 1 1/ 1 +RW Control DV Audio Start Rec DVD Stereo1 DVD SP(2Hr) The menu changes according to what mode of DVC. Switch the mode on the DVC to playback mode for the dubbing information.
DUBBING DVC to HDD / DVD Dubbing Before recording from DVC, see page 53 for connection instructions. SOURCE STANDBY-ON DTV/TV .@/: ABC DEF GHI JKL MNO PQRS TUV WXYZ SPACE CLEAR AUDIO REPEAT SETUP DISC MENU OPEN/ CLOSE CHANNEL Preparing for DV dubbing (DVC to HDD): • Make sure your DVC is in video mode. Preparing for DV dubbing (DVC to DVD): • Insert a recordable DVD. • Make sure your DVC is in video mode. If you are recording to the HDD, press [HDD] first.
DUBBING Introduction The dubbing will start. To stop dubbing; A) Press [C STOP] on the unit. or B) Use [K / L] to select “Control”, then press [OK]. Use [K / L] to select “HDD” / “DVD”, then press [OK]. Then press [STOP C]. Connections 6 7 Use [K / L] to select “Start Rec”, then press [OK]. Recording Playback • If you press [PAUSE F] at step 5, the tape will rewind to the point a few seconds preceding the paused point.
DUBBING Selected Title Dubbing Preparing for dubbing (HDD to DVD): • Insert a recordable DVD. Preparing for dubbing (DVD to HDD): • Insert a disc to be dubbed. SOURCE STANDBY-ON DTV/TV .@/: ABC DEF GHI JKL MNO PQRS TUV WXYZ SPACE CLEAR AUDIO REPEAT OPEN/ CLOSE CHANNEL 1 2 Press [SETUP] in stop mode. Use [K / L] to select “Dubbing”, then press [OK]. Setup General Setting Timer Programming Title List Disc Edit SETUP HDMI HDD Menu Dubbing DISC MENU TITLE OK RETURN DISPLAY V.
DUBBING At the upper left of each title, the number will appear in the order of selection . 8 Use [s / B] to select a desired recording mode, then press [OK]. e.g.) HDD ➡ DVD HDD DVD Connections Repeat step 5 until you register all the titles to be dubbed, then press [D. DUBBING]. Introduction 5 6 Use [K / L / s / B] to select a desired title, then press [OK]. Please select REC MODE. High HQ SP SPP LP EP Dubbing Titles e.g.
DUBBING One Title Dubbing (HDD to DVD only) This function lets you select one specific title from the title list for dubbing. SOURCE STANDBY-ON DTV/TV .@/: ABC DEF GHI JKL MNO PQRS TUV WXYZ SPACE CLEAR AUDIO REPEAT SETUP DISC MENU OPEN/ CLOSE CHANNEL 1 2 3 HDMI TITLE OK RETURN DISPLAY V.REPLAY V.SKIP RAPID PLAY 60 Preparing for dubbing: • Insert a recordable DVD. D.DUBBING HDD DVD TIMER REC MODE REC 4 Press [HDD] first. Press [TITLE].
PROTECTING A DISC ABC DEF GHI JKL MNO PQRS TUV WXYZ SPACE CLEAR SETUP AUDIO REPEAT DISC MENU CHANNEL Use [K / L] to select “Disc Edit”, then press [OK]. Use [K / L] to select “Disc Protect OFF ON”, then press [OK]. e.g.) DVD+RW Basic Setup .@/: OPEN/ CLOSE Press [SETUP]. Disc Edit Edit Disc Name Erase Disc Make Edits Compatible Disc Protect OFF ON HDMI TITLE RETURN V.REPLAY 4 V.SKIP Use [K / L] to select “Yes”, then press [OK]. Protect this disc? D.
PLAYING THE DISCS ON OTHER DVD PLAYERS Finalizing a Disc You will need to finalize DVD+R, DVD-RW or DVD-R to play them back on other DVD players. Finalizing may take several minutes up to an hour. A shorter recording period on the disc will require a longer time period for finalization. Do not unplug the power cord during finalization. STANDBY-ON DTV/TV SOURCE .@/: ABC DEF GHI JKL MNO PQRS TUV WXYZ SPACE CLEAR AUDIO REPEAT SETUP OPEN/ CLOSE CHANNEL 1 2 3 4 Press [SETUP].
PLAYING THE DISCS ON OTHER DVD PLAYERS Introduction Auto Finalizing SOURCE STANDBY-ON DTV/TV ABC DEF GHI JKL MNO PQRS TUV WXYZ SPACE CLEAR AUDIO REPEAT SETUP HDMI 5 Use [K / L] to select “ON”, then press [OK]. TITLE OK RETURN DISPLAY V.SKIP “Recording” menu will appear. Use [K / L] to select “Auto Finalize”, then press [OK]. Use [K / L] to select “Disc Full” or “End of Timer Rec”, then press [OK]. Auto Finalize Disc Full End of Timer Rec e.g.) “Disc Full” Playback V.
INFORMATION ON PLAYBACK Before you play back DVD, read the following information. Playable Discs and Files Unplayable Discs This unit is compatible to play back the following discs. To play back a DVD, make sure that it meets the requirements for region codes and color systems as described below. You can play back discs that have the following logos will play back on the unit. Other disc types are not guaranteed to play back.
INFORMATION ON PLAYBACK HDD / DVD title 1 chapter 1 chapter 2 track 1 chapter 1 title 2 chapter 2 audio CD, video CD track 2 track 3 track 4 chapter 3 track 5 Basic Setup • PBC setting turns to “ON” when loading video CD with PBC function, thus, even after setting PBC to “OFF” and ejecting the video CD then reloading the video CD, this setting turns to “ON” automatically. • Some operations cannot be performed while PBC function is on.
BASIC PLAYBACK Direct Playback If you are playing back the titles in HDD, press [HDD] first, then proceed to step 2. If you are playing back the titles in DVD, press [DVD] first. SOURCE STANDBY-ON DTV/TV .@/: ABC DEF GHI JKL MNO PQRS TUV WXYZ SPACE CLEAR AUDIO REPEAT SETUP DISC MENU OPEN/ CLOSE 1 CHANNEL Align the disc to the disc tray guide. * Make sure the disc is compatible with this unit. (Refer to page 64 for the list of compatible discs.
BASIC PLAYBACK If you are playing back the titles in HDD, press [HDD] first, then proceed to step 2. If you are playing back the titles in DVD, press [DVD] first. SOURCE ABC DEF GHI JKL MNO PQRS TUV WXYZ SPACE CLEAR AUDIO REPEAT SETUP DISC MENU 1 Insert a disc (refer to page 27 on how to insert a disc). * Make sure the disc is compatible with this unit. (Refer to page 64 for the list of compatible discs.) CHANNEL It may take a while to load the disc.
BASIC PLAYBACK Note for DVD title list If you want to see disc information, press [{ ] when the first page of the title list is displayed or press [ K ] when the first title is selected but not when “Play”, “Edit” or “Overwrite” is highlighted. e.g.) DVD+RW 4 Use [K / L] to select “Play” (for DVD), or select “Resume Playback” or “Play from Start” (for HDD), then press [OK]. e.g.
BASIC PLAYBACK Introduction Playing Back an Audio CD and a CD-RW/-R with MP3 / JPEG Files SOURCE ABC DEF GHI JKL MNO PQRS TUV WXYZ SPACE CLEAR AUDIO REPEAT SETUP DISC MENU 1 It may take a while to load the disc. When an audio CD is inserted, track list will appear. When a CD-RW/-R with MP3/JPEG files is inserted, file list will appear. When you insert a CD-RW/-R mixed with MP3/ JPEG files, the playback media selection screen will be displayed.
BASIC PLAYBACK Playing Back an Audio CD and a CD-RW/-R with MP3/JPEG Files (cont’d) Kodak Picture CD The Picture CD is a service to convert photographs taken by a conventional film camera into digital data and write the data on a CD. You can enjoy picture images on the TV set by playing back the Picture CDs. For details of Kodak Picture CD, contact a shop that provides developing service of Kodak Inc. 1) Press [TITLE].
SPECIAL PLAYBACK Introduction Resume Playback Note You can play back from where you stopped playing back the disc last. Resume ON During playback, you can skip forward or backward by the amount of time you set in “Playback” menu. To set the time amount, refer to “ 8 Variable Skip / Replay” on page 105. Recording For HDD: You can set a resume point per every title. For DVD+RW/+R, DVD-RW/-R, Video CD, Audio CD, MP3 files and JPEG files: You can set only one resume point per disc.
SPECIAL PLAYBACK Step by Step Playback Chasing Playback during Recording 1) During playback, press [PAUSE F]. Playback will be paused and sound will be muted. 2) Press [G] repeatedly. Playback will advance one frame (or step) at a time when you press [G] with the sound muted. To play back step by step backward: Press [H] repeatedly. Every time you press the button, the playback will go backward by one frame. • Press and hold [H] / [G] to reverse / advance continuously.
SPECIAL PLAYBACK Introduction Marker Setting Zoom 1) During playback, press [DISPLAY]. 1) During playback, press [DISPLAY] to bring up the display menu. If the display menu is already shown, skip to step 2. 1/ 5 0:01:00 / 1:23:45 DVD Video 2) Use [{ / B] to select e.g.) DVD-video to display the marker list. 1/ 5 Basic Setup 1/ 5 0:01:00 / 1:23:45 DVD Video 3) Use [K / L] to select a desired zoom factor to zoom, then press [OK].
SPECIAL PLAYBACK Repeat Playback Note Available repeat function may vary depending the discs. 1) During playback press [DISPLAY], then proceed to step 2), or press [REPEAT] then proceed to step 3). • If the display menu is already shown, skip to step 2. to display the selection 2) Use [{ / B] to select menu. 1/ 5 1/ 5 0:01:00 / 1:23:45 • Point B for the repeat A-B playback should be set within the same title or track as point A. • To cancel the repeat playback, select “OFF” at step 3.
SPECIAL PLAYBACK Introduction Program Playback Playing Back the Autostart Recording You can program the disc to play back in your desired order. 2) Use [K / L] to select “DISC Playback Mode”, then press [OK]. “DISC Playback Mode” menu will appear. 4) Use [K / L] to select a desired track, then press [OK] or [B].
SEARCH Title / Chapter Search Track Search Using [H] / [G] Using [H] / [G] 1) During playback, press [G] to skip the current title or chapter and move to the next. The title or chapter will move forward by one at a time. • If there is no chapter in one title, the current title will be skipped. 1) During playback, press [G] to skip the current track/file and move to the next. The track/file will move forward one at a time. To go back to the beginning of the current track/file, press [H].
SEARCH Introduction Time Search , then press [OK]. 2) Use [{ / B] to select e.g.) DVD-video 1/ 5 Connections 1)During playback, press [DISPLAY] to bring up the display menu. If the display menu is already shown, skip to step 2. 1/ 5 0:01:00 / 1:23:45 DVD Video Basic Setup e.g.) audio CD 1/ 5 0:00:15 / 0:05:00 CD Recording The number next to will be highlighted. To move to the number next to , press [B]. When time search is not available, counter are not displayed.
SELECTING THE FORMAT OF AUDIO AND VIDEO You can select the format of audio and video as you prefer depending on the contents of the disc you are playing back. Switching Subtitles Switching Audio Soundtrack DVD-video may have subtitles in 1 or more languages. Available subtitle languages can be found on the disc case. You can switch subtitle languages anytime during playback.
SELECTING THE FORMAT OF AUDIO AND VIDEO 1) During playback, press [DISPLAY] to bring up the display menu. If the display menu is already shown, skip to step 2. 2) Use [{ / B] to select menu. e.g.) DVD-video Some DVD-video have scenes shot from 2 or more angles. Angle information should be on the disc case if the disc contains multi-angle scenes. 1) During playback, press [DISPLAY]. , then press [OK]. 2) Use [{ / B] to select e.g.
INFORMATION ON EDITING Guide to a Title List Title list allows you to check the titles recorded on the HDD or the disc easily. You can choose a title to play back from this list and easily edit the titles as you prefer. Press [HDD], then press [TITLE]. Press [DVD], then press [TITLE].
INFORMATION ON EDITING Introduction Edit Menu Media Available Features Putting names on titles HDD DVD ✔ ✔ ✔ Deleting selected titles ✔ Deleting a scene of a title ✔ Adding / deleting chapter marks ✔ Connections ✔ Deleting a title ✔ ✔ Hiding chapters ✔ Dividing a title ✔ ✔ *1 Setting an index picture ✔ Finalizing a disc ✔ Making edits compatible ✔* Putting name on disc ✔ Setting or Releasing disc protect ✔ Note 2 : Not available • Once you have finalized a DVD+R/ DVD-R, you c
EDITING Deleting a Title You can delete a title which you do not need anymore. Please be advised that the title once deleted cannot be brought back. SOURCE STANDBY-ON DTV/TV .@/: ABC DEF GHI JKL MNO PQRS TUV WXYZ SPACE CLEAR AUDIO REPEAT OPEN/ CLOSE CHANNEL If you are editing the titles on HDD, press [HDD] first. If you are editing the titles on DVD, press [DVD] first. 1 2 Press [TITLE]. Use [K / L / { / B] to select a desired title to delete, then press [OK].
EDITING HDD mode Resume Playback Play From Start Edit Title Delete Delete Multiple Titles Dubbing 5 Use [K / L] to select “Yes”, then press [OK]. Final confirmation message will appear. Select “Yes”, then press [OK]. The title is now deleted. Connections Title List Title 2 12:00AM (1:00:00) JAN/ 1/09 1 2 4 5 CH10 SP 3 DVD mode Edit 1 Introduction 4 Use [K / L] to select “Title Delete”, then press [OK].
EDITING Deleting Selected Titles You can delete titles which you do not need anymore. Please be advised that the titles once deleted cannot be brought back. STANDBY-ON DTV/TV SOURCE .@/: ABC DEF GHI JKL MNO PQRS TUV WXYZ SPACE CLEAR AUDIO REPEAT SETUP DISC MENU 3 Use [K / L] to select “Delete Multiple Titles”, then press [OK]. 4 Use [K / L / { / B] to select the title you want to delete, then press [OK].
EDITING You can put title names on the titles and change the names from this menu. Edit - Edit Title Name 1 Connections OPEN/ CLOSE SOURCE STANDBY-ON DTV/TV 4 Use [K / L] to select “Yes”, then press [OK]. Yes No .@/: ABC DEF GHI JKL MNO Introduction Putting Names on Titles CHANNEL MY FAVORITE 1 : 05 : 00 PQRS WXYZ SPACE CLEAR AUDIO REPEAT The title name is now updated. SETUP 5 HDMI DISC MENU TITLE Press [RETURN] once or repeatedly to go back to the title list.
EDITING Chapter Marks (Add) You can put chapter marks in each title. Once a chapter is marked, you can use it for the chapter search feature. STANDBY-ON DTV/TV SOURCE .@/: ABC DEF GHI JKL MNO PQRS TUV WXYZ SPACE CLEAR AUDIO REPEAT SETUP DISC MENU OPEN/ CLOSE CHANNEL HDMI TITLE OK RETURN DISPLAY V.REPLAY To add a chapter mark: 1 2 3 4 V.SKIP Follow steps in “How to Access the Edit Menu” on page 81 to display “Edit” menu. Use [K / L] to select “Chapter Mark”, then press [OK].
EDITING Introduction Chapter Marks (Delete) To delete a chapter mark: ABC DEF GHI JKL MNO PQRS TUV WXYZ SPACE CLEAR AUDIO REPEAT SETUP DISC MENU CHANNEL HDMI TITLE 1 2 3 Use [K / L] to select “Chapter Mark”, then press [OK]. Submenu will appear. Use [H] / [G] to go to the chapter with the chapter mark number you want to delete, then press [PAUSE F]. Chapter mark number is displayed on the preview screen. e.g.) DVD Edit - Chapter Mark RETURN 1 V.
EDITING Chapter Marks (Delete All) To delete all chapter marks: STANDBY-ON DTV/TV SOURCE .@/: ABC DEF GHI JKL MNO PQRS TUV WXYZ SPACE CLEAR AUDIO REPEAT SETUP DISC MENU OPEN/ CLOSE CHANNEL HDMI TITLE OK RETURN DISPLAY 1 2 3 4 Follow steps in “How to Access the Edit Menu” on page 81 to display “Edit” menu. Use [K / L] to select “Chapter Mark”, then press [OK]. Submenu will appear. Use [K / L] to select “Delete All”, then press [OK]. Use [K / L] to select “Yes”, then press [OK].
EDITING Introduction Dividing a Title You can divide one title into 2 new titles. SOURCE ABC DEF GHI JKL MNO PQRS TUV WXYZ SPACE CLEAR AUDIO REPEAT SETUP DISC MENU CHANNEL HDMI TITLE When it comes to the desired point, press [PAUSE F]. Use [K / L] to select “Title Dividing”, then press [OK]. Use [K / L] to select “Yes”, then press [OK]. The title is now divided into 2 new titles, and it will go back to the title list automatically.
EDITING Deleting a Scene of a Title You can delete a specific part of a title. STANDBY-ON DTV/TV SOURCE .@/: ABC DEF GHI JKL MNO PQRS TUV WXYZ SPACE CLEAR AUDIO REPEAT OPEN/ CLOSE 1 2 Follow steps in “How to Access the Edit Menu” on page 81 to display “Edit” menu. Use [K / L] to select “Scene Delete”, then press [OK].
EDITING 7 Edit - Scene Delete 1 Yes No Connections Before and after 5 seconds of the deleted scene can be previewed every time you press [OK]. • If you are not satisfied with the result, use [K / L] to go back to “Start” or “End”, and try setting them again. • If you are satisfied with the result, proceed to step 6. Use [K / L] to select “Yes” then press [OK]. JAN/ 1/09 12:00AM CH10 LP 1 : 30 : 00 start point end point Recording 6 Use [K / L] to select “Delete” then press [OK].
EDITING Protecting a Title To prevent the accidental editing, or erasing of the titles, you can protect them in “Edit” menu. SOURCE STANDBY-ON DTV/TV .@/: ABC DEF GHI JKL MNO PQRS TUV WXYZ SPACE CLEAR AUDIO REPEAT OPEN/ CLOSE 1 2 Follow steps in “How to Access the Edit Menu” on page 81 to display “Edit” menu. Use [K / L] to select “Protect”, then press [OK].
EDITING Introduction Hiding Chapters You can hide chapters from the title list. Hidden chapters are skipped during playback. ABC DEF GHI JKL MNO PQRS TUV WXYZ SPACE CLEAR AUDIO REPEAT SETUP HDMI Use [H] / [G] to go to the chapter you want to hide, then press [PAUSE F]. Use [K / L] to select “Hidden”, then press [OK]. Edit - Hide Chapter 1 TITLE Visible Recording DISC MENU CHANNEL Submenu will appear. Hidden Chapter 2/ 3 Visible OK RETURN DISPLAY Basic Setup .
EDITING Setting an Index Picture You can set your desired scene as an index picture for each title. STANDBY-ON DTV/TV SOURCE .@/: ABC DEF GHI JKL MNO PQRS TUV WXYZ SPACE CLEAR AUDIO REPEAT SETUP DISC MENU OPEN/ CLOSE CHANNEL HDMI TITLE 1 2 3 4 Follow steps in “How to Access the Edit Menu” on page 81 to display “Edit” menu. Play back the title to find the scene you want to use as an index picture. When it comes to the desired point, press [PAUSE F].
EDITING Introduction Putting Name on Disc Press [STOP C] if you are playing back a disc. You can put a name on the disc and change it from this menu. ABC DEF GHI JKL MNO PQRS TUV WXYZ SPACE CLEAR AUDIO REPEAT SETUP HDMI Use [K / L] to select “Edit Disc Name”, then press [OK]. e.g.) DVD+RW Disc Edit Edit Disc Name Erase Disc Make Edits Compatible Disc Protect OFF ON TITLE A window for entering a title name will appear.
EDITING Erasing Disc Press [STOP C] if you are playing back a disc. You can erase all titles on a disc. STANDBY-ON DTV/TV SOURCE .@/: ABC DEF GHI JKL MNO PQRS TUV WXYZ SPACE CLEAR AUDIO REPEAT SETUP DISC MENU OPEN/ CLOSE CHANNEL HDMI 1 2 3 Press [SETUP]. Use [K / L] to select “Disc Edit”, then press [OK]. Use [K / L] to select “Erase Disc”, then press [OK]. e.g.) DVD+RW Disc Edit Edit Disc Name Erase Disc Make Edits Compatible Disc Protect OFF ON TITLE OK RETURN DISPLAY V.
EDITING Introduction Making Edits Compatible SOURCE STANDBY-ON DTV/TV ABC DEF GHI JKL MNO PQRS TUV WXYZ SPACE CLEAR AUDIO REPEAT SETUP 4 Use [K / L] to select “Yes”, then press [OK]. HDMI Use [K / L] to select “Disc Edit”, then press [OK]. Use [K / L] to select “Make Edits Compatible”, then press [OK]. Disc Edit Edit Disc Name Erase Disc Make Edits Compatible Disc Protect OFF ON Recording DISC MENU CHANNEL 1 2 3 Press [SETUP]. Basic Setup .
EDITING Deleting All Titles in HDD Press [STOP C] if you are playing back a disc. STANDBY-ON DTV/TV SOURCE .@/: ABC DEF GHI JKL MNO PQRS TUV WXYZ SPACE CLEAR AUDIO REPEAT SETUP DISC MENU OPEN/ CLOSE CHANNEL HDMI 1 2 3 TITLE Press [SETUP]. Use [K / L] to select “HDD Menu”, then press [OK]. Use [K / L] to select the desired type of deletion, then press [OK]. Select “Delete All Unprotected Titles” if you want to delete only the unprotected titles.
LIST OF SETTINGS Introduction The following table is the contents which you can set and the default setting. Refer to the following table for useful operation. Setup Playback Pages 102-105 Items (highlight is the default) Parental Lock Disc Audio ON OFF Compressing the range of sound volume. PCM 48kHz 96kHz PCM Stream Set whether the sound recorded in 96kHz will be down sampled in 48kHz. Set the type of sound signal which outputs from the digital audio output jack.
LIST OF SETTINGS Setup Display Pages 106-108 Items (highlight is the default) CC Style Font Style pages 38-39 General Setting Contents Set font style of the displayed caption. Font Opacity Solid Transparent Translucent Flash Set the font opacity of the displayed caption. Font Color White Black Red Green Blue Yellow Magenta Cyan Set the font color of the displayed caption. Edge Type None Raised Depressed Uniform L.Shadow R.
LIST OF SETTINGS Items (highlight is the default) V-Chip Downloadable Rating Block Setting Progressive Scan ON OFF TV Aspect 4:3 Letter Box 4:3 Pan & Scan 16:9 Wide Video In S-Video In Video In S-Video In OFF 5 minutes 10 minutes 15 minutes 30 minutes 60 minutes ON OFF Set to the progressive scan mode (set to "ON") or to the interlace scan mode(set to "OFF"). Set a picture size according to aspect ratio of your TV.
SETUPS Playback Press [STOP C] if you are playing back a disc. SOURCE STANDBY-ON DTV/TV .@/: ABC DEF GHI JKL MNO PQRS TUV WXYZ SPACE CLEAR SETUP AUDIO REPEAT DISC MENU OPEN/ CLOSE CHANNEL 1 2 Press [SETUP] and use [K / L] to select “General Setting”, then press [OK]. 3 Use [K / L] to select a desired item, then press [OK]. “General Setting” menu will appear. Use [K / L] to select “Playback”, then press [OK].
SETUPS Introduction Playback (cont’d) 1 Parental Lock (Default: OFF) (DVD only) Parental Lock If a password has not been set yet, proceed to A . If a password has been set already, proceed to B . Yes No Password Input Yes Your setting will be activated. B A password has been set already. • Use [the Number buttons] to enter the current password. Password Input Your setting will be activated. • If you want to change password, use [K / L] to select “Yes”.
SETUPS Playback (cont’d) 2 C Disc Audio Choose the appropriate audio setting for your external device. It will only affect a disc playback. Use [K / L] to select a setting, then press [OK]. Dolby Digital PCM Stream Use [K / L] to select a desired item, then press [OK]. Disc Audio A B C A Dynamic Range Control PCM Dolby Digital Dynamic Range Control (Default : ON) (DVD only) Set to “ON” to compress the range between soft and loud sounds. Use [K / L] to select a setting, then press [OK].
SETUPS 5 Subtitle Language (Default : OFF) (DVD only) Set the subtitle language. Use [K / L] to select a setting, then press [OK]. 7 Still Mode (Default : Auto) Select “Auto” usually. Use [K / L] to select a setting, then press [OK]. Auto Field Frame OFF English French Spanish Other Your setting will be activated. 5 , press 4-digit code Note Code Input - - • Frame is 1 completed video image made up of 2 fields (There are 30 frames per second of NTSC video).
SETUPS Display Press [STOP C] if you are playing back a disc. SOURCE STANDBY-ON DTV/TV .@/: ABC DEF GHI JKL MNO PQRS TUV WXYZ SPACE CLEAR AUDIO REPEAT SETUP DISC MENU OPEN/ CLOSE CHANNEL HDMI TITLE 1 2 3 OK Press [SETUP] and use [K / L] to select “General Setting”, then press [OK]. Use [K / L] to select “Display”, then press [OK]. Use [K / L] to select a desired item, then press [OK].
SETUPS Introduction Display (cont’d) 3 FL Dimmer (Default: Bright) Set the front panel display brightness. Use [K / L] to select a setting, then press [OK]. Auto Bright Dark You can choose one from “Auto”, “Bright” and “Dark”. If “Auto” is selected, the display gets dark when the power is in the standby mode. V-Chip 2) Use [K / L] to select a desired item, then press [OK]. V-Chip 1) Use [K / L] to select the desired rating, then press [OK] repeatedly to switch between view and block.
SETUPS Display (cont’d) [Canadian French Rating] Rating E Category 18ans+ Adult audience only higher 16ans+ Unsuitable for ages under 16 13ans+ Unsuitable for ages under 13 8ans+ Unsuitable for ages under 8 G General audience E Exempt program Downloadable Rating Set the rating system via digital broadcasting, or clear the downloaded ratings. If the broadcasting signal does not have the downloadable rating information, the message below will appear.
SETUPS Introduction Video Press [STOP C] if you are playing back a disc. ABC DEF GHI JKL MNO PQRS TUV WXYZ SPACE CLEAR AUDIO REPEAT SETUP DISC MENU CHANNEL HDMI TITLE 1 2 3 Press [SETUP] and use [K / L] to select “General Setting”, then press [OK]. Use [K / L] to select “Video”, then press [OK]. Use [K / L] to select a desired item, then press [OK]. 1 Progressive Scan 2 TV Aspect 3 Video Input RETURN V.REPLAY V.SKIP D.
SETUPS Video (cont’d) 1 Progressive Scan (Default : OFF) This unit is compatible with the progressive scan system. The feature provides you with the higher definition images than the traditional output system does. To utilize this feature, you must set progressive scan mode to “ON”. 1) Use [K / L] to select “ON“, then press [OK]. Progressive Scan 2) Use [{ / B] to select “Yes“, then press [OK]. Activating progressive scan: Check your TV has progressive scan and connect with component video cable.
SETUPS STANDBY-ON DTV/TV SOURCE OPEN/ CLOSE Use [K / L] to select a setting, then press [OK]. • When the connected device is not compatible with the Y/ Cb/Cr, HDMI signal is output as RGB regardless of the setting. Introduction HDMI Format ABC DEF GHI JKL MNO PQRS TUV WXYZ CLEAR AUDIO REPEAT DISC MENU CHANNEL Your setting will be activated.
SETUPS Reset All Reset the setting to default. SOURCE STANDBY-ON DTV/TV .@/: ABC DEF GHI JKL MNO PQRS TUV WXYZ SPACE CLEAR AUDIO REPEAT SETUP DISC MENU OPEN/ CLOSE CHANNEL HDMI 1 2 3 RETURN DISPLAY V.REPLAY “General Setting” menu will appear. Use [K / L] to select “Reset All”, then press [OK]. Select “Yes” using [K / L] , then press [OK]. Reset to factory default? Yes No TITLE OK Press [SETUP] and use [K / L] to select “General Setting”, then press [OK].
TROUBLESHOOTING The unit turns on automatically without any operation. The OSD language menu appears every time the power turns on. Remedy • Check that the AC power cord is connected securely. • Batteries of the remote control are weak. • The unit turns on automatically 2 seconds before the timer recording. • The unit may not have been turned off or correctly. Finish up the language setting procedure by selecting a language in the OSD language menu.
TROUBLESHOOTING Symptom Certain functions of the DVC cannot operate. GENERAL DV audio signal cannot be switched. No image from HDMI connection. Setup menu cannot be called up. Only specific channels do not appear. The external input channels (such as L1, L2 or L3) cannot be skipped. GENERAL CHANNEL TV channels cannot be changed. • Check if the connections are made securely and correctly. • Check if the cables are damaged. • Try channel setting by following the steps on pages 29-31.
TROUBLESHOOTING PLAYBACK HDD HDD/DVD HDD playback suddenly stops. Playback Editing Function Setup Others • When DVD recording finishes during HDD playback, the unit will stop the HDD playback, and start writing data to the DVD. This is not a malfunction. Playback cannot be performed. • Check if the playable disc is inserted. • Check if the disc is loaded correctly with the labeled side facing up.
TROUBLESHOOTING REMOTE CONTROL DVD EDITING HDD / DVD Symptom Titles cannot be edited or deleted. Dubbing cannot be executed. Titles cannot be edited or deleted. The capacity of the disc doesn’t increase even if the recorded program is deleted. Dubbing cannot be executed. Remedy • The titles or the disc itself may be protected. Cancel the protection by following the steps on page 92 for title protection and page 61 for disc protection.
TROUBLESHOOTING Cause Solution Parental Lock On The current selected parental level prohibits playback. • The current selected parental level prohibits playback. • Check “Parental Lock” setting in “Playback” menu (page 103). Recording Error This program is not allowed to be recorded. • The recording function encountered the copy prohibited program. • You cannot record copy prohibited programs. Recording Error This program is not recordable in +VR mode.
LANGUAGE CODE Language Abkhazian Afar Afrikaans Albanian Amharic Arabic Armenian Assamese Aymara Azerbaijani Bashkir Basque Bengali;Bangla Bhutani Bihari Bislama Breton Bulgarian Burmese Byelorussian Cambodian Catalan Chinese Corsican Croatian Czech Danish Dutch English Esperanto Estonian Faroese Fiji Finnish French Frisian Galician Georgian German Greek Greenlandic Guarani Gujarati Hausa Hebrew Hindi Code 4748 4747 4752 6563 4759 4764 5471 4765 4771 4772 4847 5167 4860 5072 4854 4855 4864 4853 5971 4851 5
GLOSSARY PBC (playback control) (video CD only) An electrical signal that directly represents sound. Compare this to digital audio which can be an electrical signal, but is an indirect representation of sound. See also “Digital Audio”. This function enables you to play back interactive software using a menu screen. See also “Video CD”. Aspect Ratio Chapter (HDD/DVD) Just as a book is split up into several chapters, a title on HDD/DVD is usually divided into chapters. See also “Title”.
SPECIFICATIONS General Power requirements Power consumption Dimensions (width x height x depth) Weight Operating temperature Operating humidity TV system Recording Recording format Recording discs 120V AC +/- 10%, 60Hz +/- 5% 33W (standby: 5.7W) 16.6 x 2.4 x 11.5 inches (420 x 59 x 290mm) 7.5 lbs. ( 3.
ESPAÑOL Disco Grabable Este aparato es compatible con la reproducción de los siguientes discos y archivos.
ESPAÑOL Conexión Básica cable RCA de vídeo VIDEO OUT VIDEO IN AUDIO IN L L cable RCA de audio R R AUDIO OUT parte trasera de la unidad IN VIDEO VIDEO IN OUT Y L L OUT R ANTENNA AUDIO IN (L1) IN R S-VIDEO AUDIO OUT OUT COAXIAL ANT.
ESPAÑOL Introduction Conexión a un Televisor con un Puerto Compatible con HDMI™ • HDMI emite las señales de video / audio sin convertirlas en señales analógicas. • No es necesaria una conexión de audio. HDMI IN cable HDMI HDMI OUT Connections parte trasera de la unidad VIDEO VIDEO IN OUT IN L Y L OUT R ANTENNA AUDIO IN (L1) IN R S-VIDEO AUDIO OUT OUT COAXIAL S-VIDEO ANT.
ESPAÑOL Configuración Inicial Cuando usted encienda este aparato por primera vez necesita seguir estos pasos. 1 2 Presione [STANDBY-ON y]. 3 Utilice [K / L] para seleccionar el tipo de señal de emisión, y luego presione [OK]. Ajuste inicial Ajuste de Canal Encienda el televisor. Seleccione la entrada a la cual está conectado el aparato. Verificar que la antena esté conectada a la toma "ANTENNA IN".
ESPAÑOL Preparación para el copiado (unidad de disco rígido a DVD): • Inserte un DVD grabable. Preparación para el copiado (DVD a unidad de disco rígido): • Inserte un disco a ser copiado. Utilice [K / L] para seleccionar “Doblaje”, y luego presione [OK]. Utilice [K / L] para seleccionar “HDD DVD”, y luego presione [OK]. DVD a Unidad de disco rígido 4 Utilice [K / L] para seleccionar “Añadir”, y luego presione [OK].
ESPAÑOL Reproducción Directa Si usted está reproduciendo los títulos de una unidad de disco rígido, presione primero [HDD] y luego continúe al paso 2. Si usted está reproduciendo los títulos de un DVD, presione primero [DVD]. 1 Presione [OPEN/CLOSE A] para abrir la bandeja de discos e insertar su disco con el rótulo aupntando hacia arriba. Presione de nuevo [OPEN/CLOSE A] para cerrar la bandeja de discos. * Asegúrese de que el disco sea compatible con este aparato.
MEMO Introduction Connections Basic Setup Recording Playback Editing Function Setup Others Español ES 127 2008/11/20 12:58:36 E2S00UD_H2160MW9_EN_v1.
LIMITED WARRANTY FUNAI CORP. will repair this product, free of charge in the USA in the event of defect in materials or workmanship as follows: DURATION: PARTS: FUNAI CORP. will provide parts to replace defective parts without charge for one (1) year from the date of original retail purchase. Certain parts are excluded from this warranty. LABOR: FUNAI CORP. will provide the labor without charge for a period of ninety (90) days from the date of original retail purchase.
Introduction Manuel de l’utilisateur Configuration de base T ARRÊ Connexions H2160MW9 A LECTEUR / ENREGISTREUR SUR DD ET DVD AVEC TUNER NUMÉRIQUE MAGNAVOX VOUS REMERCIE DE VOTRE CONFIANCE. Enregistrement BESOIN D’UNE AIDE RAPIDE? LE GUIDE RAPIDE DE DÉBUT ET MANUEL DE L’UTILISATEUR REGORGENT D’ASTUCES DESTINÉES À SIMPLIFIER L’UTILISATION DE VOTRE PRODUIT MAGNAVOX. TOUTEFOIS, SI VOUS NE PARVENEZ PAS À RÉSOUDRE VOTRE PROBLÈME, VOUS POUVEZ ACCÉDER À NOTRE AIDE EN LIGNE À L’ADRESSE HTTP://WWW.MAGNAVOX.
4. Préparation 5. Enregistrement 1 Lorsque toutes les connexions sont Si vous enregistrez sur le DD, appuyez d’abord sur [HDD],puis passez à l’étape 2. Si vous enregistrez sur un disque, appuyez d’abord sur [DVD]. raccordées, branchez le cordon d'alimentation. 2 Insérez deux piles AA (R6). 3 Appuyez sur [STANDBY-ON allumer l'appareil. ] pour (consultez la page 27 du manuel de l’utilisateur pour savoir comment insérer un disque).
2. Sélectionnez la connexion appropriée La meilleure Video Audio Câble HDMI Compatible avec le balayage progressif Votre TV HDMI IN Téléviseur à haute définition 3. Connecter Câble HDMI IN VIDEO VIDEO IN OUT L Votre TV Y L OUT R ANTENNA R IN AUDIO IN (L1) OUT S-VIDEO AUDIO OUT COAXIAL S-VIDEO Le câble HDMI envoie des signaux numériques audio et vidéo. (Aucune autre connexion audio n’est nécessaire.) Meilleure HDMI IN Câble HDMI Câble HDMI vendu séparément.
PRÉCAUTIONS Les numéros de modèle et de série de cet appareil se trouvent sur le boîtier. N° modèle : Vous devriez prendre ces numéros en note car ils pourraient vous être utiles. N° série.: MISE EN GARDE: POUR RÉDUIRE LES RISQUES DE FEU OU DE CHOCS ÉLECTRIQUES, N’EXPOSEZ PAS CET APPAREIL À LA PLUIE OU À L’HUMIDITÉ. L’APPAREIL NE DEVRAIT PAS ÊTRE EXPOSÉ À DES ÉCLABOUSSURES OU DES PROJECTIONS D’EAU ET AUCUN RÉCIPIENT REMPLI DE LIQUIDE, TEL QU’UN VASE NE DEVRAIT ÊTRE POSÉ SUR L’APPAREIL.
PRÉCAUTIONS ATTENTION: Introduction Danger d’explosion si la pile n’est pas remplacée correctement. Remplacez uniquement avec le même type ou un type équivalent. MISE EN GARDE: Les piles (bloc-piles ou pile installée) ne doivent pas être exposées à une source de chaleur excessive, telle que soleil, feu ou autre. Connexions SÉCURITÉ CONCERNANT LE LASER Cet appareil utilise un laser.
PRÉCAUTIONS Accessoires fournis télécommande (NB820UD) avec piles (AAx2) Nettoyage des disques • Si un disque est sale, nettoyez-le avec un chiffon de nettoyage. Essuyez le disque du centre vers l’extérieur. Ne l’essuyez pas selon un mouvement circulaire. • N’utilisez pas de solvants tels que la benzine, les diluants, les décapants du commerce, les détergents, les produits de nettoyage abrasifs ou les aérosols antistatiques destinés aux disques analogiques.
Rensrignements Relatifs à la Marque de Commerce Information sur les Marques Commerciales Introduction Est une marque de commerce de Eastman kodak company. Connexions HDMI, le logo HDMI et High-Definition Multimedia Interface (Interface Multimédia à Haute Définition) sont des marques commerciales ou des marques commerciales enregistrées de HDMI Licensing LLC. Fabriqué sous licence de Dolby Laboratories. Le terme Dolby et le sigle double D sont des marques commerciales de Dolby Laboratories.
SOMMAIRE Introduction Enregistrement PRÉCAUTIONS . . . . . . . . . . . . . . . . . . . . . . . . . . . . . . . . . . . 2 CARACTÉRISTIQUES. . . . . . . . . . . . . . . . . . . . . . . . . . . . . . 8 Symboles utilisés dans ce manuel de l’utilisateur . . . . .9 PRÉSENTATION DES FONCTIONNALITÉS. . . . . . . . . . 10 Face avant . . . . . . . . . . . . . . . . . . . . . . . . . . . . . . . . . . . . . . . . 10 Face arrière . . . . . . . . . . . . . . . . . . . . . . . . . . . . . . . . . . . . . . .
SOMMAIRE Introduction Lecture Édition 64 66 66 67 Enregistrement Réglage des fonctions LISTE DES RÉGLAGES. . . . . . . . . . . . . . . . . . . . . . . . . . . . 99 RÉGLAGES. . . . . . . . . . . . . . . . . . . . . . . . . . . . . . . . . . . . . 102 Lecture . . . . . . . . . . . . . . . . . . . . . . . . . . . . . . . . . . . . . . . . . . 102 Affichage . . . . . . . . . . . . . . . . . . . . . . . . . . . . . . . . . . . . . . . . 106 Vidéo . . . . . . . . . . . . . . . . . . . . . . . . . . . . . . .
CARACTÉRISTIQUES Cet appareil lit les contenus du DD interne, des DVD ou des CD et offre également des fonctionnalités d’enregistrement sur DD ou DVD et des possibilités d’édition ultérieure. Cet appareil offre les fonctionnalités suivantes. Enregistrement Copie Cet appareil vous permet d’enregistrer sur DD, sur DVD+RW/ DVD-RW (réinscriptible) et sur DVD+R/DVD-R (inscriptible une seule fois). Vous pouvez choisir l’un d’entre eux à votre convenance. Vous pouvez choisir le type qui vous convient.
CARACTÉRISTIQUES Édition DD DVD DD DVD Pour l’enregistrement, la lecture et l’édition La description concerne le DD La description se réfère au DVD+RW La description se réfère au DVD+R La description se réfère au DVD-RW Enregistrement Masquage des chapitres : Vous pouvez masquer certains chapitres afin d’éviter que d’autres personnes puissent les lire. Définition des images d’index : Vous pouvez remplacer les images d’un index. Nommage d’un disque : Vous pouvez mettre le nom de disque de votre choix.
PRÉSENTATION DES FONCTIONNALITÉS Face avant 1 2 3* 4 5 6 7 8* 9 10 H2160MW9 15 14 13 12 11 (*) L’appareil peut également être allumé en appuyant sur ces boutons. 1.Touche y STANDBY-ON Permet d’allumer l’appareil ou de le placer en mode veille (débranchez le cordon d’alimentation AC pour mettre l’appareil totalement hors tension). 2.Tiroir du disque Placez un disque en ouvrant le tiroir du disque. 3.Touche A OPEN/CLOSE* Appuyez sur cette touche pour ouvrir ou fermer le tiroir du disque. 4.
PRÉSENTATION DES FONCTIONNALITÉS 1 2 4 3 VIDEO VIDEO IN OUT IN L Introduction Face arrière 5 Y L OUT 12 AUDIO IN (L1) IN R S-VIDEO AUDIO OUT 11 10 9 OUT Connexions R ANTENNA COAXIAL S-VIDEO 8 7 6 Enregistrement Lecture 8. Prises COMPONENT VIDEO OUTPUT Elles servent à connecter un moniteur de télévision sur les entrées composantes vidéo avec un câble de composantes vidéo. 9.
PRÉSENTATION DES FONCTIONNALITÉS Télécommande Installation des piles de la télécommande Installez des piles (AA x 2) en respectant les polarités indiquées dans le compartiment des piles de la télécommande. 1 Ouvrez le couvercle. 2 Insérez les piles. Utilisation d’une télécommande Gardez les notions suivantes à l’esprit lors de l’utilisation de la télécommande : • Veillez à ce qu’il n’y ait aucun obstacle entre la télécommande et la fenêtre du capteur infrarouge de l’appareil.
PRÉSENTATION DES FONCTIONNALITÉS (*) L’appareil peut également être allumé en appuyant sur ces touches. Enregistrement Lecture Édition Réglage des fonctions Autres E2S00UD_H2167MGX_FR_v1_Book.indb13 13 Configuration de base FR Connexions 16. Touche TIMER • Appuyez sur cette touche pour afficher la liste des programmations différées. 17. Touche SOURCE • Appuyez sur cette touche pour sélectionner l’entrée appropriée. 18.
PRÉSENTATION DES FONCTIONNALITÉS Affichage de la face avant 2 1 PM 3 DTV BS CS DR CD VCR DB HDD DVD 4 5 1. PM 4. État actuel de l’appareil : Apparaît l’après-midi avec l’affichage de l’horloge. : Apparaît quand la lecture est suspendue. 2. DTV : Apparaît lors de la lecture d’un DD ou disque. : Apparaît quand la chaîne est en mode DTV. : Apparaît quand la programmation différée ou l’OTR ont été réglés et sont en cours.
CONNEXION Introduction Lisez ceci avant de commencer: 1) Débranchez les cordons secteur des appareils de la prise secteur. 2) Effectuez la connexion comme illustré ci-dessous. 3) Branchez les cordons secteurs des appareils à la prise secteur. Connexions • Connectez cet appareil directement au téléviseur. Si les câbles audio/vidéo RCA sont connectés à un magnétoscope, les images peuvent être déformées à cause du système de protection contre la copie.
CONNEXION Raccordement à un téléviseur à l’aide des prises audio / vidéo VIDEO IN câble vidéo RCA VIDEO OUT AUDIO IN L L câble audio RCA R R AUDIO OUT arrière de l’appareil VIDEO VIDEO IN OUT IN Y L L OUT R ANTENNA AUDIO IN (L1) IN R S-VIDEO AUDIO OUT OUT COAXIAL ANT.
CONNEXION Introduction Raccordement à un téléviseur à l’aide de la prise de sortie S-vidéo AUDIO IN VIDEO OUT L câble audio RCA L Connexions R S-VIDEO IN câble S-vidéo R OUT AUDIO OUT S-VIDEO ANT.
CONNEXION Raccordement à un téléviseur équipé d’un port compatible HDMI™ • La prise HDMI transmet les signaux audio / vidéo sans les convertir en signaux analogiques. • Aucun branchement de signal audio n’est nécessaire. HDMI IN câble HDMI HDMI OUT arrière de l’appareil VIDEO VIDEO IN OUT IN Y L L OUT R ANTENNA AUDIO IN (L1) IN R S-VIDEO AUDIO OUT OUT COAXIAL S-VIDEO ANT.
CONNEXION Introduction Raccordement à un décodeur diffusion par câble ou satellite câble vidéo RCA câble audio RCA L VIDEO IN R L AUDIO OUT AUDIO IN L Connexions câble vidéo RCA VIDEO VIDEO IN OUT VIDEO OUT L AUDIO IN (L1) R IN S-VIDEO AUDIO OUT arrière de l’appareil IN VIDEO VIDEO IN OUT L L IN R S-VIDEO AUDIO OUT OUT ANT.OUT ANT.
CONNEXION Raccordement à un téléviseur sans prises audio / vidéo antenne VHF / UHF arrière de l’appareil VIDEO VIDEO IN OUT IN L Y L OUT R ANTENNA câble coaxial RF AUDIO IN (L1) IN IN OUT COAXIAL S-VIDEO VIDEO OUT ou société de TV par câble R S-VIDEO AUDIO OUT câble vidéo RCA L OUT R ANTENNA AUDIO OUT câble audio RCA ANT. IN arrière de votre modulateur RF (non fourni) câble coaxial RF câble coaxial RF ANT.
CONNEXION Introduction Branchement des signaux audio numériques Branchement du câble coaxial Décodeur Dolby Digital COAXIAL arrière de l’appareil câble audio numérique coaxial VIDEO VIDEO IN OUT IN Y L L OUT R R IN OUT S-VIDEO AUDIO OUT COAXIAL S-VIDEO Connexions AUDIO IN (L1) ANTENNA COAXIAL prise d’entrée audio numérique coaxiales Raccordement du câble audio HDMI arrière de l’appareil VIDEO VIDEO IN OUT IN HDMI IN Y L L câble HDMI OUT R ANTENNA AUDIO IN (L1) R IN S-VIDEO A
AVANT DE DÉMARRER Lorsque vous avez effectué tous les raccordements, vous devez trouver la chaîne de visionnement (chaîne d’entrée externe) de votre téléviseur. Recherche de la chaîne de visionnement sur votre téléviseur STANDBY-ON DTV/TV SOURCE .@/: ABC DEF GHI JKL MNO PQRS SETUP TUV WXYZ SPACE CLEAR AUDIO REPEAT DISC MENU OPEN/ CLOSE CHANNEL HDMI TITLE 1 2 3 Lorsque vous ayez établi toutes les connexions nécessaires, appuyez sur [STANDBY-ON y] pour allumer l’appareil.
AVANT DE DÉMARRER Introduction Cet appareil utilise le menu et l’affichage à l’écran suivant pour vous guider facilement dans ses fonctions. L’affichage à l’écran vous donne des informations sur le disque chargé ou le disque/fichier lu, ou l’état HDMI, etc. Les menus vous permettent de modifier les divers types de réglage de la lecture, de l’enregistrement ou de l’édition en fonction de vos préférences.
AVANT DE DÉMARRER Informations / Menu DD / DVD 6 7 Information sur le nom du titre/fichier Information sur le nom du titre Nom du Titre 1/ 5 1/ 5 0:01:00 / 1:23:45 Mon titre DVD Video CH 10 5 1 2 Information sur le nom du fichier Nom fichier Mon fichier DVD SP(2Hr) 4 1h53m 3 * Ceci est un exemple d’écran prévu uniquement pour l’explication. Les éléments affichés dépendent du disque que vous avez inséré. Information sur le MP3 Tag • Le nom de piste est affiché en premier. Nom de piste 1.
AVANT DE DÉMARRER Appuyez sur [SETUP] pour afficher le menu principal. Utilisez alors [K / L] pour sélectionner un menu puis appuyez sur [OK] pour l’afficher. Ces menus sont les entrées vers toutes les principales fonctions de l’appareil. Réglage Réglage général Programmation Liste titres Edition d’un disque Menu HDD Doublage Mode lecture disque Réglage général Blocage parental Disque audio Langue du menu disque Langue audio Langue sous-titre Icône de L'angle Arrêt Sur Image Saut/Répet.
AVANT DE DÉMARRER Edition d’un disque / Menu HDD / Doublage / Mode lecture dispue
AVANT DE DÉMARRER Cet appareil étant la combinaison d’enregistreurs DD et DVD, vous devez d’abord sélectionner le composant (mode de sortie) que vous souhaitez utiliser. Mode DD Mode DVD Appuyez sur [HDD] pour activer le composant DD. Introduction Commutation des modes DD / DVD Appuyez sur [DVD] pour activer le composant DVD. Connexions H2160MW9 SOURCE STANDBY-ON DTV/TV .
RÉGLAGES INITIAUX Lors de la première mise sous tension de cet appareil, vous devez exécuter les étapes suivantes. SOURCE STANDBY-ON DTV/TV .@/: ABC DEF GHI JKL MNO PQRS TUV WXYZ SPACE CLEAR AUDIO REPEAT SETUP DISC MENU OPEN/ CLOSE CHANNEL Initial Setup English Français Español HDMI OK RETURN V.REPLAY Utilisez [K / L] pour sélectionner la langue de votre choix puis appuyez sur [OK].
RÉGLAGE DES CHAÎNES Introduction Si vous avez modifié la connexion de l’antenne, nous recommandons que vous programmiez les chaînes disponibles dans votre zone selon les procédures suivantes. Balayage auto des chaînes SOURCE ABC DEF GHI JKL MNO PQRS TUV WXYZ SPACE CLEAR AUDIO REPEAT SETUP DISC MENU CHANNEL HDMI TITLE RETURN V.REPLAY Le menu “Réglage général” apparaît. Utilisez [K / L] pour sélectionner “Canal” puis appuyez sur [OK]. Le menu “Canal” apparaît.
RÉGLAGE DES CHAÎNES Ajout / suppression de chaînes Vous pouvez ajouter ou supprimer des chaînes de télévision si votre éventail de chaînes change ou si vous ne regardez plus certaines chaînes. L’ajout de chaînes n’est possible que pour les chaînes de télévision analogiques. N’oubliez pas • Vous exécutez le “Balayage auto des chaînes” avant d’ajouter ou supprimer des chaînes. STANDBY-ON DTV/TV SOURCE .
RÉGLAGE DES CHAÎNES Préréglage manuel des canaux 2 6 Ajouter Effacer Utilisez [K / L] pour sélectionner “Effacer” puis appuyez sur [OK]. Sélectionnez ensuite la chaîne suivante à supprimer. • Si les réglages sont terminés, appuyez sur [RETURN] pour activer le “Préréglage manuel des canaux”. Enregistrement CH • Seule la chaîne principale est affichée dans le menu “Préréglage manuel des canaux”. (Le numéro de chaîne affiché entre parenthèses est un numéro de chaîne virtuelle.
RÉGLAGE DE L’HORLOGE Réglez l’horloge avant d’essayer une programmation en différé. Si PBS (station de diffusion publique) est disponible dans votre zone, consultez “Réglage auto de l’horloge” ci-dessous. Sinon, consultez “Réglage manuel de l’horloge” en page 33. Réglage auto de l’horloge Cet appareil peut régler automatiquement l’heure et la date en se référant à une station PBS. N’oubliez pas • Les connexions d’antenne/de télévision par câble sont correctes. • Les chaînes sont réglées.
RÉGLAGE DE L’HORLOGE Appuyez sur [SETUP] et utilisez [K / L] pour sélectionner “Réglage général”, puis appuyez sur [OK]. Si le réglage “Heure d’été” est “EF”, l’horloge de l’appareil se règle en fonction de l’heure d’été. “EF (MAR - NOV)” est sélectionné par défaut. Le menu “Réglage général” apparaît. 1 2 3 4 Utilisez [K / L] pour sélectionner “Horloge” puis appuyez sur [OK]. Le menu “Horloge” apparaît. Utilisez [K / L] pour sélectionner le calendrier ou l’heure puis appuyez sur [OK].
RÉGLAGES DU TUNER Commutation entre les modes analogiques et numériques Vous pouvez facilement passer de la télévision analogique (NTSC) et à la télévision numérique (ATSC) avec la télécommande. Appuyez sur [DTV/TV] sur la télécommande. • Le mode analogique et le mode numérique alternent. Sélection d’un chaîne Sélectionnez les chaînes avec [CHANNEL / touches numérotées] qui se trouvent sur la télécommande.
RÉGLAGES DU TUNER Sélection du l’audio de TV TV numérique ABC DEF GHI JKL MNO PQRS TUV WXYZ SPACE CLEAR AUDIO REPEAT SETUP CHANNEL HDMI TITLE OK RETURN DISPLAY V.REPLAY Anglais 1/2 V.SKIP • La langue sélectionnée est affichée sur l’écran de télévision quand vous appuyez sur [AUDIO]. • Chaque pression sur [AUDIO] change la langue. p.ex.) Anglais 1/3➔ Espagnol 2/3 ➔ Autre 3/3 • Les langues disponibles dépendent du diffuseur.
RÉGLAGES DU TUNER Sélection du l’audio de TV (suite) TV analogique STANDBY-ON DTV/TV SOURCE .@/: ABC DEF GHI JKL MNO PQRS TUV WXYZ SPACE CLEAR AUDIO REPEAT SETUP DISC MENU OPEN/ CLOSE CHANNEL HDMI TITLE OK RETURN DISPLAY 1 2 3 4 Appuyez sur [SETUP] et utilisez [K / L] pour sélectionner “Réglage général”, puis appuyez sur [OK]. Le menu “Réglage général” apparaît. Utilisez [K / L] pour sélectionner “Canal” puis appuyez sur [OK]. Le menu “Canal” apparaît.
RÉGLAGES DU TUNER Introduction Sous-titres DTV TV numérique La TV numérique dispose de ses propres sous-titres appelés DTV CC (ST DTV). Utilisez ce menu pour modifier les réglages des ST DTV. .@/: SOURCE ABC DEF JKL MNO PQRS TUV WXYZ SPACE CLEAR AUDIO REPEAT HDMI TITLE Le menu “Réglage général” apparaît. Utilisez [K / L] pour sélectionner “Affichage” puis appuyez sur [OK]. Utilisez [K / L] pour sélectionner “DTV CC” puis appuyez sur [OK].
RÉGLAGES DU TUNER Style des sous-titres TV numérique La TV numérique peut également modifier le style de ses sous-titres y compris le caractère, la couleur ou la taille, etc. STANDBY-ON DTV/TV SOURCE .@/: ABC DEF GHI JKL MNO PQRS TUV WXYZ SPACE CLEAR AUDIO REPEAT SETUP DISC MENU OPEN/ CLOSE CHANNEL HDMI 1 2 3 TITLE OK Appuyez sur [SETUP] et utilisez [K / L] pour sélectionner “Réglage général”, puis appuyez sur [OK]. Le menu “Réglage général” apparaît.
RÉGLAGES DU TUNER Le type de bord des sous-titres affichés peut être choisi comme suit. Type Bord Edge Color Taille Police