Introduction Owner's Manual Playback INSTRUCCIONES EN ESPAÑOL INCLUIDAS. Recording NEED HELP FAST? READ YOUR QUICK GUIDE AND/OR OWNER'S MANUAL FIRST FOR QUICK TIPS THAT MAKE USING YOUR MAGNAVOX PRODUCT MORE ENJOYABLE. IF YOU HAVE READ YOUR INSTRUCTIONS AND STILL NEED ASSISTANCE, YOU MAY ACCESS OUR ONLINE HELP AT HTTP://WWW.FUNAI-CORP.COM OR CALL 1-800-605-8610 WHILE WITH YOUR PRODUCT. Basic Setup THANK YOU FOR CHOOSING MAGNAVOX.
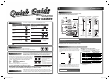
1 Connections Bas ic Connection HDD & DVD PLAYER / RECORDER WITH DIGITAL TUNER H2160MW9 Pl a y a b l e Di s cs Playable discs DVD-video This unit is compatible to play back the following discs / files. Logos Playable discs 1) Disconnect the power cord of your TV from the AC outlet. 2) Make the basic connection as illustrated below.
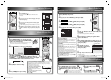
2 Initial Setting You need to follow these steps when you turn on this unit for the first time. STANDBY-ON DTV/TV .@/: ABC DEF GHI JKL 1 PQRS TUV WXYZ SETUP 2 to SOURCE MNO SPACE CLEAR AUDIO REPEAT DISC MENU OPEN/ CLOSE CHANNEL TITLE 4 OK RETURN DISPLAY V.REPLAY V.SKIP Basic Dubbing Preparing for dubbing (HDD to DVD): • Insert a recordable DVD. 1 Press [STANDBY-ON y]. Turn on the TV. Select the input to which the unit is connected.
PRECAUTIONS The model and serial numbers of this unit may be found on the cabinet. You should record and retain those numbers for future reference. Model No.: Serial No.: WARNING: TO REDUCE THE RISK OF FIRE OR ELECTRIC SHOCK, DO NOT EXPOSE THIS APPARATUS TO RAIN OR MOISTURE.
PRECAUTIONS Introduction Do not place the unit on the furniture that is capable of being tilted by a child and an adult leaning, pulling, standing or climbing on it. A falling unit can cause serious injury or even death. CAUTION: To prevent electric shock, match wide blade of plug to wide slot, fully insert. Connections FCC WARNING This apparatus may generate or use radio frequency energy.
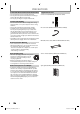
PRECAUTIONS To Avoid the Hazards of Electrical Shock and Fire • Do not handle the power cord with wet hands. • Do not pull on the power cord when disconnecting it from an AC outlet. Grasp it by the plug. • Do not put your fingers or objects into the unit. Supplied Accessories remote control (NB820UD) with batteries (AAx2) Location and Handling • Do not install the unit in direct sunlight, near strong magnetic fields, or in a place subject to dust or strong vibration.
PRECAUTIONS Cleaning the cabinet • Use a soft cloth slightly moistened with a mild detergent solution. Do not use a solution containing alcohol, spirits, ammonia or abrasive. • When a disc becomes dirty, clean it with a cleaning cloth. Wipe the disc from the center to out. Do not wipe in a circular motion. • Do not use solvents such as benzine, thinner, commercially available cleaners, detergent, abrasive cleaning agents or antistatic spray intended for analog records.
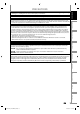
CONTENTS Introduction Recording PRECAUTIONS . . . . . . . . . . . . . . . . . . . . . . . . . . . . . . . . . . . 2 FEATURES . . . . . . . . . . . . . . . . . . . . . . . . . . . . . . . . . . . . . . . 8 Symbols Used in this Owner's Manual . . . . . . . . . . . . . . .9 FUNCTIONAL OVERVIEW . . . . . . . . . . . . . . . . . . . . . . . . 10 Front Panel . . . . . . . . . . . . . . . . . . . . . . . . . . . . . . . . . . . . . . . 10 Rear Panel . . . . . . . . . . . . . . . . . . . . . . . . . . . . . . .
CONTENTS Introduction Editing 63 65 65 66 79 79 80 80 81 81 83 84 85 86 87 88 89 91 92 93 94 95 96 97 Recording Function Setup Playback LIST OF SETTINGS . . . . . . . . . . . . . . . . . . . . . . . . . . . . . . . 98 SETUPS. . . . . . . . . . . . . . . . . . . . . . . . . . . . . . . . . . . . . . . . 101 Playback . . . . . . . . . . . . . . . . . . . . . . . . . . . . . . . . . . . . . . . . . 101 Display . . . . . . . . . . . . . . . . . . . . . . . . . . . . . . . . . . . . . . . . . . 105 Video .
FEATURES This unit not only plays back the contents on internal HDD, DVD, or CD, but also offers features for you to record on HDD or DVD and edit them after that. The following features are offered with this unit. Recording This unit allows you to record on the HDD, a DVD+RW/RW (rewritable) and a DVD+R/-R (one-time write). You can choose any one for your convenience. Even if you choose DVD-RW/-R, these discs will automatically be recorded in the DVD+VR mode.
FEATURES Introduction Editing Symbols Used in this Owner's Manual Deleting a scene of a title: You can delete a scene from a title as you like. HDD To specify for which media type each function is, we put the following symbols at the beginning of each item to operate. * DVD-RW/-R recorded in VR mode or non compatible recording format are not playable. * DVD-RW recorded in the mode other than +VR is not recordable on this unit unless you erase all contents in the disc (refer to page 95).
FUNCTIONAL OVERVIEW Front Panel 1 2 3* 4 15 5 6 7 8* 9 10 14 13 12 11 (*) The unit can also be turned on by pressing these buttons. 1. STANDBY-ON y button Press to turn the unit on and off. 2. Disc tray Place a disc when opening the disc tray. 3. OPEN/CLOSE A button* Press to open or close the disc tray. 4. Display Refer to “Front Panel Display” on page 14. 5. HDD button Press to select the HDD output mode. 6. DVD button Press to select the DVD output mode. 7.
FUNCTIONAL OVERVIEW Introduction Rear Panel 1 2 4 3 VIDEO VIDEO IN OUT IN L 5 Y L Connections OUT R ANTENNA 12 AUDIO IN (L1) IN R S-VIDEO AUDIO OUT 11 10 9 OUT COAXIAL S-VIDEO 8 7 6 Playback Note Recording 8. COMPONENT VIDEO OUTPUT jacks Use to connect a TV monitor with component video inputs with a component video cable. 9. AUDIO OUT jacks Use to connect a TV monitor, AV receiver or other device with an RCA audio cable. 10.
FUNCTIONAL OVERVIEW Remote Control Installing the Batteries in the Remote Control Install the batteries (AAx2) matching the polarity indicated inside battery compartment of the remote control. 1 Open the cover. 2 Insert batteries. Using a Remote Control Keep in mind the following when using the remote control: • Make sure that there are no obstacles between the remote control and the infrared sensor window on the unit.
FUNCTIONAL OVERVIEW Recording Playback Editing Function Setup Others Español EN E2M01UD_H2160MW9_EN.indd 13 Basic Setup 18. OPEN/CLOSE A button* • Press to open or close the disc tray. 19. CHANNEL / buttons • Press to change the channel up and down. 20. CLEAR button • Press to clear the information once entered, to clear the marker settings, or to cancel the programming for CD, etc. 21. HDMI button • Press to set the HDMI connector’s video signal output mode. 22.
FUNCTIONAL OVERVIEW Front Panel Display 2 1 PM 3 DTV BS CS DR CD VCR DB HDD DVD 4 5 1. PM 4. Current status of the unit : Appears in the afternoon with the clock display. : Appears when playback is paused. 2. DTV : Appears when playing back an HDD or disc. : Appears when the channel is in DTV mode. : Appears when the timer programming or OTR has been set and is proceeding. : Flashes when timer programming was not executed because of some error. 3.
ANTENNA CABLE CONNECTION Introduction This section describes how to connect your unit to an antenna, cable box, etc. Disconnect RF coaxial cable from antenna input jack of your TV. Connections 1 2 Disconnect the power cord of your TV from the AC outlet. rear of your TV VHF / UHF antenna 2 1 disconnect disconnect or RF coaxial cable 3 ANT. IN Basic Setup cable TV company Connect cables to the unit. Make the basic connection as illustrated below.
RF MODULATOR CONNECTION If your TV has antenna in jack only, it is still possible to connect this unit to your TV by using a commercially available stereo audio/video RF modulator. In this case, follow the instructions below. 1) Disconnect the power cords of the devices from the AC outlet. 2) Make the connection as illustrated below. 3) Set your RF modulator’s channel 3/4 switch to either 3 or 4, whichever the TV channel is least used in your area.
CONNECTION TO A CABLE / SATELLITE BOX Introduction 1) Disconnect the power cords of the devices from the AC outlet. 2) Make the connection as illustrated below. 3) Plug in the power cords of the devices to the AC outlet. e.g.) rear of your TV This connection is for TV loop through only VIDEO IN Connections satellite dish AUDIO IN R L or ANT.
CONNECTION TO A TV Make one of the following connections, depending on the capabilities of your existing device.
CONNECTION TO A TV WITH AN HDMI™ COMPATIBLE PORT TV HDMI IN Introduction A simple 1-cable connection with a device having an HDMI (high-definition multimedia interface) connector allows digital transfer of both digital video signals and multi-channel audio signals. HDMI Mode and Actual Output Signals Press [HDMI] to select the HDMI output mode. The output mode changes as follows every time [HDMI] is pressed.
CONNECTION TO AN AUDIO SYSTEM • When you change the connections, all devices should be turned off. • Refer to the manual accompanying external devices for more information.
BEFORE YOU START Finding the Viewing Channel on Your TV SOURCE ABC DEF GHI JKL MNO PQRS TUV WXYZ SPACE CLEAR AUDIO REPEAT SETUP DISC MENU CHANNEL HDMI TITLE 1 2 3 Turn on your TV. • If connected to your VCR make sure it is switched off or in standby mode before proceeding. Press “2” on the TV’s remote control, then press channel down button repeatedly until you see “Initial Setup” menu. Basic Setup .
BEFORE YOU START This unit uses the following on-screen displays and menus to guide you to the easy operations. The on-screen displays give you the information on the loaded disc or the disc/file in playback, or the HDMI status, etc. The menus allow you to change the various kinds of settings for playing back, recording, or editing to suite your preference. Guide to On-Screen Display / Menu The on-screen display changes in the following order as you press [DISPLAY].
BEFORE YOU START 6 1/ 5 7 1/ 5 0:01:00 / 1:23:45 DVD Video Introduction HDD / DVD Information / Menu Title/File Name Information Title Name Information Title Name My Title CH 10 1 2 Connections 5 File Name Information File Name My File DVD SP(2Hr) 4 1h53m 3 : Marker : Audio : Noise Reduction : Subtitle : Zoom : Angle : Surround Track Name • If you press [DISPLAY] one more time, artist name will be displayed.
BEFORE YOU START Main Menu Press [SETUP] to display the main menu. Then use [K / L] to select a menu and press [OK] to display the menu. These menus provide entries to all main functions of the unit. Setup 1 2 3 4 5 4 6 4 7 4 General Setting Timer Programming Title List Disc Edit HDD Menu Dubbing CD Playback Mode 1. General Setting: To go to general setting menu. 2. Timer Programming: To program a timer recording. 3. Title List: To call up the title list. 4. Disc Edit: To set up the DVD setting. 5.
BEFORE YOU START Disc Edit Edit Disc Name Erase Disc Make Edits Compatible Disc Protect OFF ON Disc Edit 1 2 3 4 Edit Disc Name Erase Disc Finalize Disc Protect OFF ON Disc Edit 1 3 2 4 3 Edit Disc Name Finalize Disc Protect OFF ON Random Play Program Play PBC (Video CD only) Slide Show HDD Menu Delete All Titles Delete All Unprotected Titles Dubbing 11 1 2 12 HDD DVD DVD HDD Playback 9 1 10
BEFORE YOU START Switching HDD / DVD Mode Because this unit is a combination of HDD and DVD recorder, you must first select which component (output mode) you wish to operate. HDD mode DVD mode Press [HDD] to activate the HDD component. Press [DVD] to activate the DVD component. DVD button HDD button HDD button DVD button How to Insert a Disc 1) Press [OPEN/CLOSE A] to open the disc tray. 2) Place the disc on the disc tray with its label side facing up. Align the disc to the disc tray guide.
INITIAL SETTING SOURCE STANDBY-ON DTV/TV ABC DEF GHI JKL MNO PQRS TUV WXYZ SPACE CLEAR AUDIO REPEAT CHANNEL 1 2 Connections .@/: OPEN/ CLOSE Follow the procedure in “Finding the Viewing Channel on Your TV” on page 21 to display “Initial Setup” menu. Introduction You need to follow these steps when you turn on this unit for the first time. Use [K / L] to select your desired language, then press [OK].
CHANNEL SETTING If you have changed antenna connection, we recommend that you program available channels in your area with the following procedures. Auto Channel Scan STANDBY-ON DTV/TV SOURCE .@/: ABC DEF GHI JKL MNO PQRS TUV WXYZ SPACE CLEAR AUDIO REPEAT SETUP DISC MENU OPEN/ CLOSE CHANNEL HDMI TITLE OK RETURN DISPLAY V.REPLAY 1 2 3 4 Press [SETUP] and use [K / L] to select “General Setting”, then press [OK]. “General Setting” menu will appear.
CHANNEL SETTING SOURCE ABC DEF GHI JKL MNO PQRS TUV WXYZ SPACE CLEAR AUDIO REPEAT SETUP DISC MENU CHANNEL HDMI TITLE “General Setting” menu will appear. Use [K / L] to select “Channel”, then press [OK]. “Channel” menu will appear. Use [K / L] to select “Manual Channel Preset”, then press [OK]. Auto Channel Preset Manual Channel Preset TV Audio Select • If you are adding or deleting analog TV/CATV channels, go to to continue.
CHANNEL SETTING 5 6 ANALOG Select the channel number to add or delete. • Use [CHANNEL / ] to cycle through only the memorized channels. • Use [{ / B] to cycle through all the channels including the ones not memorized. • Use [the Number buttons] to select a channel directly. • When a memorized channel is selected, “Add” is checked and highlighted as a default. • When an unmemorized channel is selected “Delete” is checked and highlighted as a default.
SETTING THE CLOCK Introduction Set the clock before you try the timer programming. If a PBS (public broadcasting station) is available in your area, follow “Auto Clock Setting” below. If not, follow “Manual Clock Setting” on page 32. Auto Clock Setting SOURCE ABC DEF GHI JKL MNO PQRS TUV WXYZ SPACE CLEAR AUDIO REPEAT SETUP DISC MENU CHANNEL Use [K / L] to select “Auto Clock Setting”, then press [OK]. Use [K / L] to select “Auto”, then press [OK].
SETTING THE CLOCK Manual Clock Setting 1 2 3 4 Press [SETUP] and use [K / L] to select “General Setting”, then press [OK]. Daylight Saving Time When “Daylight Saving Time” is “ON”, the unit clock will automatically adjust the time in order to fit the daylight saving time. “ON (MAR - NOV)” has been selected as the default. “General Setting” menu will appear. Use [K / L] to select “Clock”, then press [OK]. “Clock” menu will appear. Use [K / L] to select “Clock Setting”, then press [OK].
TUNER SETTINGS You can easily switch the analog TV (NTSC) and digital TV (ATSC) with the remote control. Note DTV 125. 1 Now Scanning Note Channel Selection [CHANNEL / Use [CHANNEL ] / ] to change the channel.
TUNER SETTINGS This section describes how to switch the TV audio. When you record a TV program, only the audio selected here will be recorded. Selecting TV Audio Digital TV SOURCE STANDBY-ON DTV/TV .@/: ABC DEF GHI JKL MNO PQRS TUV WXYZ SPACE CLEAR AUDIO REPEAT SETUP DISC MENU OPEN/ CLOSE HDMI OK RETURN V.REPLAY English 1/2 CHANNEL TITLE DISPLAY 1 Press [AUDIO] to cycle through available audio languages. V.
TUNER SETTINGS Introduction Selecting TV Audio (cont’d) Analog TV SOURCE ABC DEF GHI JKL MNO PQRS TUV WXYZ SPACE CLEAR AUDIO REPEAT SETUP DISC MENU CHANNEL HDMI TITLE RETURN V.REPLAY “General Setting” menu will appear. Use [K / L] to select “Channel”, then press [OK]. “Channel” menu will appear. Use [K / L] to select “TV Audio Select”, then press [OK]. Use [K / L] to select “Stereo” or “SAP”, then press [OK]. Recording OK DISPLAY 1 2 3 4 Basic Setup .
TUNER SETTINGS DTV Closed Caption Digital TV Digital TV has its own closed captions called DTV CC. Use this menu to change the settings for DTV CC. STANDBY-ON DTV/TV SOURCE .@/: ABC DEF GHI JKL MNO PQRS TUV WXYZ SPACE CLEAR AUDIO REPEAT SETUP DISC MENU OPEN/ CLOSE CHANNEL HDMI 1 2 3 TITLE OK Press [SETUP] and use [K / L] to select “General Setting”, then press [OK]. “General Setting” menu will appear. Use [K / L] to select “Display”, then press [OK].
TUNER SETTINGS Introduction Closed Caption Style Digital TV Digital TV can also change the style of its closed caption such as font, color or size, etc. SOURCE ABC DEF GHI JKL MNO PQRS TUV WXYZ SPACE CLEAR AUDIO REPEAT SETUP HDMI TITLE OK “General Setting” menu will appear. Use [K / L] to select “Display”, then press [OK]. Use [K / L] to select “CC Style”, then press [OK]. OSD Language Screen Saver FL Dimmer DTV CC CC Style V-Chip Recording DISC MENU CHANNEL 1 2 3 Basic Setup .
TUNER SETTINGS 6 Use [K / L] to select the item and switch the setting for each item you want to set, then press [OK]. Edge type of the displayed caption can be switched as below. Edge Type • When “User Setting” is set to “ON”, you can set the following items. CC style set by “User Setting” will be displayed. • The setting description for each item is shown below. None Raised Depressed Uniform L.Shadow R.Shadow Font size of the displayed caption can be switched as below.
INFORMATION ON RECORDING Recordable Discs Unrecordable Discs Logo Attributes • DVD-RW recorded in the mode other than +VR is not recordable on this unit unless you erase all contents in the disc (refer to page 95). • DVD-R recorded in the mode other than +VR is not recordable on this unit. Maximum recordable numbers of title / chapters HDD : DVD+R DVD-RW DVD-R DVD : Basic Setup DVD+RW 8cm/12cm, single-sided, single layer disc Approx. max. recording time (SLP mode): 360 minutes (4.
INFORMATION ON RECORDING Recording Mode About HDD You can select a recording mode among 6 options, and the recording time will depend on the recording mode you select as follows.
BEFORE RECORDING 1) Press [SETUP] and use [K / L] to select “General Setting”, then press [OK]. 2) Use [K / L] to select “Display”, then press [OK]. 3) Use [K / L] to select “DTV CC”, then press [OK]. 4) Use [K / L] to select “Recording”, then press [OK]. • If the “Caption Service” is set to “OFF”, you cannot select “Recording”. 5) Use [K / L] to select “ON”, then press [OK].
BASIC RECORDING & ONE-TOUCH TIMER RECORDING Follow the steps to record TV programs. STANDBY-ON DTV/TV SOURCE .@/: ABC DEF GHI JKL MNO PQRS TUV WXYZ SPACE CLEAR AUDIO REPEAT SETUP DISC MENU OPEN/ CLOSE CHANNEL If you are recording to the HDD, press [HDD] first, then proceed to step 2. If you are recording to a disc, press [DVD] first. 1 Insert a recordable disc (refer to page 26 on how to insert a disc). Align the disc to the disc tray guide.
BASIC RECORDING & ONE-TOUCH TIMER RECORDING 5 Introduction 4 Press [REC] to start recording. “I HDD” or “I DVD” will be displayed for 4 seconds. e.g.) DVD Press [STOP C] to stop recording. As for DVD recording, the title list will appear automatically after writing to a disc complete. (Refer to “Guide to a Title List” on page 79.) e.g.) DVD+R Connections I DVD Press [PAUSE F] to pause recording. Press [PAUSE F]] or [REC] again to restart recording. To set one-touch timer recording (OTR)...
AUTOSTART RECORDING Every time you turn on this unit, this unit automatically records the channel currently viewed and temporarily stores the recorded content to the HDD (Autostart recording). By using this function, you can pause or go back the TV program you are currently watching, and you can also start recording the whole TV program even at the middle of the TV program. The temporary recording can be made up to 6 hours of time range.
TIMER RECORDING Guide to Timer Programming Display 3 1 2 Timer Programming FEB/20/08 10:30 AM 125.1 SP SP (1:00) TUE FEB/19 11:30AM Date FEB/20 Start End CH 10:30AM 11:30AM DTV125.
TIMER RECORDING 4 Use [K / L / s / B] or [the Number buttons] to enter the start and end time, then press [B]. Date FEB/20 CH DTV125. 1 Start 10 : 30AM REC To HDD 7 End --:-Mode SP SP Use [K / L / s / B] to select analog (“- - -”) / digital (“DTV”) mode or external input (L1 / L2), then press [B]. e.g.) external input mode Date FEB/20 CH L1 Start 10 : 30AM REC To HDD End 11 : 30AM Mode SP SP Start 10 : 30AM REC To HDD End 11 : 30AM Mode SP SP 1h00m e.g.) digital mode Date FEB/20 CH DTV125.
TIMER RECORDING Introduction How to select a channel number for the timer recording For channel number 2-6 press, press [B] or [ • ] to decide the channels. For other channels (7-69), the channel will be decided as soon as you enter the channel number. Analog CATV For channel number 1-12 press, press [B] or [ • ] to decide the channels. For other channels (13125), the channel will be decided as soon as you enter the channel number.
TIMER RECORDING Hints for Timer Recording • If there is a power failure or this unit has been unplugged for more than 30 seconds, the clock setting and all timer programming will be lost. • When recording to a DVD, if a disc is not inserted, the unit will perform the alternate recording to the HDD (refer to page 46). • When a timer recording is completed, the unit will ask you whether to turn off the unit if there is no timer recording which starts within 5 minutes, except under conditions listed below.
SPECIAL RECORDING 2) Load the disc that includes a title to be overwritten. It takes a while to display the title list. 3) Press [REC MODE] to select a recording mode. Refer to “Recording Mode” on page 40. 4) Use [K / L] to select a title to be overwritten, then press [OK]. 1 SP(2Hr) 2) Use [K / L] to select “Play”, then press [OK]. Playback will start. 3) Press [PAUSE F] at the point from which you want to start overwriting. 4) Press [REC].
SPECIAL RECORDING Hints for Overwriting When you overwrite on the unnecessary title, there were various circumstances such as follows. Please note that following cases only describe the overwriting without any recording mode discrepancy. To avoid accidental deletion please check if there is no important title after the overwriting point. When overwriting title is shorter than the existing title: (overwriting from the beginning of the title) overwrite recording : A 30 - 180 seconds will be cut off.
DUBBING Introduction Information on Dubbing You can dub the contents of the HDD to DVD or vice verse. Before you start dubbing, refer to page 41 to see the recording compatibility.
DUBBING Settings for an External Device Connect the external device properly to the unit by using input jacks either L2 and L3 (Front) or L1 (Rear). When connecting an external device of monaural output to this unit, use AUDIO L jack of L1 (Rear) or L2 (Front). Use S-video or the RCA audio/video cables for this connection. When connecting a DVC (digital video camcorder), use DV-IN jack of L3 (Front).
DUBBING Before recording from an external device, refer to the instructions for the connection on page 52. ABC DEF GHI JKL MNO PQRS TUV WXYZ SPACE CLEAR AUDIO REPEAT SETUP DISC MENU 1 2 CHANNEL HDMI TITLE RETURN V.REPLAY It takes a while to load the disc. Select the appropriate external input channel (L1, L2 or L3) by pressing [SOURCE] or [CHANNEL / ]. • If the external device is connected to the rear of this unit, select L1.
DUBBING Information on DV Dubbing Guide to DV and On-Screen Display This function helps you to easily dub the contents of the DVC (digital video camcorder) to HDD or DVD. You can control basic operations of the DVC from the remote control of this unit such as playback, fast forward or reverse and stop all operations if the DVC is in video mode. Use the DV cable that has 4-pin input jack and is compliance with the IEEE1394 standards.
DUBBING Introduction DVC to HDD / DVD Dubbing Before recording from DVC, see page 52 for connection instructions. ABC DEF GHI JKL MNO PQRS TUV WXYZ SPACE CLEAR AUDIO REPEAT SETUP DISC MENU CHANNEL If you are recording to the HDD, press [HDD] first. If you are recording to a disc, press [DVD] first. 1 Use [SOURCE] or [CHANNEL select “L3(DV-IN)”. / ] to Basic Setup .
DUBBING Note for DV dubbing • If you press [PAUSE F] at step 5, the tape will rewind to the point a few seconds preceding the paused point. When you press [OK] at step 6, then, it will start dubbing when it comes to the paused point. • The unit does not send out the output signal to DVC. • For the proper operation, connect DVC to the unit directly. Do not connect this unit and DVC via any other unit. • Do not connect more than 1 DVC. • The unit can only accept DVC.
DUBBING Introduction Selected Title Dubbing STANDBY-ON DTV/TV SOURCE ABC DEF GHI JKL MNO PQRS TUV WXYZ SPACE CLEAR AUDIO REPEAT CHANNEL 1 2 Press [SETUP] in stop mode. Use [K / L] to select “Dubbing”, then press [OK]. Setup General Setting Timer Programming Title List Basic Setup .@/: OPEN/ CLOSE Connections Preparing for dubbing (HDD to DVD): • Insert a recordable DVD. Preparing for dubbing (DVD to HDD): • Insert a disc to be dubbed.
DUBBING 5 Use [K / L / s / B] to select a desired title, then press [OK]. e.g.) HDD 8 Use [s / B] to select a desired recording mode, then press [OK]. e.g.) HDD ➡ DVD HDD Title List ABCDE 12:00AM (10:00:00) JAN/ 1/08 1 2 3 Please select REC MODE. High 4 5 DVD CH10 SP HQ SP SPP LP EP Dubbing Titles 6 SLP Auto 500 MB 3000 MB 1/6 The title is now registered in the dubbing list. 6 Repeat steps 4 to 5 until you register all the titles to be dubbed.
DUBBING Introduction One Title Dubbing (HDD to DVD only) This function lets you select one specific title from the title list for dubbing. DEF GHI JKL MNO PQRS TUV WXYZ SPACE CLEAR AUDIO REPEAT SETUP DISC MENU CHANNEL HDMI TITLE OK V.REPLAY V.SKIP RAPID PLAY HDD DVD TIMER REC MODE REC Use [K / L] to select “Yes”, then press [OK]. Start Dubbing? Yes No Dubbing of the selected title will start. To stop the dubbing in progress: Press [STOP C] on the front panel.
PROTECTING A DISC To prevent accidental recording, editing or erasing the titles, you can protect them from “Disc Edit” menu. SOURCE STANDBY-ON DTV/TV .@/: ABC DEF GHI JKL MNO PQRS TUV WXYZ SPACE CLEAR SETUP AUDIO REPEAT DISC MENU OPEN/ CLOSE CHANNEL 1 2 3 Press [SETUP]. Use [K / L] to select “Disc Edit”, then press [OK]. Use [K / L] to select “Disc Protect OFF ON”, then press [OK]. e.g.
PLAYING THE DISCS ON OTHER DVD PLAYERS Introduction Finalizing a Disc SOURCE STANDBY-ON DTV/TV DEF GHI JKL MNO PQRS TUV WXYZ SPACE CLEAR AUDIO REPEAT SETUP DISC MENU CHANNEL “Disc Edit” menu will appear. Use [K / L] to select “Finalize”, then press [OK]. Use [K / L] to select “Yes”, then press [OK]. e.g.) DVD+R, DVD-R Finalize disc? Recording ABC Use [K / L] to select “Disc Edit”, then press [OK]. Yes No HDMI Finalizing will start. TITLE Basic Setup .
PLAYING THE DISCS ON OTHER DVD PLAYERS Auto Finalizing You can finalize discs automatically using this function. You can use this function to finalize discs after finishing all timer recordings and at the end of the disc space. SOURCE STANDBY-ON DTV/TV .@/: ABC DEF GHI JKL MNO PQRS TUV WXYZ SPACE CLEAR AUDIO REPEAT SETUP DISC MENU OPEN/ CLOSE CHANNEL HDMI 1 2 3 4 TITLE OK RETURN DISPLAY V.REPLAY 5 V.SKIP Press [SETUP] and use [K / L] to select “General Setting”, then press [OK].
INFORMATION ON PLAYBACK Playable Discs and Files Unplayable Discs Playable discs Logos DVD-video DVD+R Basic Setup DVD+RW The following discs will not play back on this unit.
INFORMATION ON PLAYBACK PBC (playback control) for Video CD You can select images or information on the menu screen by activating the PBC (playback control) function of the video CD. This unit conforms to ver.1.1 and ver. 2.0 of video CD standard with PBC function. Ver.1.1 (without PBC function): You can enjoy playback picture as well as music CD. Ver.2.0 (with PBC function): While using a video CD with PBC function, “PBC” appears on the TV screen.
BASIC PLAYBACK If you are playing back the titles in HDD, press [HDD] first, then proceed to step 2. If you are playing back the titles in DVD, press [DVD] first. SOURCE ABC DEF GHI JKL MNO PQRS TUV WXYZ SPACE CLEAR AUDIO REPEAT SETUP DISC MENU 1 CHANNEL Align the disc to the disc tray guide. * Make sure the disc is compatible with this unit. (Refer to page 63 for the list of compatible discs.) HDMI OK RETURN DISPLAY V.REPLAY V.SKIP D.
BASIC PLAYBACK Playback from the Title List If you are playing back the titles in HDD, press [HDD] first, then proceed to step 2. If you are playing back the titles in DVD, press [DVD] first. STANDBY-ON DTV/TV SOURCE .@/: ABC DEF GHI JKL MNO PQRS TUV WXYZ SPACE CLEAR AUDIO REPEAT SETUP DISC MENU OPEN/ CLOSE 1 Insert a disc (refer to page 26 on how to insert a disc). * Make sure the disc is compatible with this unit. (Refer to page 63 for the list of compatible discs.
BASIC PLAYBACK If you want to see disc information, press [{ ] when the first page of the title list is displayed or press [ K ] when the first title is selected but not when “Play”, “Edit” or “Overwrite” is highlighted. e.g.) DVD+RW 4 Use [K / L] to select “Play” (for DVD), or select “Resume Playback” or “Play from Start” (for HDD), then press [OK]. e.g.
BASIC PLAYBACK Playing Back an Audio CD and a CD-RW/-R with MP3 / JPEG Files STANDBY-ON DTV/TV SOURCE .@/: ABC DEF GHI JKL MNO PQRS TUV WXYZ SPACE CLEAR AUDIO REPEAT SETUP DISC MENU OPEN/ CLOSE When an audio CD is inserted, track list will appear. When a CD-RW/-R with MP3/JPEG files is inserted, file list will appear. • To exit the track/file list, press [STOP C]. • To resume the track/file list, press [TITLE]. CHANNEL HDMI OK RETURN V.
BASIC PLAYBACK Pause 1) During playback, press [PAUSE F]. Playback will be paused. Connections DVD or video CD with PBC function may contain a title list, which describes the contents of the disc, or a disc menu, which guides you through the available functions in the disc. Press [DVD] first. 1) Insert a disc (refer to page 26 on how to insert a disc). * Make sure the disc is compatible with this unit. (Refer to page 63 for the list of compatible discs.
SPECIAL PLAYBACK Resume Playback Note You can play back from where you stopped playing back the disc last. 1) During playback, press [STOP C]. The resume message will appear. Resume ON 2) Press [PLAY B]. In a few seconds, playback will resume from the point at which it stopped last. You can resume playback at the same point even if you turn off the unit (HDD/DVD only). To cancel the resume playback and start playing back the disc from the beginning, press [STOP C] again while the playback is stopped.
SPECIAL PLAYBACK Introduction Step by Step Playback Chasing Playback during Recording Note • Only step by step forward playback is available for playing back video CD. Slow Forward / Slow Reverse Playback Recording • You can also use the special playback functions such as [E], [D] etc. during chasing playback mode. • [REC] is invalid during chasing playback. • You can no longer fast forward the playback when it comes to a few seconds before the current recording point.
SPECIAL PLAYBACK Marker Setting Zoom 1) During playback, press [DISPLAY]. , then press [OK] within 1 2) Use [{ / B] to select second or wait for 1 second to display the selection menu. e.g.) DVD-video 1/ 5 1/ 5 0:01:00 / 1:23:45 DVD Video This feature allows you to assign a specific point on a title to be called back later. 1) During playback, press [DISPLAY]. , then press [OK] within 1 2) Use [{ / B] to select second or wait for 1 second to display the marker list. e.g.
SPECIAL PLAYBACK Note Available repeat function may vary depending the discs. 1) During playback press [DISPLAY], then proceed to step 2), or press [REPEAT] then proceed to step 3). 1/ 5 1/ 5 0:01:00 / 1:23:45 DVD Video 1/ 5 1/ 5 0:01:00 / 1:23:45 DVD Video You can play back a disc randomly instead of playing back in the original order. 1) Press [SETUP]. OFF Title Chapter A–B 0:00:15 / 0:05:00 CD OFF Track All Recording 2) Use [K / L] to select “CD Playback Mode”, then press [OK].
SPECIAL PLAYBACK Program Playback Playing Back the Autostart Recording You can program the disc to play back in your desired order. 1) Press [SETUP]. 2) Use [K / L] to select “CD Playback Mode”, then press [OK]. “CD Playback Mode” menu will appear. 3) Use [K / L] to select “Program Play”, then press [OK]. 4) Use [K / L] to select a desired track, then press [OK] or [B].
SEARCH Introduction Title / Chapter Search Track Search Using [H] / [G] 1) During playback, press [G] to skip the current title or chapter and move to the next. The title or chapter will move forward by one at a time. • If there is no chapter in one title, the current title will be skipped. 1) During playback, press [G] to skip the current track/file and move to the next. The track/file will move forward one at a time. To go back to the beginning of the current track/file, press [H].
SEARCH Time Search 1) During playback, press [DISPLAY]. , then press [OK]. 2) Use [{ / B] to select e.g.) DVD-video 1/ 5 1/ 5 0:01:00 / 1:23:45 DVD Video e.g.) audio CD 1/ 5 0:00:15 / 0:05:00 CD The number next to will be highlighted. To move to the number next to , press [B]. When time search is not available, counter are not displayed. and time 3) Use [K / L / { / B] or [the Number buttons] to enter a desired time to search, then press [OK]. After the search, playback will start automatically.
SELECTING THE FORMAT OF AUDIO AND VIDEO Switching Subtitles Switching Audio Soundtrack When playing back a DVD-video recorded with 2 or more soundtracks (these are often in different languages), you can switch them during playback. When playing back video CD, audio CD you can switch “L/R”(stereo), “L”(left) or “R”(right). 1) During playback, press [DISPLAY]. 1/ 5 1/ 5 1) During playback press [DISPLAY], then proceed to step 2), or press [AUDIO] then proceed to step 3).
SELECTING THE FORMAT OF AUDIO AND VIDEO Switching Virtual Surround System You can enjoy stereophonic virtual space through your existing 2 channel stereo system. 2) Use [{ / B] to select , then press [OK] within 1 second or wait for 1 second to display the selection menu. e.g.) DVD-video 1/ 5 Some DVD-video have scenes shot from 2 or more angles. Angle information should be on the disc case if the disc contains multi-angle scenes. 1) During playback, press [DISPLAY]. 1) During playback, press [DISPLAY].
INFORMATION ON EDITING Title list allows you to check the titles recorded on the HDD or the disc easily. You can choose a title to play back from this list and easily edit the titles as you prefer. Press [HDD], then press [TITLE]. Press [DVD], then press [TITLE].
INFORMATION ON EDITING Edit Menu Media Available Features Putting names on titles HDD DVD ✔ ✔ Deleting a title ✔ ✔ Deleting selected titles ✔ Deleting a scene of a title ✔ Adding / deleting chapter marks ✔ ✔ ✔ Hiding chapters Protecting a title ✔ Dividing a title ✔ ✔ *1 Setting an index picture ✔ Finalizing a disc ✔ Making edits compatible ✔* Putting name on disc ✔ Setting or Releasing disc protect ✔ Note 2 ✔ : Available : Not available • Once you have finalized a DVD+R/ DVD
EDITING Introduction Deleting a Title You can delete a title which you do not need anymore. Please be advised that the title once deleted cannot be brought back. ABC DEF GHI JKL MNO PQRS TUV WXYZ SPACE CLEAR AUDIO REPEAT CHANNEL 1 2 Use [K / L / { / B] to select a desired title to delete, then press [OK]. If you are editing the titles on HDD, proceed to step 4. If you are editing the titles on DVD, proceed to step 3.
EDITING 4 Use [K / L] to select “Title Delete”, then press [OK]. HDD mode Resume Playback Play From Start Edit Title Delete Delete Multiple Titles Dubbing 5 Use [K / L] to select “Yes”, then press [OK]. Final confirmation message will appear. Select “Yes”, then press [OK]. The title is now deleted.
EDITING STANDBY-ON DTV/TV SOURCE ABC DEF GHI JKL MNO PQRS TUV WXYZ SPACE CLEAR AUDIO REPEAT SETUP CHANNEL Title List Title 1 12:00AM (1:00:00) HDMI JAN/ 1/08 CH10 SP 1 2 3 4 5 6 Recording DISC MENU 4 Use [K / L / { / B] to select the title you want to delete, then press [OK]. OPEN/ CLOSE Resume Playback Play From Start Edit Title Delete Delete Multiple Titles Dubbing TITLE 1/1 Trash mark will appear indicating the title is marked for deletion. OK RETURN DISPLAY V.
EDITING Putting Names on Titles You can put title names on the titles and change the names from this menu. Edit - Edit Title Name OPEN/ CLOSE SOURCE STANDBY-ON DTV/TV 4 Use [K / L] to select “Yes”, then press [OK]. 1 Yes No .@/: ABC DEF GHI JKL MNO CHANNEL MY FAVORITE 1 : 05 : 00 PQRS TUV WXYZ SPACE CLEAR AUDIO REPEAT The title name is now updated. SETUP 5 HDMI DISC MENU TITLE Press [RETURN] once or repeatedly to go back to the title list.
EDITING Introduction Chapter Marks (Add) You can put chapter marks in each title. Once a chapter is marked, you can use it for the chapter search feature. ABC DEF GHI JKL MNO PQRS TUV WXYZ SPACE CLEAR AUDIO REPEAT SETUP DISC MENU CHANNEL HDMI TITLE RETURN DISPLAY V.REPLAY V.SKIP Use [K / L] to select “Chapter Mark”, then press [OK]. Submenu will appear. Play back the title up to the point where you want to set a new chapter mark. When it comes to the desired point, press [PAUSE F].
EDITING Chapter Marks (Delete) To delete a chapter mark: SOURCE STANDBY-ON DTV/TV .@/: ABC DEF GHI JKL MNO PQRS TUV WXYZ SPACE CLEAR AUDIO REPEAT SETUP DISC MENU OPEN/ CLOSE CHANNEL HDMI TITLE 1 2 3 OK Use [K / L] to select “Chapter Mark”, then press [OK]. Submenu will appear. Use [H] / [G] to go to the chapter with the chapter mark number you want to delete, then press [PAUSE F]. Chapter mark number is displayed on the preview screen. e.g.
EDITING Introduction Chapter Marks (Delete All) To delete all chapter marks: ABC DEF GHI JKL MNO PQRS TUV WXYZ SPACE CLEAR AUDIO REPEAT SETUP DISC MENU CHANNEL HDMI TITLE RETURN Use [K / L] to select “Chapter Mark”, then press [OK]. Submenu will appear. Use [K / L] to select “Delete All”, then press [OK]. Use [K / L] to select “Yes”, then press [OK]. Edit - Chapter Mark - Delete All 1 Yes No V.REPLAY V.SKIP Chapter Recording OK DISPLAY 1 2 3 4 Basic Setup .
EDITING Dividing a Title You can divide one title into 2 new titles. STANDBY-ON DTV/TV SOURCE .@/: ABC DEF GHI JKL MNO PQRS TUV WXYZ SPACE CLEAR AUDIO REPEAT SETUP DISC MENU OPEN/ CLOSE CHANNEL HDMI TITLE OK 1 2 3 4 Follow steps in “How to Access the Edit Menu” on page 80 to display “Edit” menu. Play back the title up to the point where you want to divide the title. When it comes to the desired point, press [PAUSE F]. Use [K / L] to select “Title Dividing”, then press [OK].
EDITING Introduction Deleting a Scene of a Title You can delete a specific part of a title. SOURCE ABC DEF GHI JKL MNO PQRS TUV WXYZ SPACE CLEAR AUDIO REPEAT Use [K / L] to select “Scene Delete”, then press [OK]. Edit 1 CHANNEL Scene Delete Edit Title Name Chapter Mark Title Dividing Protect Basic Setup .
EDITING 5 With “Preview” highlighted, press [OK] to preview the result. Before and after 5 seconds of the deleted scene can be previewed every time you press [OK]. • If you are not satisfied with the result, use [K / L] to go back to “Start” or “End”, and try setting them again. • If you are satisfied with the result, proceed to step 6. 7 Use [K / L] to select “Yes” then press [OK].
EDITING Introduction Protecting a Title To prevent the accidental editing, or erasing of the titles, you can protect them in “Edit” menu. SOURCE ABC DEF GHI JKL MNO PQRS TUV WXYZ SPACE CLEAR AUDIO REPEAT Use [K / L] to select “Protect”, then press [OK]. Edit 1 CHANNEL Scene Delete Edit Title Name Chapter Mark Title Dividing Protect Basic Setup .@/: OPEN/ CLOSE Connections STANDBY-ON DTV/TV 1 2 Follow steps in “How to Access the Edit Menu” on page 80 to display “Edit” menu.
EDITING Hiding Chapters You can hide chapters from the title list. Hidden chapters are skipped during playback. STANDBY-ON DTV/TV SOURCE .@/: ABC DEF GHI JKL MNO PQRS TUV WXYZ SPACE CLEAR AUDIO REPEAT SETUP DISC MENU OPEN/ CLOSE CHANNEL HDMI 1 2 3 4 Follow steps in “How to Access the Edit Menu” on page 80 to display “Edit” menu. Use [K / L] to select “Hide Chapter”, then press [OK]. Submenu will appear. Use [H] / [G] to go to the chapter you want to hide, then press [PAUSE F].
EDITING Introduction Setting an Index Picture You can set your desired scene as an index picture for each title. SOURCE ABC DEF GHI JKL MNO PQRS TUV WXYZ SPACE CLEAR AUDIO REPEAT SETUP DISC MENU CHANNEL HDMI TITLE Play back the title to find the scene you want to use as an index picture. When it comes to the desired point, press [PAUSE F]. Use [K / L] to select “Index Picture”, then press [OK]. Use [K / L] to select “Yes”, then press [OK].
EDITING Putting Name on Disc Press [STOP C] if you are playing back a disc. You can put a name on the disc and change it from this menu. STANDBY-ON DTV/TV SOURCE .@/: ABC DEF GHI JKL MNO PQRS TUV WXYZ SPACE CLEAR AUDIO REPEAT SETUP DISC MENU OPEN/ CLOSE CHANNEL 1 2 3 HDMI Press [SETUP]. Use [K / L] to select “Disc Edit”, then press [OK]. Use [K / L] to select “Edit Disc Name”, then press [OK]. e.g.
EDITING Introduction Erasing Disc Press [STOP C] if you are playing back a disc. You can erase all titles on a disc. SOURCE ABC DEF GHI JKL MNO PQRS TUV WXYZ SPACE CLEAR AUDIO REPEAT SETUP DISC MENU CHANNEL HDMI 1 2 3 Use [K / L] to select “Disc Edit”, then press [OK]. Basic Setup .@/: OPEN/ CLOSE Use [K / L] to select “Erase Disc”, then press [OK]. e.g.) DVD+RW Disc Edit Recording Edit Disc Name Erase Disc Make Edits Compatible Disc Protect OFF ON TITLE OK RETURN DISPLAY V.
EDITING Making Edits Compatible If you have added or deleted chapters, or made chapters hidden, you must perform “Make Edits Compatible” to see those effects on other unit. STANDBY-ON DTV/TV SOURCE .@/: ABC DEF GHI JKL MNO PQRS TUV WXYZ SPACE CLEAR AUDIO REPEAT SETUP DISC MENU OPEN/ CLOSE CHANNEL Press [STOP C] if you are playing back a disc. 1 2 3 Press [SETUP]. 4 Use [K / L] to select “Yes”, then press [OK]. HDMI Use [K / L] to select “Disc Edit”, then press [OK].
EDITING Introduction Deleting All Titles in HDD Press [STOP C] if you are playing back a disc. ABC DEF GHI JKL MNO PQRS TUV WXYZ SPACE CLEAR AUDIO REPEAT SETUP DISC MENU CHANNEL HDMI 1 2 3 TITLE Use [K / L] to select “HDD Menu”, then press [OK]. Use [K / L] to select the desired type of deletion, then press [OK]. Select “Delete All Unprotected Titles” if you want to delete only the unprotected titles.
LIST OF SETTINGS The following table is the contents which you can set and the default setting. Refer to the following table for useful operation. Setup Playback Pages 101-104 Items (highlight is the default) Parental Lock Disc Audio Dynamic Range Control ON OFF Compressing the range of sound volume. PCM 48kHz 96kHz PCM Stream Set whether the sound recorded in 96kHz will be down sampled in 48kHz.
LIST OF SETTINGS Items (highlight is the default) CC Style Font Style pages 37-38 Set the font opacity of the displayed caption. Font Color White Black Red Green Blue Yellow Magenta Cyan Set the font color of the displayed caption. Edge Type None Raised Depressed Uniform L.Shadow R.Shadow White Black Red Green Blue Yellow Magenta Cyan Set edge type of the displayed caption. Set edge color of the displayed caption. Set back opacity of the displayed caption. Set back color of the displayed caption.
LIST OF SETTINGS Setup Display Pages 105-107 Items (highlight is the default) V-Chip Downloadable Rating BLOCK SETTING CLEAR DOWNLOADABLE RATING Clear the downloadable rating information and its setting. Change the password. Progressive Scan ON OFF TV Aspect 4:3 Letter Box 4:3 Pan & Scan 16:9 Wide Video In S-Video In Video In S-Video In OFF 5 minutes 10 minutes 15 minutes 30 minutes 60 minutes ON OFF Set to the progressive scan mode (set to "ON") or to the interlace scan mode(set to "OFF").
SETUPS Introduction Playback Press [STOP C] if you are playing back a disc. ABC DEF GHI JKL MNO PQRS TUV WXYZ SPACE CLEAR SETUP AUDIO REPEAT DISC MENU CHANNEL 1 2 Press [SETUP] and use [K / L] to select “General Setting”, then press [OK]. “General Setting” menu will appear. Use [K / L] to select “Playback”, then press [OK]. Basic Setup .
SETUPS Playback (cont’d) 1 Parental Lock (Default: OFF) (DVD only) Some DVD-video feature a parental lock level. Playback will stop if the ratings exceed the levels you set, it will require you to enter a password before the disc will playback. This feature prevents your children from viewing inappropriate material. Use [K / L] to select the desired level, then press [OK].
SETUPS Introduction Playback (cont’d) 2 C Disc Audio Use [K / L] to select a setting, then press [OK]. Dolby Digital PCM Stream Use [K / L] to select a desired item, then press [OK]. Disc Audio A B C Dynamic Range Control (Default : ON) (DVD only) Set to “ON” to compress the range between soft and loud sounds. Use [K / L] to select a setting, then press [OK]. Dynamic Range Control Your setting will be activated.
SETUPS Playback (cont’d) 5 Subtitle Language (Default : OFF) (DVD only) Set the subtitle language. Use [K / L] to select a setting, then press [OK]. 7 Still Mode (Default : Auto) Select “Auto” usually. Use [K / L] to select a setting, then press [OK]. Still Mode Subtitle Language Auto Field Frame OFF English French Spanish Other Your setting will be activated. If “Other” is selected for 3 to using [the Number buttons]. 5 , press 4-digit code - - Your setting will be activated.
SETUPS Introduction Display Press [STOP C] if you are playing back a disc. ABC DEF GHI JKL MNO PQRS TUV WXYZ SPACE CLEAR AUDIO REPEAT SETUP DISC MENU CHANNEL HDMI TITLE 1 2 3 Use [K / L] to select “Display”, then press [OK]. Use [K / L] to select a desired item, then press [OK]. 1 2 3 4 5 6 OSD Language Screen Saver FL Dimmer DTV CC CC Style V-Chip RETURN DISPLAY Selection menu will appear. V.REPLAY V.SKIP D.
SETUPS Display (cont’d) 3 FL Dimmer (Default: Bright) Set the front panel display brightness. Use [K / L] to select a setting, then press [OK]. FL Dimmer Auto Bright Dark You can choose one from “Auto”, “Bright” and “Dark”. If “Auto” is selected, the display gets dark when the power is off.
SETUPS Introduction Display (cont’d) [Canadian English Rating] Rating E Category Adult audience only higher 14+ Unsuitable for ages under 14 PG Parental guidance suggested G General audience C8+ For children over 8 C For all children E Exempt program Downloadable Rating is currently not available.
SETUPS Video Press [STOP C] if you are playing back a disc. SOURCE STANDBY-ON DTV/TV .@/: ABC DEF GHI JKL MNO PQRS TUV WXYZ SPACE CLEAR AUDIO REPEAT SETUP DISC MENU OPEN/ CLOSE CHANNEL HDMI TITLE 1 2 3 Press [SETUP] and use [K / L] to select “General Setting”, then press [OK]. Use [K / L] to select “Video”, then press [OK]. Use [K / L] to select a desired item, then press [OK]. 1 Progressive Scan 2 TV Aspect 3 Video Input Submenu will appear. OK RETURN DISPLAY V.REPLAY V.
SETUPS 1 Progressive Scan (Default : OFF) 1) Use [K / L] to select “ON“, then press [OK]. Progressive Scan TV Aspect Activating progressive scan: Check your TV has progressive scan and connect with component video cable. Recording NOTE : If there is no picture or picture is distorted after selecting “Yes”, Wait about 15 seconds for auto recovery.
SETUPS HDMI SOURCE STANDBY-ON DTV/TV .@/: ABC DEF GHI JKL MNO PQRS TUV WXYZ SPACE CLEAR AUDIO REPEAT SETUP DISC MENU OPEN/ CLOSE HDMI OK RETURN V.REPLAY 4 When you finish with the setting, press [SETUP] to exit. 1 Format 2 HDMI Audio 3 RGB Range CHANNEL TITLE DISPLAY 3 Use [K / L] to select a desired item, then press [OK]. 1 Format (Default : RGB) You can select the color space for HDMI output. Set the appropriate color space for your display device.
SETUPS Reset the setting to default. ABC DEF GHI JKL MNO PQRS TUV WXYZ SPACE CLEAR AUDIO REPEAT SETUP DISC MENU CHANNEL HDMI V.REPLAY Select “Yes” using [K / L] , then press [OK]. Reset to factory default? 4 Select “Yes” again using [K / L] , then press [OK]. Are you sure? Recording RETURN DISPLAY Use [K / L] to select “Reset All”, then press [OK]. Yes No TITLE OK “General Setting” menu will appear. Basic Setup .
TROUBLESHOOTING Before requesting service for this unit, check the table below for a possible cause of the problem you are experiencing. Some simple checks or a minor adjustment on your part may eliminate the problem and restore proper operation. POWER Symptom The power does not turn on. The unit turns on automatically without any operation. The OSD language menu appears every time the power turns on. Remedy • Check that the AC power cord is connected securely. • Batteries of the remote control are weak.
TROUBLESHOOTING GENERAL No image from HDMI connection. CHANNEL GENERAL The image from the external device • Try pressing [SOURCE] repeatedly. cannot be displayed or recorded. • Turn on all connected devices. • Check if the connections are made securely and correctly. HDD / DVD Timer recording cannot be performed. DVD 100% ” Others The indication “ Writing to Disc does not disappear. • Copy-once programs cannot be recorded on DVD. This is not a malfunction.
TROUBLESHOOTING Symptom TV aspect ratio does not match your TV screen. DVD PLAYBACK HDD HDD/DVD GENERAL Playback picture is distorted. Color of the picture is abnormal. There is no sound, or no subtitle. Playback does not start from the beginning. Remedy • Check the TV aspect ratio. (Refer to page 109.) • A different aspect ratio will be used when the aspect ratio specified by the disc is not supported by this unit. • During fast forward or fast reverse, playback picture may be distorted.
TROUBLESHOOTING EDITING HDD / DVD DVD Titles cannot be edited or deleted. The remote control does not function. • No batteries in the remote or the batteries may be weak. Replace the batteries. • Make sure there is no obstacle between the remote and the unit. • Try getting closer to the unit. (Refer to page 12.) • If above solutions do not solve the problem, please call an Authorized Service Center. Basic Setup The capacity of the disc doesn’t increase even if the recorded program is deleted.
TROUBLESHOOTING Error message Cause Solution Disc Error — Please eject the disc. — Playback feature may not be available on this Disc. • Unplayable disc is inserted in the unit. • The disc is upside down. • Insert the standardized disc which bear the marks on page 63. • Insert the disc with the labeled side facing up. Region Error — Please eject the disc. — Playback is not authorized in your region. • Playback is not authorized in the region of the DVD-video which you inserted in the unit.
LANGUAGE CODE Editing Function Setup Others Code 6467 6559 6553 6547 5350 6564 6554 6566 6660 6560 6550 6555 6565 6557 6558 6561 5165 6567 6569 6568 6658 6653 6647 6666 6651 6654 4861 6655 6661 6665 6664 6657 6669 6757 6764 6772 6855 6861 4971 6961 7054 5655 7161 7267 Playback Language Russian Samoan Sangho Sanskrit Scots Gaelic Serbian Serbo-Croatian Sesotho Setswana Shona Sindhi Singhalese Siswat Slovak Slovenian Somali Spanish Sundanese Swahili Swedish Tagalog Tajik Tamil Tatar Telugu Thai Tibetan Ti
GLOSSARY Analog Audio PBC (playback control) (video CD only) An electrical signal that directly represents sound. Compare this to digital audio which can be an electrical signal, but is an indirect representation of sound. See also “Digital Audio”. This function enables you to play back interactive software using a menu screen. See also “Video CD”. Aspect Ratio The width of a TV screen relative to its height.
SPECIFICATIONS 120V AC +/-10%, 60Hz +/-5% 33W (standby: 5.7W) 16.6 x 2.4 x 11.5 inches (420 x 59 x 290mm) 7.5 lbs. ( 3.4kg ) 41°F (5°C) to 104°F (40°C) Less than 80% (no condensation) ATSC / NTSC-M TV standard +VR (video recording) format DVD+Rewritable, DVD+Recordable DVD-Rewritable, DVD-Recordable (+VR mode only) 13.
ESPAÑOL Discos Reproducibles Disco Grabable Este aparato es compatible con la reproducción de los siguientes discos y archivos. Discos reproducibles Logotipos DVD-video Este aparato puede grabar a DVD+RW, DVD+R, DVD-RW y DVD-R. Los discos DVD+R/DVD-R pueden ser grabados sólo una vez. Los discos DVD+RW/DVD-RW pueden ser grabados y borrados muchas veces. En este aparato los discos DVD-RW/-R serán grabados automáticamente en el modo DVD+VR.
ESPAÑOL 1) Desconecte el cable de alimentación de su televisor del tomacorriente de CA. 2) Efectúe la conexión como se ilustra abajo. imagen normal COMPONENT VIDEO IN S-VIDEO IN VIDEO IN TV imagen mejor Y PB/CB o cable coaxial RF cable de vídeo en componentes cable S-video y L (Rojo) o o R AUDIO IN parte trasera de la unidad Basic Setup cable RCA de vídeo parte trasera del televisor ANT.
ESPAÑOL Configuración Inicial Cuando usted encienda este aparato por primera vez necesita seguir estos pasos. 1 2 3 Utilice [K / L] para seleccionar el tipo de señal de emisión, y luego presione [OK]. Ajuste inicial Ajuste de Canal Presione [STANDBY-ON y]. Verificar que la antena esté conectada a la toma "ANTENNA IN". Antena Cable (Analógico) Cable (Analógico/Digital) Encienda el televisor. Seleccione la entrada a la cual está conectado el aparato.
ESPAÑOL Preparación para el copiado (unidad de disco rígido a DVD): • Inserte un DVD grabable. Preparación para el copiado (DVD a unidad de disco rígido): • Inserte un disco a ser copiado. Presione [SETUP] en el modo de detención. DVD Seleccione REC MODE. Utilice [K / L] para seleccionar “Doblaje”, y luego presione [OK]. DVD 3000 MB 1/1 El título estará ahora registrado en la lista de títulos copiados.
LIMITED WARRANTY FUNAI CORP. will repair this product, free of charge in the USA in the event of defect in materials or workmanship as follows: DURATION: PARTS: FUNAI CORP. will provide parts to replace defective parts without charge for one (1) year from the date of original retail purchase. Certain parts are excluded from this warranty. LABOR: FUNAI CORP. will provide the labor without charge for a period of ninety (90) days from the date of original retail purchase.
MAGNAVOX VOUS REMERCIE DE VOTRE CONFIANCE. Enregistrement BESOIN D’UNE AIDE RAPIDE? LE GUIDE RAPIDE DE DÉBUT ET MANUEL DE L’UTILISATEUR REGORGENT D’ASTUCES DESTINÉES À SIMPLIFIER L’UTILISATION DE VOTRE PRODUIT MAGNAVOX. TOUTEFOIS, SI VOUS NE PARVENEZ PAS À RÉSOUDRE VOTRE PROBLÈME, VOUS POUVEZ ACCÉDER À NOTRE AIDE EN LIGNE À L’ADRESSE HTTP://WWW.FUNAI-CORP.COM OU FORMEZ LE 1-800-605-8610 VEILLEZ À AVOIR VOTRE PRODUIT À PORTÉE DE MAIN.
e d i p a R e Guid LECTEUR / ENREGISTREUR SUR DD ET DVD AVEC TUNER NUMÉRIQUE 1 Connexions Connexion de Base 1) Débranchez les cordons secteur des appareils de la prise secteur. 2) Effectuez la connexion comme illustré ci-dessous.
2 Réglages Initiaux Lors de la première mise sous tension de cet appareil, vous devez exécuter les étapes suivantes. STANDBY-ON DTV/TV .@/: ABC DEF GHI JKL 1 PQRS TUV WXYZ SPACE CLEAR AUDIO REPEAT SETUP 2 à SOURCE MNO DISC MENU OPEN/ CLOSE CHANNEL HDMI 4 OK RETURN V.REPLAY V.SKIP Initial Setup PQRS Appuyez sur [SETUP] en mode arrêt. English Français Español SETUP Vérifier connexion antenne à prise jack “ANTENNA IN”.
PRÉCAUTIONS Les numéros de modèle et de série de cet appareil se trouvent sur le boîtier. Vous devriez prendre ces numéros en note car ils pourraient vous être utiles. N° modèle : N° série.: MISE EN GARDE: POUR RÉDUIRE LES RISQUES DE FEU OU DE CHOCS ÉLECTRIQUES, N’EXPOSEZ PAS CET APPAREIL À LA PLUIE OU À L’HUMIDITÉ.
PRÉCAUTIONS Introduction Ne placez pas cet appareil sur un meuble qui pourrait être renversé par un enfant ou un adulte qui pourrait s’y appuyer, le tirer ou monter dessus. La chute de l’appareil peut causer des blessures graves ou même la mort. ATTENTION: :Pour éviter les chocs électriques, introduire la lame la plus large de la fiche dans la borne correspondante de la prise et pousser jusqu’au fond.
PRÉCAUTIONS Pour éviter les risques de choc électrique et d’incendie • Ne manipulez pas le cordon d’alimentation avec les mains mouillées. • Ne tirez pas directement sur le cordon d’alimentation pour le débrancher de la prise de courant. Saisissez-le par la fiche. • Ne pas insérer vos doigts ou des objets à l’intérieur de l’appareil.
PRÉCAUTIONS Nettoyage du boîtier • Utiliser un chiffon doux imbibé d’une solution détergente douce. Ne pas utiliser de solution contenant de l’alcool, de l’ammoniac ou des abrasifs. • Si un disque est sale, nettoyez-le avec un chiffon de nettoyage. Essuyez le disque du centre vers l’extérieur. Ne l’essuyez pas selon un mouvement circulaire.
SOMMAIRE Introduction Enregistrement PRÉCAUTIONS . . . . . . . . . . . . . . . . . . . . . . . . . . . . . . . . . . . 2 CARACTÉRISTIQUES. . . . . . . . . . . . . . . . . . . . . . . . . . . . . . 8 Symboles utilisés dans ce manuel de l’utilisateur . . . . .9 PRÉSENTATION DES FONCTIONNALITÉS. . . . . . . . . . 10 Face avant . . . . . . . . . . . . . . . . . . . . . . . . . . . . . . . . . . . . . . . . 10 Face arrière . . . . . . . . . . . . . . . . . . . . . . . . . . . . . . . . . . . . . . .
SOMMAIRE Introduction Lecture Édition 63 65 65 66 Enregistrement Réglage des fonctions LISTE DES RÉGLAGES. . . . . . . . . . . . . . . . . . . . . . . . . . . . 98 RÉGLAGES. . . . . . . . . . . . . . . . . . . . . . . . . . . . . . . . . . . . . 101 Lecture . . . . . . . . . . . . . . . . . . . . . . . . . . . . . . . . . . . . . . . . . . 101 Affichage . . . . . . . . . . . . . . . . . . . . . . . . . . . . . . . . . . . . . . . . 105 Vidéo . . . . . . . . . . . . . . . . . . . . . . . . . . . . . . .
CARACTÉRISTIQUES Cet appareil lit les contenus du DD interne, des DVD ou des CD et offre également des fonctionnalités d’enregistrement sur DD ou DVD et des possibilités d’édition ultérieure. Cet appareil offre les fonctionnalités suivantes. Enregistrement Copie Cet appareil vous permet d’enregistrer sur DD, sur DVD+RW/ DVD-RW (réinscriptible) et sur DVD+R/DVD-R (inscriptible une seule fois). Vous pouvez choisir l’un d’entre eux à votre convenance. Vous pouvez choisir le type qui vous convient.
CARACTÉRISTIQUES Édition DD DVD DD DVD Pour l’enregistrement, la lecture et l’édition La description concerne le DD La description se réfère au DVD+RW La description se réfère au DVD+R La description se réfère au DVD-RW Enregistrement Masquage des chapitres : Vous pouvez masquer certains chapitres afin d’éviter que d’autres personnes puissent les lire. Définition des images d’index : Vous pouvez remplacer les images d’un index. Nommage d’un disque : Vous pouvez mettre le nom de disque de votre choix.
PRÉSENTATION DES FONCTIONNALITÉS Face avant 1 2 3* 4 15 5 6 7 8* 9 10 14 13 12 11 (*) L’appareil peut également être allumé en appuyant sur ces boutons. 1.Touche STANDBY-ON y Appuyez sur cette touche pour allumer ou éteindre l’appareil. 2.Tiroir du disque Placez un disque en ouvrant le tiroir du disque. 3.Touche OPEN/CLOSE A* Appuyez sur cette touche pour ouvrir ou fermer le tiroir du disque. 4.Affichage Consultez “Affichage de la face avant” en page 14. 5.
PRÉSENTATION DES FONCTIONNALITÉS 1 2 4 3 VIDEO VIDEO IN OUT IN L Introduction Face arrière 5 Y L OUT 12 AUDIO IN (L1) IN R S-VIDEO AUDIO OUT 11 10 9 OUT Connexions R ANTENNA COAXIAL S-VIDEO 8 7 6 Enregistrement Lecture 8. Prises COMPONENT VIDEO OUTPUT Elles servent à connecter un moniteur de télévision sur les entrées composantes vidéo avec un câble de composantes vidéo. 9.
PRÉSENTATION DES FONCTIONNALITÉS Télécommande Installation des piles de la télécommande Installez des piles (AA x 2) en respectant les polarités indiquées dans le compartiment des piles de la télécommande. 1 Ouvrez le couvercle. 2 Insérez les piles. Utilisation d’une télécommande Gardez les notions suivantes à l’esprit lors de l’utilisation de la télécommande : • Veillez à ce qu’il n’y ait aucun obstacle entre la télécommande et la fenêtre du capteur infrarouge de l’appareil.
PRÉSENTATION DES FONCTIONNALITÉS (*) L’appareil peut également être allumé en appuyant sur ces touches. Enregistrement Lecture Édition Réglage des fonctions Autres E2M01UD_H2160MW9_FR_Book.indb 13 Configuration de base FR Connexions 16. Touche TIMER • Appuyez sur cette touche pour afficher la liste des programmations différées. 17. Touche SOURCE • Appuyez sur cette touche pour sélectionner l’entrée appropriée. 18.
PRÉSENTATION DES FONCTIONNALITÉS Affichage de la face avant 2 1 PM 3 DTV BS CS DR CD VCR DB HDD DVD 4 5 1. PM 4. État actuel de l’appareil : Apparaît l’après-midi avec l’affichage de l’horloge. : Apparaît quand la lecture est suspendue. 2. DTV : Apparaît lors de la lecture d’un DD ou disque. : Apparaît quand la chaîne est en mode DTV. : Apparaît quand la programmation différée ou l’OTR ont été réglés et sont en cours.
CONNEXION DU CÂBLE D’ANTENNE Cette section décrit la connexion de votre appareil à une antenne, un boîtier du câble, etc. Introduction 1 2 Débranchez le cordon secteur de votre téléviseur de la prise secteur. Débranchez le câble coaxial RF de la prise d’entrée d’antenne de votre téléviseur. arrière de votre TV 2 1 déconnectez déconnectez Connexions antenne VHF / UHF ou câble coaxial RF 3 ANT. IN Configuration de base société de TV par câble Branchez les câbles sur l’appareil.
CONNEXION DU MODULATEUR RF Si votre téléviseur a uniquement une prise d’entrée d’antenne, il est toujours possible de connecter cet appareil à votre téléviseur en utilisant un modulateur RF audio/vidéo stéréo du commerce. Dans ce cas, suivez les instructions cidessous. 1) Débranchez les cordons secteur des appareils de la prise secteur. 2) Effectuez la connexion comme illustré ci-dessous.
CONNEXION À UN RÉCEPTEUR CÂBLE / SATELLITE Introduction 1) Débranchez les cordons secteur des appareils de la prise secteur. 2) Effectuez la connexion comme illustré ci-dessous. 3) Branchez les cordons secteurs des appareils à la prise secteur. p.ex.) arrière de votre TV antenne parabolique VIDEO IN AUDIO IN R Connexions Cette connexion sert uniquement à la boucle de télévision L ou ANT.
CONNEXION À UN TÉLÉVISEUR Effectuez l’une des connexions suivantes, en fonction des possibilités de votre appareil existant.
CONNEXION À UN TÉLÉVISEUR ÉQUIPÉ D’UN PORT HDMI™ COMPATIBLE TV Mode HDMI et signaux de sortie réels Appuyez sur [HDMI] pour sélectionner le mode de sortie HDMI. Le mode de sortie change comme suit à chaque pression sur [HDMI].
CONNEXION À UN SYSTÈME AUDIO • Tous les appareils doivent être éteints pour modifier les connexions. • Consultez le mode d’emploi joint aux appareils externes pour plus d’informations.
AVANT DE DÉMARRER Recherche de la chaîne de visionnement sur votre téléviseur STANDBY-ON DTV/TV SOURCE ABC DEF GHI JKL MNO PQRS WXYZ SPACE CLEAR AUDIO REPEAT DISC MENU HDMI TITLE Allumez votre téléviseur. • S’il est connecté à votre magnétoscope assurez-vous qu’il est éteint ou en veille avant de continuer. OK Initial Setup RETURN DISPLAY OSD Language V.REPLAY V.
AVANT DE DÉMARRER Cet appareil utilise le menu et l’affichage à l’écran suivant pour vous guider facilement dans ses fonctions. L’affichage à l’écran vous donne des informations sur le disque chargé ou le disque/fichier lu, ou l’état HDMI, etc. Les menus vous permettent de modifier les divers types de réglage de la lecture, de l’enregistrement ou de l’édition en fonction de vos préférences.
AVANT DE DÉMARRER Informations / Menu DD / DVD 7 Introduction 6 Information sur le nom du titre/fichier Information sur le nom du titre Nom du Titre 1/ 5 1/ 5 0:01:00 / 1:23:45 Mon titre DVD Video CH 10 5 1 2 Information sur le nom du fichier Connexions Nom fichier Mon fichier DVD SP(2h) 4 1h53m 3 : Audio Nom de piste • Si vous appuyez encore sur [DISPLAY], le nom de l’artiste s’affichera. Nom d’artiste • Si vous appuyez encore sur [DISPLAY], le nom de l’album s’affichera.
AVANT DE DÉMARRER Menu principal Appuyez sur [SETUP] pour afficher le menu principal. Utilisez alors [K / L] pour sélectionner un menu puis appuyez sur [OK] pour l’afficher. Ces menus sont les entrées vers toutes les principales fonctions de l’appareil. Réglage 1 2 3 4 5 4 6 4 7 4 Réglage général Programmation Liste titres Edition d’un disque Menu HDD Doublage Mode lecture CD 1. Réglage général : Pour aller au menu des paramètres généraux. 2. Programmation : Pour programmer un enregistrement différé. 3.
AVANT DE DÉMARRER Edition d’un disque / Menu HDD / Doublage / Mode lecture CD Edition d'un disque 1 2 3 4 Nom du disque édité Disque effacé Permet édit. Compatib.
AVANT DE DÉMARRER Commutation des modes DD / DVD Cet appareil étant la combinaison d’enregistreurs DD et DVD, vous devez d’abord sélectionner le composant (mode de sortie) que vous souhaitez utiliser. Mode DD Mode DVD Appuyez sur [HDD] pour activer le composant DD. Appuyez sur [DVD] pour activer le composant DVD. touche DVD touche HDD touche HDD touche DVD Comment insérer un disque 1) Appuyez sur [OPEN/CLOSE A] pour ouvrir le tiroir du disque.
RÉGLAGES INITIAUX Lors de la première mise sous tension de cet appareil, vous devez exécuter les étapes suivantes. ABC DEF GHI JKL MNO PQRS TUV WXYZ SPACE CLEAR AUDIO REPEAT CHANNEL 1 2 Connexions .@/: OPEN/ CLOSE Introduction SOURCE STANDBY-ON DTV/TV Suivez la procédure de “Recherche de la chaîne de visionnement sur votre téléviseur” en page 21 pour afficher le menu “Initial Setup”. Utilisez [K / L] pour sélectionner la langue de votre choix puis appuyez sur [OK].
RÉGLAGE DES CHAÎNES Si vous avez modifié la connexion de l’antenne, nous recommandons que vous programmiez les chaînes disponibles dans votre zone selon les procédures suivantes. Balayage auto des chaînes STANDBY-ON DTV/TV SOURCE .@/: ABC DEF GHI JKL MNO PQRS TUV WXYZ SPACE CLEAR AUDIO REPEAT SETUP DISC MENU OPEN/ CLOSE CHANNEL HDMI TITLE OK RETURN DISPLAY V.REPLAY 1 2 3 4 Appuyez sur [SETUP] et utilisez [K / L] pour sélectionner “Réglage général”, puis appuyez sur [OK].
RÉGLAGE DES CHAÎNES SOURCE ABC DEF GHI JKL MNO PQRS TUV WXYZ SPACE CLEAR AUDIO REPEAT SETUP DISC MENU CHANNEL HDMI Le menu “Réglage général” apparaît. Utilisez [K / L] pour sélectionner “Canal” puis appuyez sur [OK]. Le menu “Canal” apparaît. Utilisez [K / L] pour sélectionner “Préréglage manuel des canaux” puis appuyez sur [OK]. Préréglage auto des canaux Préréglage manuel des canaux Sélection audio TV TITLE OK V.
RÉGLAGE DES CHAÎNES 5 6 ANALOGUE Sélectionnez le numéro de chaîne à supprimer. • Utilisez [CHANNEL / ] pour ne parcourir que les chaînes mémorisées. • Utilisez [{ / B] pour parcourir toutes les chaînes, y compris celles qui ne sont pas mémorisées. • Utilisez [les touches numérotées] pour sélectionner directement une chaîne. • Lorsqu’une chaîne mémorisée est sélectionnée, “Ajouter” est coché et sélectionné par défaut.
RÉGLAGE DE L’HORLOGE Réglage auto de l’horloge SOURCE ABC DEF GHI JKL MNO PQRS TUV WXYZ SPACE CLEAR AUDIO REPEAT SETUP DISC MENU CHANNEL Utilisez [K / L] pour sélectionner “Auto” puis appuyez sur [OK]. Réglage horloge auto HDMI RETURN V.SKIP 5 6 Appuyez sur [SETUP] pour quitter. Appuyez sur [STANDBY-ON y] pour éteindre l’appareil. Cet appareil recherche l’heure uniquement lorsqu’il est éteint. Laissez-le éteint plusieurs minutes afin qu’il ait le temps de régler l’horloge.
RÉGLAGE DE L’HORLOGE Réglage manuel de l’horloge 1 2 3 4 Appuyez sur [SETUP] et utilisez [K / L] pour sélectionner “Réglage général”, puis appuyez sur [OK]. Si le réglage “Heure d’été” est “EF”, l’horloge de l’appareil se règle en fonction de l’heure d’été. “EF (MAR - NOV)” est sélectionné par défaut. Le menu “Réglage général” apparaît. 1 2 3 4 Utilisez [K / L] pour sélectionner “Horloge” puis appuyez sur [OK]. Le menu “Horloge” apparaît.
RÉGLAGES DU TUNER Vous pouvez facilement passer de la télévision analogique (NTSC) et à la télévision numérique (ATSC) avec la télécommande. Remarques DTV 125. 1 Remarques Balayage en cours À propos de la diffusion de la télévision numérique : Avec sa diffusion en haute définition, la diffusion numérique surpasse largement les qualités d’image et de son de la diffusion analogique. Sélection d’un chaîne [CHANNEL / ] Utilisez [CHANNEL / ] ou [les ] pour changer de chaîne.
RÉGLAGES DU TUNER Cette section décrit la commutation du son de la télévision. Pendant l’enregistrement d’un programme de télévision, seul l’audio choisi ici sera enregistré. Sélection du l’audio de TV TV numérique SOURCE STANDBY-ON DTV/TV .@/: ABC DEF GHI JKL MNO PQRS TUV WXYZ SPACE CLEAR AUDIO REPEAT SETUP DISC MENU OPEN/ CLOSE HDMI OK RETURN V.REPLAY Anglais 1/2 CHANNEL TITLE DISPLAY 1 Appuyez sur [AUDIO] pour parcourir les langues audio disponibles. V.
RÉGLAGES DU TUNER Introduction Sélection du l’audio de TV (suite) TV analogique SOURCE ABC DEF GHI JKL MNO PQRS TUV WXYZ SPACE CLEAR AUDIO REPEAT SETUP DISC MENU CHANNEL HDMI TITLE RETURN Le menu “Réglage général” apparaît. Utilisez [K / L] pour sélectionner “Canal” puis appuyez sur [OK]. Le menu “Canal” apparaît. Utilisez [K / L] pour sélectionner “Sélection audio TV” puis appuyez sur [OK]. Utilisez [K / L] pour sélectionner “Stéréo” ou “SAP” puis appuyez sur [OK].
RÉGLAGES DU TUNER Sous-titres DTV TV numérique La TV numérique dispose de ses propres sous-titres appelés DTV CC (ST DTV). Utilisez ce menu pour modifier les réglages des ST DTV. STANDBY-ON DTV/TV .@/: SOURCE ABC DEF GHI JKL MNO PQRS TUV WXYZ SPACE CLEAR AUDIO REPEAT SETUP OPEN/ CLOSE DISC MENU CHANNEL HDMI 1 2 3 TITLE Appuyez sur [SETUP] et utilisez [K / L] pour sélectionner “Réglage général”, puis appuyez sur [OK]. Le menu “Réglage général” apparaît.
RÉGLAGES DU TUNER Introduction Style des sous-titres TV numérique La TV numérique peut également modifier le style de ses sous-titres y compris le caractère, la couleur ou la taille, etc. SOURCE ABC DEF GHI JKL MNO PQRS TUV WXYZ SPACE CLEAR AUDIO REPEAT SETUP HDMI TITLE OK Le menu “Réglage général” apparaît. Utilisez [K / L] pour sélectionner “Affichage” puis appuyez sur [OK]. Utilisez [K / L] pour sélectionner “Style S-T” puis appuyez sur [OK].
RÉGLAGES DU TUNER 6 Utilisez [K / L] pour sélectionner l’élément et commuter le réglage de chaque élément que vous voulez modifier, puis appuyez sur [OK]. Le type de bord des sous-titres affichés peut être choisi comme suit. Type Bord Aucun Accru Réduit Uniforme Ombre G. Ombre Dr. • Quand le “Param. Utilis” est sur “EF”, vous pouvez réglez les éléments suivants. Le style ST défini dans les “Param. Utilis” est affiché.
INFORMATIONS SUR L’ENREGISTREMENT DE DVD Lisez les informations suivantes avant d’effectuer un enregistrement. Disque non enregistrable Logo Caractéristiques DVD+R DVD-RW DVD-R Nombre maximum de titres / chapitres enregistrables DD : DVD : 600 titres 99 chapitres par titre 49 titres par disque 254 chapitres par disque 99 chapitres par titre Configuration de base DVD+RW Disque à couche unique, une face, 8 cm/12 cm Durée d’enregistrement max.
INFORMATIONS SUR L’ENREGISTREMENT DE DVD Mode d’enregistrement Description du DD Vous pouvez choisir un mode d’enregistrement parmi 6 options, la durée d’enregistrement dépendra du mode d’enregistrement sélectionné comme suit.
AVANT L’ENREGISTREMENT 1) Appuyez sur [SETUP] et utilisez [K / L] pour sélectionner “Réglage général”, puis appuyez sur [OK]. 2) Utilisez [K / L] pour sélectionner “Affichage” puis appuyez sur [OK]. 3) Utilisez [K / L] pour sélectionner “DTV CC” puis appuyez sur [OK]. 4) Utilisez [K / L] pour sélectionner “Enregist.” puis appuyez sur [OK]. • Si “Serv. sous-titres” est réglé sur “HF”, vous ne pouvez pas choisir “Enregist.”. 5) Utilisez [K / L] pour sélectionner “EF” puis appuyez sur [OK]. Enr.
ENREGISTREMENT DE BASE ET ENREGISTREMENT EXPRESS Suivez les étapes pour enregistrer des programmes de télévision. STANDBY-ON DTV/TV SOURCE .@/: ABC DEF GHI JKL MNO PQRS TUV WXYZ SPACE CLEAR AUDIO REPEAT SETUP DISC MENU Le chargement du disque peut prendre quelques instants. • Lors de l’insertion d’un DVD+RW/DVD-RW neuf, l’appareil démarre automatiquement son formatage. (Sauf lors de l’enregistrement sur DD, ou si une programmation différée démarre dans les 15 minutes.
ENREGISTREMENT DE BASE ET ENREGISTREMENT EXPRESS “I HDD” ou “I DVD” sera affiché pendant 5 secondes. p.ex.) DVD I DVD Comme pour l’enregistrement sur DVD, la liste des titres apparaît automatiquement lorsque l’écriture sur un disque est terminée. (Consultez le “Guide de la liste des titres” en page 79.) p.ex.) DVD+R Connexions Appuyez sur [PAUSE F] pour suspendre l’enregistrement. Appuyez à nouveau sur [PAUSE F] ou sur [REC] pour redémarrer l’enregistrement.
ENREGISTREMENT AUTOMATIQUE À chaque fois que vous mettez cet appareil en marche, il enregistre la chaîne en cours et stocke temporairement le contenu enregistré sur le disque dur (Enregistrement automatique). En utilisant cette fonction, vous pouvez mettre en pause le programme que vous regardez ou y revenir, et vous pouvez aussi commencer à enregistrer la totalité du programme même s’il en est déjà à la moitié. L’enregistrement temporaire peut durer jusqu’à 6 heures d’affilée.
ENREGISTREMENT PROGRAMMÉ Guide de l’écran de la programmation en différé 3 1 Introduction 2 Programmation FÉV/20/08 10:30 AM 125.1 SP SP (1:00) MAR FÉV/19 11:30AM Date FÉV/20 Début Fin CH 10:30AM 11:30AM DTV125. 1 Nouv. prog. 6 Connexions Vous pouvez programmer l’appareil pour l’enregistrer jusqu’à 36 programmes, jusqu’à un mois à l’avance. Les enregistrements programmés quotidiens ou hebdomadaires sont également possibles.
ENREGISTREMENT PROGRAMMÉ 4 Date FÉV/20 CH DTV125. 1 Début 10 : 30AM ENR sur HDD 2h00m • Un enregistrement programmé dont la durée d’enregistrement dépasse 12 heures ne peut pas être effectué. Utilisez [K / L / s / B] pour sélectionner le mode analogique (“- - -”) / numérique (“DTV”) ou une entrée externe (L1 / L2) puis appuyez sur [B]. p.ex.) mode d’entrée externe Date FÉV/20 CH L1 Début 10 : 30AM ENR sur HDD Fin 11 : 30AM Mode SP SP 1h00m Pour enregistrer à partir d’une entrée externe (p.ex.
ENREGISTREMENT PROGRAMMÉ Sélection d’un numéro de chaîne pour l’enregistrement programmé CATV analogique TV numérique Pour les numéros de chaîne 2-6, appuyez sur [B] ou [ • ] afin de choisir les chaînes. Les autres chaînes (7-69) sont choisies dès que vous saisissez leur numéro. Pour les numéros de chaîne 1-12, appuyez sur [B] ou [ • ] afin de choisir les chaînes. Les autres chaînes (13-125) sont choisies dès que vous saisissez leur numéro.
ENREGISTREMENT PROGRAMMÉ Conseils pour l’enregistrement programmé • En cas de panne de courant ou si cet appareil a été débranché pendant plus de 30 secondes, le réglage de l’horloge et toutes les programmations en différé sont perdus. • Lors d’un enregistrement sur DVD, si aucun disque n’est inséré, l’appareil exécute un enregistrement relais sur le DD (reportez-vous à la page 46).
ENREGISTREMENT SPÉCIAL La liste des titres apparaît. Si la liste des titres n’apparaît pas, appuyez sur [TITLE]. 1 SP(2h) NOV/21/08 11:00AM CH12 SP NOV/21/08 0:20:44 2 2) Appuyez sur [K / L] pour sélectionner “Lecture”, puis appuyez sur [OK]. La lecture démarre. 3) Appuyez sur [PAUSE F] au point à partir duquel vous voulez commencer à écraser. NOV/22/08 11:35AM CH13 EP NOV/22/08 0:10:33 3 6) Appuyez à nouveau sur [REC]. L’écrasement par l’enregistrement démarre.
ENREGISTREMENT SPÉCIAL Conseils pour l’écrasement Lors de l’écrasement du titre inutile, les divers cas de figures ci-dessous peuvent se présenter. Notez que les cas suivants décrivent seulement l’écrasement sans anomalie du mode d’enregistrement. Pour éviter un effacement accidentel, confirmez l’absence de titre important après le point d’écrasement.
COPIE Introduction Informations sur la copie Vous pouvez copier le contenu du DD sur un DVD ou inversement. Avant de démarrer la copie, consultez la page 41 pour déterminer la compatibilité de l’enregistrement. Guide de l’affichage du menu de copie 1 HDD Mode d’enregistrement de la copie DVD 3 2 Ajouter Suppr. tout Début montage 4 1/1 Sens de la copie Menu de copie Espace enregistrable restant Liste de copie Numéro de page courant / nombre total de pages Autres E2M01UD_H2160MW9_FR_Book.
COPIE Réglages pour un appareil externe Branchez correctement l’appareil externe à l’appareil en utilisant les prises d’entrée L2 et L3 (avant) ou L1 (arrière). Lors de la connexion d’un appareil externe de sortie monaurale à cet appareil, utilisez la prise AUDIO L de L1 (arrière) ou L2 (avant). Utilisez des câbles audio/vidéo S-vidéo ou RCA pour cette connexion. Lors de la connexion d’un caméscope numérique (DVC, Digital Video Camcorder), utilisez la prise d’entrée DV-IN de L3 (avant).
COPIE Avant l’enregistrement d’un appareil externe, consultez les instructions relatives à la connexion en page 52. SOURCE STANDBY-ON DTV/TV DEF GHI JKL MNO PQRS TUV WXYZ SPACE CLEAR AUDIO REPEAT SETUP DISC MENU CHANNEL HDMI TITLE 1 Insérez un disque enregistrable (consultez la page 26 pour savoir comment insérer un disque). 2 Sélectionnez le canal d’entrée externe appropriée (L1, L2 ou L3) en appuyant sur [SOURCE] ou [CHANNEL / ]. RETURN V.REPLAY V.
COPIE Informations sur la copie de DV Guide de la DV et de l’affichage à l’écran Cette fonction vous aide à repiquer facilement le contenu d’un DVC (caméscope vidéo numérique) sur DD ou DVD. Vous pouvez commander les principales opérations de la DVC avec la télécommande de cet appareil telles que la lecture, l’avance et le recul rapides et l’arrêt de toutes les fonctions si le DVC est en mode vidéo. Utilisez le câble DV avec une prise jack d’entrée à 4 broches, elle est conforme à la norme IEEE1394.
COPIE Avant l’enregistrement d’un DVC, consultez les instructions de branchement de la page 52. ABC DEF GHI JKL MNO PQRS TUV WXYZ SPACE CLEAR AUDIO REPEAT SETUP DISC MENU CHANNEL Si vous copiez sur le DD, appuyez d’abord sur [HDD]. Si vous copiez sur un disque, appuyez d’abord sur [DVD]. 1 Utilisez [SOURCE] ou [CHANNEL / ] pour sélectionner “L3 (DV-ENTRÉE)”. L3 (DV-ENTRÉE) AB-1234 0:00:00 HDMI Configuration de base .
COPIE 6 7 Utilisez [K / L] pour sélectionner “Début enrg” puis appuyez sur [OK]. Le repiquage démarre. Pour arrêter la copie ; Utilisez [K / L] pour sélectionner “Commande” puis appuyez sur [OK]. Utilisez [K / L] pour sélectionner “HDD” / “DVD” (le composant avec lequel vous voulez enregistrer) puis appuyez sur [OK]. Appuyez sur [STOP C].
COPIE Introduction Sélectionnez la copie de titre Préparation de la copie (DD vers DVD) : • Insérez un DVD enregistrable. Préparation de la copie (DVD vers DD) : • Insérez un disque à copier. SOURCE ABC DEF GHI JKL MNO PQRS TUV WXYZ SPACE CLEAR AUDIO REPEAT CHANNEL 1 2 Appuyez sur [SETUP] en mode arrêt. Utilisez [K / L] pour sélectionner “Doublage” puis appuyez sur [OK]. Configuration de base .
COPIE 5 Utilisez [K / L / s / B] pour sélectionner le titre désiré puis appuyez sur [OK]. p.ex.) DD 8 Liste titres p.ex.) DD ➡ DVD HDD ABCDE 12:00AM (10:00:00) JAN/ 1/08 1 Utilisez [s / B] pour sélectionner le mode d’enregistrement de votre choix, puis appuyez sur [OK]. 2 3 Choisir REC MODE. Haut 4 5 DVD CH10 SP HQ SP SPP LP EP Copie titres 6 SLP Auto 500 MB 3000 MB 1/6 Le titre est à présent enregistré dans la liste des copies.
COPIE Cette fonction vous permet de sélectionner un titre donné dans la liste des titres en vue de sa copie. DEF GHI JKL MNO PQRS TUV WXYZ SPACE CLEAR AUDIO REPEAT SETUP DISC MENU CHANNEL HDMI TITLE OK RETURN DISPLAY V.SKIP RAPID PLAY HDD DVD TIMER REC MODE REC Reprise lecture Lire dès début Edition Effacer titre Effacer Plusieurs Titres Doublage Utilisez [K / L] pour sélectionner “Oui” puis appuyez sur [OK]. Démarrer copie? Oui Non La copie du titre sélectionné démarre.
PROTECTION D’UN DISQUE Pour éviter un enregistrement, une édition ou un effacement des titres accidentels, vous pouvez les protégez dans le menu “Edition d’un disque”. STANDBY-ON DTV/TV SOURCE .@/: ABC DEF GHI JKL MNO PQRS TUV WXYZ SPACE CLEAR AUDIO SETUP REPEAT DISC MENU OPEN/ CLOSE CHANNEL 1 2 3 Appuyez sur [SETUP]. Utilisez [K / L] pour sélectionner “Edition d’un disque” puis appuyez sur [OK]. Utilisez [K / L] pour sélectionner “Protection de disque HF EF”, puis appuyez sur [OK]. p.
LECTURE DES DISQUES SUR D’AUTRES LECTEURS DE DVD ABC DEF GHI JKL MNO PQRS TUV WXYZ SPACE CLEAR AUDIO REPEAT SETUP CHANNEL Le menu “Edition d’un disque” apparaît. Utilisez [K / L] pour sélectionner “Fermeture” puis appuyez sur [OK]. Utilisez [K / L] pour sélectionner “Oui” puis appuyez sur [OK]. p.ex.) DVD+R, DVD-R Final. disque ? Enregistrement .@/: OPEN/ CLOSE Utilisez [K / L] pour sélectionner “Edition d’un disque” puis appuyez sur [OK].
LECTURE DES DISQUES SUR D’AUTRES LECTEURS DE DVD Finalisation auto Vous pouvez finaliser automatiquement les disques avec cette fonction. Vous pouvez l’utiliser pour finaliser les disques après l’achèvement de tous les enregistrements programmés et lorsqu’il ne reste plus d’espace sur le disque. SOURCE STANDBY-ON DTV/TV .
INFORMATIONS SUR LA LECTURE Disques et fichiers lisibles Disques non lisibles Disques lisibles Logos DVD vidéo DVD+R Systèmes de couleur DVD-R (Disques finalisés en mode vidéo seulement) Enregistrement Les DVD sont enregistrés selon différents systèmes de couleur dans le monde entier. Le système de couleur le plus courant est NTSC (utilisé principalement aux ÉtatsUnis et au Canada). Cet appareil utilise le NTSC, les DVD que vous lisez doivent donc être enregistrés selon le système NTSC.
INFORMATIONS SUR LA LECTURE PBC (commande de la lecture) pour CD vidéo Vous pouvez sélectionner les images ou les informations dans le menu à l’écran en activant la fonction PBC (commande de la lecture) du CD vidéo. Cet appareil est conforme aux standards de CD vidéo versions 1.1 et 2.0 avec fonction PBC. Version 1.1 (sans fonction PBC) : Vous pouvez lire des images et des CD de musique. Version 2.
LECTURE SIMPLE Introduction Lecture directe Si vous lisez les titres du DD, appuyez sur d’abord sur [HDD] puis passez à l’étape 2. Si vous lisez les titres d’un DVD, appuyez d’abord sur [DVD]. SOURCE ABC DEF GHI JKL MNO PQRS TUV WXYZ SPACE CLEAR AUDIO REPEAT SETUP DISC MENU CHANNEL 1 Alignez le disque sur le guide de son tiroir. HDMI OK Le chargement du disque peut prendre quelques instants. RETURN V.REPLAY V.SKIP D.
LECTURE SIMPLE Lecture à partir de la liste des titres 2 STANDBY-ON DTV/TV SOURCE .@/: ABC DEF GHI JKL MNO PQRS TUV WXYZ SPACE CLEAR AUDIO REPEAT SETUP DISC MENU OPEN/ CLOSE • Pour quitter la liste des titres, appuyez sur [STOP C]. • Pour rappeler la liste des titres, appuyez sur [TITLE]. CHANNEL HDMI Pour le DD, appuyez sur [TITLE] afin d’afficher la liste des titres. La liste des titres d’un DVD apparaît automatiquement quand vous insérez un disque.
LECTURE SIMPLE Si vous voulez voir les informations du disque, appuyez sur [{ ] quand la première page de la liste des titres est affichée ou appuyez sur [ K ] quand le premier titre est sélectionné mais pas quand “Lecture”, “Edition” ou “Recou. écri.” sont sélectionnés. p.ex.) DVD+RW 4 Utilisez [K / L] pour sélectionner “Lecture“ (pour DVD), ou sélectionnez “Reprise lecture” ou “Lire dès début” (pour le DD), puis appuyez sur [OK]. Introduction Remarque sur la liste des titres d’un DVD p.ex.
LECTURE SIMPLE Lecture d’un CD audio et CD-RW/-R avec des fichiers MP3 / JPEG STANDBY-ON DTV/TV SOURCE .@/: ABC DEF GHI JKL MNO PQRS TUV WXYZ SPACE CLEAR AUDIO REPEAT SETUP DISC MENU OPEN/ CLOSE * Vérifiez que le disque est compatible avec cet appareil. (Consultez la liste des disques compatibles en page 63.) Le chargement du disque peut prendre quelques instants. Lors de l’insertion d’un CD audio, la liste des pistes apparaît.
LECTURE SIMPLE Un DVD ou CD vidéo avec la fonction PBC peut contenir une liste de titres, qui décrit le contenu du disque, ou un menu de disque, qui vous guide dans les fonctions disponibles sur celui-ci. 2) Appuyez sur [TITLE] ou [DISC MENU] pour appeler la liste des titres ou le menu du disque. 2) Appuyez sur [PLAY B] pour reprendre la lecture normale. Remarques • Sur un DVD, réglez “Arrêt Sur Image” sur “Trame” dans le menu “Lecture” si des images sont brouillées en mode pause.
LECTURE SPÉCIALE Reprise de la lecture Remarques Vous pouvez reprendre la lecture où vous vous êtes arrêté. 1) Pendant la lecture, appuyez sur [STOP C]. Le message de reprise apparaît. Reprise en cours 2) Appuyez sur [PLAY B]. La lecture reprend quelques secondes plus tard à partir du point où elle avait été interrompue. Vous pouvez reprendre la lecture en ce point même si vous arrêtez l’appareil (DD / DVD seulement).
LECTURE SPÉCIALE Lecture avec décalage temporel pendant un enregistrement Lecture en avant / en arrière lente Remarques • Vous pouvez aussi utiliser les fonctions de lecture spéciale telles que [E], [D] etc. pendant le mode de lecture avec décalage temporel. • [REC] est inactif pendant la lecture avec décalage temporel. • Vous ne pouvez plus mettre la lecture en avance rapide lorsque vous vous trouvez quelques secondes avant le point d’enregistrement courant. 1) Pendant la lecture, appuyez sur [PAUSE F].
LECTURE SPÉCIALE Réglage des marqueurs Zoom 1) Pendant la lecture, appuyez sur [DISPLAY]. , puis 2) Utilisez [{ / B] pour sélectionner appuyez sur [OK] dans 1 seconde qui suit ou attendez 1 seconde pour afficher le menu de sélection. p.ex.) DVD vidéo 1/ 5 1/ 5 0:01:00 / 1:23:45 DVD Video Cette fonctionnalité vous permet d’affecter un point spécifique sur un titre afin de le rappeler ultérieurement. 1) Pendant la lecture, appuyez sur [DISPLAY].
LECTURE SPÉCIALE Répétition de lecture La fonction de répétition disponible peut varier en fonction des disques. 1) Pendant la lecture appuyez sur [DISPLAY], puis passez à l’étape 2), ou appuyez sur [REPEAT] et passez à l’étape 3). 1/ 5 1/ 5 0:01:00 / 1:23:45 DVD Video 1/ 5 1/ 5 0:01:00 / 1:23:45 DVD Video HF Titre Chapitre A–B Vous pouvez lire un disque de façon aléatoire au lieu de le lire dans l’ordre d’origine. 1) Appuyez sur [SETUP].
LECTURE SPÉCIALE Lecture programmée Lecture de l’enregistrement automatique Vous pouvez programmer la lecture du disque dans votre ordre préféré. 1) Appuyez sur [SETUP]. 2) Utilisez [K / L] pour sélectionner le “Mode lecture CD” puis appuyez sur [OK]. Le menu “Mode lecture CD” apparaît. 3) Utilisez [K / L] pour sélectionner “Lecture programmée” puis appuyez sur [OK]. 4) Utilisez [K / L] pour sélectionner une piste de votre choix puis appuyez sur [OK] ou [B].
RECHERCHE Recherche de piste Introduction Recherche de titre / de chapitre 1) Pendant la lecture, appuyez sur [G] pour sauter le titre ou le chapitre courant et pour passer au suivant. Le titre ou le chapitre sont parcourus en séquence. • Si un titre ne contient pas de chapitre, le titre courant est sauté. Pour revenir au début du titre ou du chapitre courant, appuyez sur [H]. Appuyez plusieurs fois sur la touche pour passer au titre ou au chapitre précédent.
RECHERCHE Recherche chronologique 1) Pendant la lecture, appuyez sur [DISPLAY]. 2) Utilisez [{ / B] pour sélectionner sur [OK]. p.ex.) DVD vidéo 1/ 5 1/ 5 puis appuyez 0:01:00 / 1:23:45 DVD Video p.ex.) CD audio 1/ 5 0:00:15 / 0:05:00 CD Le numéro à côté de est sélectionné. Pour passer au numéro en regard de , appuyez sur [B]. Si la recherche chronologique n’est pas disponible, et la durée ne sont pas affichés.
SÉLECTION DES FORMATS AUDIO ET VIDÉO Commutation des sous-titres Introduction Vous pouvez sélectionner les formats audio et vidéo selon vos préférences en fonction du contenu du disque que vous lisez. Commutation de la piste audio 1) Pendant la lecture, appuyez sur [DISPLAY]. 1) Pendant la lecture appuyez sur [DISPLAY], puis passez à l’étape 2), ou appuyez sur [AUDIO] et passez à l’étape 3).
SÉLECTION DES FORMATS AUDIO ET VIDÉO Commutation du système d’ambiance virtuelle Vous pouvez profitez à l’espace stéréophonique virtuel avec votre système stéréo à 2 canaux existant. 1) Pendant la lecture, appuyez sur [DISPLAY]. 2) Utilisez [{ / B] pour sélectionner , puis appuyez sur [OK] dans 1 seconde qui suit ou attendez 1 seconde pour afficher le menu de sélection. p.ex.) DVD vidéo 1/ 5 1/ 5 Commutation des angles de caméra Certains DVD vidéo ont des scènes filmées de 2 angles différents ou plus.
INFORMATIONS SUR L’ÉDITION La liste des titres vous permet de connaître facilement les titres enregistrés sur le DD ou le disque. Vous pouvez choisir de lire un titre à partir de cette liste et y éditer facilement les titres que vous préférez. Appuyez sur [HDD] puis sur [TITLE]. Appuyez sur [DVD] puis sur [TITLE].
INFORMATIONS SUR L’ÉDITION Menu édition Média Fonctions disponibles Affectation de noms aux titres DD DVD ✔ ✔ Suppression d’un titre ✔ ✔ Suppression des titres sélectionnés ✔ Suppression d’une scène d’un titre ✔ Ajout / suppression de repères de chapitre ✔ ✔ ✔ Masquage de chapitres Protection d’un titre ✔ Division d’un titre ✔ ✔ *1 Définition d’une image d’index ✔ Finalisation d’un disque ✔ Compatibilité des éditions ✔ *2 Affectation d’un nom au disque ✔ Application ou suppressio
ÉDITION Vous pouvez supprimer un titre dont vous n’avez plus besoin. Sachez que les titres supprimés ne peuvent pas être restaurés sur le disque. SOURCE ABC DEF GHI JKL MNO PQRS TUV WXYZ SPACE CLEAR AUDIO REPEAT SETUP DISC MENU OPEN/ CLOSE CHANNEL 1 2 HDMI TITLE Appuyez sur [TITLE]. Utilisez [K / L / { / B] pour sélectionner le titre de votre choix puis appuyez sur [OK]. Si vous éditez les titres du DD, passez à l’étape 4. Si vous éditez les titres du DVD, passez à l’étape 3.
ÉDITION 4 Utilisez [K / L] pour sélectionner “Effacer titre” puis appuyez sur [OK]. Mode DD Reprise lecture Lire dès début Edition Effacer titre Effacer Plusieurs Titres Doublage Le message final de confirmation apparaît. Sélectionnez “Oui” puis appuyez sur [OK]. Le titre est maintenant supprimé. Liste titres JAN/ 1/08 12:00AM CH10 SP 12:00AM (1:00:00) JAN/ 1/08 Mode DVD Edition 1 5 Utilisez [K / L] pour sélectioner “Oui” puis appuyez sur [OK].
ÉDITION Vous pouvez supprimer un titre dont vous n’avez plus besoin. Sachez que les titres supprimés ne peuvent pas être restaurés sur le disque. ABC DEF GHI JKL MNO PQRS TUV WXYZ CHANNEL AUDIO REPEAT JAN/ 1/08 CH10 SP 1 2 3 4 5 6 HDMI TITLE 1/1 Le symbole de corbeille apparaît pour indiquer que le titre est marqué pour la suppression. OK RETURN DISPLAY V.REPLAY Répétez l’étape 4 jusqu’à ce que tous les titres que vous voulez supprimer soient sélectionnés.
ÉDITION Nommage des titres Vous pouvez affecter des noms de titres aux titres et les modifier dans ce menu. .@/: ABC DEF GHI JKL MNO PQRS TUV WXYZ SPACE CLEAR AUDIO REPEAT Edition - Editer titre OPEN/ CLOSE SOURCE STANDBY-ON DTV/TV 4 Utilisez [K / L] pour sélectionner “Oui” puis appuyez sur [OK]. 1 Oui Non CHANNEL MON FAVORI 1 : 05 : 00 Le nom du titre est à présent à jour.
ÉDITION Vous pouvez mettre des marqueurs de chapitre dans chaque titre. Lorsqu’un chapitre est marqué, vous pouvez l’utiliser avec la fonction de recherche de chapitre. SOURCE ABC DEF GHI JKL MNO PQRS TUV WXYZ SPACE CLEAR AUDIO REPEAT SETUP DISC MENU CHANNEL HDMI TITLE RETURN DISPLAY V.REPLAY Utilisez [K / L] pour sélectionner “Repère chapitre” appuyez sur [OK]. Le sous-menu apparaît. Lisez le titre jusqu’au point où vous voulez définir un nouveau repère de chapitre.
ÉDITION Repères de chapitre (suppression) Pour supprimer un repère de chapitre : SOURCE STANDBY-ON DTV/TV .@/: ABC DEF GHI JKL MNO PQRS TUV WXYZ SPACE CLEAR AUDIO REPEAT SETUP DISC MENU OPEN/ CLOSE CHANNEL HDMI TITLE 1 2 3 Utilisez [K / L] pour sélectionner “Repère chapitre” appuyez sur [OK]. Le sous-menu apparaît. Utilisez [H] / [G] pour aller au chapitre portant le numéro de repère de chapitre que vous voulez supprimer, puis appuyez sur [PAUSE F].
ÉDITION Introduction Repères de chapitre (suppression totale) Pour supprimer tous les marqueurs de chapitre : SOURCE STANDBY-ON DTV/TV DEF GHI JKL MNO PQRS TUV WXYZ SPACE CLEAR AUDIO REPEAT SETUP DISC MENU CHANNEL HDMI TITLE RETURN DISPLAY Utilisez [K / L] pour sélectionner “Repère chapitre” appuyez sur [OK]. Le sous-menu apparaît. Utilisez [K / L] pour sélectionner “Suppres. tot.” puis appuyez sur [OK]. Utilisez [K / L] pour sélectioner “Oui” puis appuyez sur [OK].
ÉDITION Division d’un titre Vous pouvez diviser un titre en 2 nouveaux titres. STANDBY-ON DTV/TV SOURCE .@/: ABC DEF GHI JKL MNO PQRS TUV WXYZ SPACE CLEAR AUDIO REPEAT SETUP DISC MENU OPEN/ CLOSE CHANNEL HDMI TITLE OK 1 2 3 4 Suivez les étapes de “Comment accéder au menu d’édition” en page 80 pour afficher le menu “Edition”. Lisez le titre jusqu’au point où vous voulez le diviser. Lorsque vous arrivez au point désiré, appuyez sur [PAUSE F]. Utilisez [K / L] pour sélectionner “Div.
ÉDITION Vous pouvez supprimer une partie spécifique d’un titre. SOURCE ABC DEF GHI JKL MNO PQRS TUV WXYZ SPACE CLEAR AUDIO REPEAT Utilisez [K / L] pour sélectionner “Effacer scène” puis appuyez sur [OK]. Edition CHANNEL 1 SETUP Effacer scène Editer titre Repère chapitre Div. titres Protéger Configuration de base .@/: OPEN/ CLOSE Connexions STANDBY-ON DTV/TV 1 2 Suivez les étapes de “Comment accéder au menu d’édition” en page 80 pour afficher le menu “Edition”.
ÉDITION 5 “Aperçu” étant sélectionné, appuyez sur [OK] pour visionner le résultat. Vous pouvez visionner 5 secondes avant et après la scène supprimée chaque fois que vous appuyez sur [OK]. • Si le résultat ne vous convient pas, utilisez [K / L] pour revenir à “Début” ou “Fin” et réitérez leur définition. • Si le résultat vous satisfait, passez à l’étape 6. 7 Utilisez [K / L] pour sélectionner “Oui” puis appuyez sur [OK].
ÉDITION Afin d’éviter une édition accidentelle, ou l’effacement de titres, vous pouvez définir une protection dans le menu “Edition”. SOURCE ABC DEF GHI JKL MNO PQRS TUV WXYZ SPACE CLEAR AUDIO REPEAT Edition 1 CHANNEL Effacer scène Editer titre Repère chapitre Div. titres Protéger Configuration de base .@/: OPEN/ CLOSE Utilisez [K / L] pour sélectionner “Protéger” puis appuyez sur [OK].
ÉDITION Masquage des chapitres Vous pouvez cacher des chapitres dans la liste des titres. Les chapitres cachés sont ignorés pendant la lecture. STANDBY-ON DTV/TV SOURCE .@/: ABC DEF GHI JKL MNO PQRS TUV WXYZ SPACE CLEAR AUDIO REPEAT SETUP DISC MENU OPEN/ CLOSE CHANNEL HDMI 1 2 3 4 Suivez les étapes de “Comment accéder au menu d’édition” en page 80 pour afficher le menu “Edition”. Utilisez [K / L] pour sélectionner “Cach. chap.” puis appuyez sur [OK]. Le sous-menu apparaît.
ÉDITION Vous pouvez définir la scène de votre choix comme image d’index pour chaque titre. SOURCE ABC DEF GHI JKL MNO PQRS TUV WXYZ SPACE CLEAR AUDIO REPEAT SETUP DISC MENU CHANNEL HDMI TITLE Lisez le titre afin de trouver la scène que vous voulez utiliser comme image d’index. Lorsque vous arrivez au point désiré, appuyez sur [PAUSE F]. Utilisez [K / L] pour sélectionner “Indexer image” puis appuyez sur [OK]. Utilisez [K / L] pour sélectioner “Oui” puis appuyez sur [OK].
ÉDITION Nommage d’un disque Appuyez sur [STOP C] si vous lisez actuellement un disque. Vous pouvez affecter un nom au disque et le modifier dans ce menu. STANDBY-ON DTV/TV SOURCE .@/: ABC DEF GHI JKL MNO PQRS TUV WXYZ SPACE CLEAR AUDIO REPEAT SETUP OPEN/ CLOSE CHANNEL 1 2 3 Appuyez sur [SETUP]. Utilisez [K / L] pour sélectionner “Edition d’un disque” puis appuyez sur [OK]. Utilisez [K / L] pour sélectionner “Nom du disque édité” puis appuyez sur [OK]. p.ex.
ÉDITION Vous pouvez effacer tous les titres d’un disque. SOURCE ABC DEF GHI JKL MNO PQRS TUV WXYZ SPACE CLEAR AUDIO REPEAT SETUP DISC MENU CHANNEL HDMI 1 2 3 Utilisez [K / L] pour sélectionner “Edition d’un disque” puis appuyez sur [OK]. Configuration de base .@/: OPEN/ CLOSE Appuyez sur [SETUP]. Connexions STANDBY-ON DTV/TV Appuyez sur [STOP C] si vous lisez actuellement un disque. Utilisez [K / L] pour sélectionner “Disque effacé” puis appuyez sur [OK]. p.ex.
ÉDITION Rendre les éditions compatibles Si vous avez ajouté ou supprimé des chapitres, ou créé des chapitres cachés, vous devez exécuter “Permet édit. Compatib.” avant de voir ces effets sur un autre appareil. SOURCE STANDBY-ON DTV/TV .@/: ABC DEF GHI JKL MNO PQRS TUV WXYZ SPACE CLEAR AUDIO REPEAT OPEN/ CLOSE CHANNEL Appuyez sur [STOP C] si vous lisez actuellement un disque. 1 2 3 Appuyez sur [SETUP]. Utilisez [K / L] pour sélectionner “Edition d’un disque” puis appuyez sur [OK].
ÉDITION Appuyez sur [STOP C] si vous lisez actuellement un disque. STANDBY-ON DTV/TV SOURCE DEF GHI JKL MNO PQRS TUV WXYZ SPACE CLEAR AUDIO REPEAT SETUP DISC MENU CHANNEL HDMI 1 2 3 TITLE RETURN V.REPLAY Utilisez [K / L] pour sélectionner le type de suppression de votre choix puis appuyez sur [OK]. Sélectionnez “Suppr. titres non protégés” si vous ne voulez supprimer que les titres non protégés. Sélectionnez “Suppr.
LISTE DES RÉGLAGES Le tableau suivant représente le contenu que vous pouvez définir et les réglages par défaut. Consultez le tableau suivant pour connaître des actions pratiques. Configuration Éléments (la sélection est la valeur par défaut) Contenu Lecture Blocage parental Pages 101-104 Disque audio Réglage dynamique PCM Dolby Digital Langue du menu disque Langue audio Langue sous-titre Icône de L’angle Arrêt Sur Image Réglage général Saut / Répet.
LISTE DES RÉGLAGES Configuration Éléments (la sélection est la valeur par défaut) Opacité Police Plein Transparent Translucide Clignotement Définit l’opacité de la police des sous-titres affichés. Couleur Police Blanc Noir Rouge Vert Bleu Jaune Magenta Cyan Définit la couleur de la police des sous-titres affichés. Type Bord Aucun Accru Réduit Uniforme Ombre G. Ombre Dr. Blanc Noir Rouge Vert Bleu Jaune Magenta Cyan Définit le type de bord des sous-titres affichés.
LISTE DES RÉGLAGES Configuration Éléments (la sélection est la valeur par défaut) Affichage V-Chip Pages 105-107 Vidéo Pages 108-109 Cote téléchargée Changer mot de passe Balayage progressif Aspect TV Entrée vidéo Page 52 Réglage général Enregist. Final. auto Page 62 L2(Avant) Entrée vidéo Entrée S-vidéo HF 5 minutes 10 minutes 15 minutes 30 minutes 60 minutes EF HF Disque plein Réglage horloge Réglage horloge auto Réglez le type d’entrée vidéo pour l’entrée externe.
RÉGLAGES Appuyez sur [STOP C] si vous lisez actuellement un disque. SOURCE STANDBY-ON DTV/TV DEF GHI JKL MNO PQRS TUV WXYZ SPACE CLEAR SETUP AUDIO REPEAT DISC MENU CHANNEL 1 2 Le menu “Réglage général” apparaît. Utilisez [K / L] pour sélectionner “Lecture” puis appuyez sur [OK]. Configuration de base ABC Appuyez sur [SETUP] et utilisez [K / L] pour sélectionner “Réglage général”, puis appuyez sur [OK]. Réglage général Lecture Affichage Vidéo Enregist.
RÉGLAGES Lecture (suite) 1 Blocage parental (Par défaut : HF) (DVD seulement) Certains DVD vidéo comportent un niveau de contrôle parental. La lecture s’arrête si le classement dépasse les niveaux que vous définissez, vous devez saisir un mot de passe avant de pouvoir lire le disque. Cette fonctionnalité empêche vos enfants de visionner des médias inadéquats. Utilisez [K / L] pour sélectionner le niveau de votre choix puis appuyez sur [OK].
RÉGLAGES 2 C Disque audio Disque audio A B C Réglage dynamique (Par défaut : EF) (DVD seulement) Réglez sur “EF” pour comprimer la plage entre les sons faibles et forts. Utilisez [K / L] pour sélectionner un réglage puis appuyez sur [OK]. EF HF Votre réglage sera activé. Remarques B Votre réglage sera activé. PCM : Convertit le Dolby Digital en PCM (2 canaux). Si votre amplificateur/décodeur n’est PAS compatible avec le Dolby Digital, choisissez “PCM”.
RÉGLAGES Lecture (suite) 5 Langue sous-titre (Par défaut : HF) (DVD seulement) 7 Arrêt Sur Image (Par défaut : Auto) (DVD seulement) Définit la langue des sous-titres. Utilisez [K / L] pour sélectionner un réglage puis appuyez sur [OK]. Sélectionnez généralement “Auto”. Utilisez [K / L] pour sélectionner un réglage puis appuyez sur [OK]. Langue sous-titre Arrêt Sur Image HF Anglais Français Espagnol Autre Auto Trame Image Votre réglage sera activé.
RÉGLAGES Appuyez sur [STOP C] si vous lisez actuellement un disque. SOURCE STANDBY-ON DTV/TV DEF GHI JKL MNO PQRS TUV WXYZ SPACE CLEAR AUDIO REPEAT SETUP DISC MENU CHANNEL HDMI TITLE 1 2 3 RETURN Utilisez [K / L] pour sélectionner l’élément désiré puis appuyez sur [OK]. 1 2 3 4 5 6 Langue ASE Economiseur d'écran Rhéostat FL DTV CC Style S-T V-Chip Le menu de sélection apparaît. V.REPLAY V.
RÉGLAGES Affichage (suite) 3 Rhéostat FL (Par défaut : Clair) Réglez la luminosité de l’affichage de la face avant. Utilisez [K / L] pour sélectionner un réglage puis appuyez sur [OK]. Rhéostat FL Auto Clair Sombre Vous pouvez choisir parmi “Auto”, “Clair” et “Sombre”. Si “Auto” est sélectionné, l’affichage est atténué lorsque l’appareil est éteint.
RÉGLAGES [Classement EN-CA] Classification E Catégorie plus haut Réservé aux adultes 14+ Ne convient pas aux enfants de moins de 14 ans PG Accompagnement parental suggéré G Tous publics C8+ Convient aux enfants à partir de 8 ans C Convient à tous les enfants E Programme exempté S L D TV-14 TV-PG TV-G TV-Y7 TV-Y NR Catégorie Classification FV Violence fantastique TV-Y7 V Violence S Situations de nature sexuelle L Langage grossier TV-PG TV-14 TV-MA D Dialogue suggestif TV-PG,
RÉGLAGES Vidéo Appuyez sur [STOP C] si vous lisez actuellement un disque. SOURCE STANDBY-ON DTV/TV .@/: ABC DEF GHI JKL MNO PQRS TUV WXYZ SPACE CLEAR AUDIO REPEAT SETUP DISC MENU OPEN/ CLOSE CHANNEL HDMI TITLE 1 2 3 Appuyez sur [SETUP] et utilisez [K / L] pour sélectionner “Réglage général”, puis appuyez sur [OK]. Utilisez [K / L] pour sélectionner “Vidéo” puis appuyez sur [OK]. Utilisez [K / L] pour sélectionner l’élément désiré puis appuyez sur [OK].
RÉGLAGES 1 Balayage progressif (Par défaut : HF) Balayage progressif Utilisez [K / L] pour sélectionner une option de votre choix puis appuyez sur [OK]. Activation d’un balayage progressif: Verifiez que votre TV a cette fonction et utilisez un cable vidéo constituant. Si vous avez un téléviseur standard : Sélectionnez “4:3 Letter Box”, de telle façon que des barres noires apparaissent en haut et en bas de l’écran du téléviseur lors de la lecture d’un film écran large.
RÉGLAGES HDMI SOURCE STANDBY-ON DTV/TV .@/: ABC DEF GHI JKL MNO PQRS TUV WXYZ SPACE CLEAR AUDIO REPEAT SETUP DISC MENU OPEN/ CLOSE HDMI OK RETURN V.REPLAY 4 Une fois les réglages terminés, appuyez sur [SETUP] pour quitter. 1 Format 2 HDMI Audio 3 Plage RVB CHANNEL TITLE DISPLAY 3 Utilisez [K / L] pour sélectionner un réglage puis appuyez sur [OK]. V.SKIP 1 Format (Par défaut : RVB) Vous pouvez choisir l’espace colorimétrique de la sortie HDMI.
RÉGLAGES Réinitialiser les réglages à leurs valeurs par défaut. SOURCE STANDBY-ON DTV/TV DEF GHI JKL MNO PQRS TUV WXYZ SPACE CLEAR AUDIO REPEAT SETUP DISC MENU CHANNEL HDMI V.REPLAY Sélectionnez “Oui” avec [K / L], puis appuyez sur [OK]. Rappel réglages d’usine? 4 Sélectionnez “Oui” à nouveau avec [K / L], puis appuyez sur [OK]. Etes-vous sur ? Oui Non V.SKIP Vos réglages d’enregistrement seront initialisés.
DÉPANNAGE Avant de demander une intervention sur cet appareil, consultez le tableau ci-dessous afin de trouver une cause possible au problème que vous rencontrez. Certains contrôles simples ou un ajustement mineur de votre part peuvent résoudre le problème et restaurer le bon fonctionnement. Symptôme ALIMENTATION L’appareil ne s’allume pas. L’appareil s’allume automatiquement sans action. Le menu de langue OSD apparaît à chaque allumage de l’appareil. L’appareil ne fonctionne pas.
DÉPANNAGE GÉNÉRALITÉS L’image de l’appareil externe ne peut • Essayez d’appuyer plusieurs fois sur [SOURCE]. pas être affichée ou enregistrée. • Allumez tous les appareils connectés. • Contrôlez que toutes les connexions sont correctes et fermes. ENREGISTREMENT DD DD/DVD Réglage des fonctions Autres DVD Édition • Il est impossible d’effectuer un enregistrement 2 minutes avant l’heure de début d’un enregistrement programmé.
DÉPANNAGE Symptôme LECTURE DD DD/DVD GÉNÉRALITÉS Les proportions de l’image de télévision ne correspond pas à l’écran de votre téléviseur. L’image lue est déformée. Les couleurs de l’image sont anormales. Absence de son ou de sous-titres. La lecture ne démarre pas au début. La lecture sur DD s’arrête soudainement. La lecture est impossible. DVD Absence de son ou de sous-titres. Remède • Vérifiez les proportions de l’aspect de la télévision. (Consultez la page 109.
DÉPANNAGE ÉDITION DVD La télécommande ne fonctionne pas. • La télécommande ne contient pas de pile ou les piles sont peut-être faibles. Remplacez les piles. • Assurez-vous qu’il n’y a pas d’obstacle entre la télécommande et l’appareil. • Essayez de vous rapprocher de l’appareil. (Consultez la page 12.) • Si les solutions ci-dessus ne résolvent pas le problème, appelez un centre de réparation agréé. C’est possible si son code de zone est 1 ou ALL.
DÉPANNAGE Message d’erreur Cause Solution Erreur Disque — Éjectez le disque. — La lecture peut ne pas être offerte sur le disque. • Le disque illisible est inséré dans l’appareil. • Le disque est à l’envers. • Insérez un disque normalisé qui porte les marques de la page 63. • Insérez le disque avec l’étiquette vers le haut. Erreur de Région — Éjectez le disque.
CODE DE LANGUE Édition Réglage des fonctions Autres Code 6266 6164 6265 6367 6459 6461 6467 6559 6553 6547 6564 6554 6566 6660 6560 6550 6555 6565 6557 6558 6561 6567 6568 6569 6653 6658 6647 6666 4965 6651 6654 4861 6655 6661 6664 6657 6669 6757 6855 6861 7054 5655 7161 7267 Lecture Langue Portugais Provençal Pushtu ; Pushto Quechua Rhéto-Roman Roumain Russe Samoan Sangho Sanscrit Serbe Serbo-Croate Sesotho Setswana Shana Sindhi Singhalais Siswat Slovaque Slovène Somalien Soudanais Suédois Swahili Tadj
GLOSSAIRE Audio analogique JPEG (joint photographic experts group) Un signal électrique qui représente directement le son. Comparez-le à l’audio numérique qui peut être un signal électrique, mais qui est une représentation indirecte du son. Voir également “Audio numérique”. Le JPEG est une méthode de compression des fichiers d’images fixes. Vous pouvez copier des fichiers JPEG sur CD-RW/-R à partir d’un ordinateur et les lire sur cet appareil.
CARACTÉRISTIQUES TECHNIQUES 13,5 MHz MPEG 2 48 kHz Dolby Digital Système de syntonisation par synthétiseur de fréquence VHF 2~13, UHF 14~69 2~13, A~W, W+1~W+94 (analogue W+1~W+84), A-5~A1, 5A 2 V eff.
GARANTIE LIMITÉE FUNAI CORP. réparera ce produit sans frais aux États-Unis dans le cas d’une défectuosité des matériaux ou d’un défaut de fabrication selon les dispositions suivantes : DURÉE : PIÈCES : MAIN D’ŒUVRE : FUNAI CORP. remplacera les pièces défectueuses sans frais pour une durée d’un (1) an suivant la date d’achat initial. Certaines pièces ne sont pas couvertes par cette garantie. FUNAI CORP.