
User`s guide


Graphics contained within this publication are for representation only.
48
Graphics contained within this publication are for representation only.
49
Chapter 5: Menu System
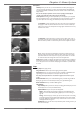
Disc Options
AutoPlay: When you select On, a pre-recorded DVD disc immediately starts playing after
you insert it into the player (there’s no need to press the PLAY button). With AutoPlay On,
recordable discs (DVD+R or DVD+RW) with content recorded on them will automatically
display contents.
Note: For CDs with mp3 or JPEG les on them, instead of playing automatically, the
contents of the CD (the les and/or folders) appear automatically.
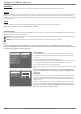
Screen format: the setting you choose adjusts the way a movie appears on your TV (DVD
discs only). Standard TVs are 4 x 3 format. Depending on the type of television you have, you
may want to adjust the screen setting (also called the aspect ratio). The choices follow:
4 x 3 Letterbox
4 x 3 Standard
16 x 9
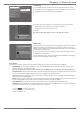
Tape
Play Tape: starts playing the tape.
Play from Start: Rewinds the tape to the beginning and starts playback.
Copy Tape: Allows you to copy the contents of a tape to a DVD+R or DVD+RW disc. The
copy will begin from the current position on the tape to the end of the tape.
Note: Tapes (movies) that have been encoded with copy-protection cannot be copied
to disc.
Review A-B Edits: Allows you to review A-B Edit segments you created using the VCR Info
Display (see page 35 for more information). Also allows you to play A-B Edit segments.
Delete A-B Edits: Allows you to delete A-B Edit segments.
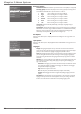
Tape Options:
Tape AutoPlay: When you select On, the tape starts playing automatically after you insert
it into VCR (there’s no need to press the PLAY button).
Playback Mode: Gives you two options for VCR playback:
Digital – Sends the VCR content through the digital part of the DVD/VCR, which
enables you to use the VCR InfoDisplay during playback (for more information, go to
page 35).
Analog – Choose Analog if you want to play a tape and view the picture in true analog
format without going through the digital encode and decode process, which is applied
through the digital path. In the Analog mode, you will not be able to see the on-screen
Info Display described on page 35.
AutoRewind: When you select On, the tape automatically starts rewinding as soon as you
reach the end of the tape.
4 x 3 Letterbox – Choose this setting if you want to see movies in their original aspect
ratio (height-to-width ratio). You’ll see the entire frame of the movie, but it will take up a
smaller portion of the screen vertically. The movie might appear with black bars at the top
and bottom of the screen.
4 x 3 Standard – Choose this setting if you want the movie to ll the entire screen of
your TV. This might mean that parts of the picture (the left and right edges) won’t be seen.
Most discs that are produced in a widescreenonly format can’t be cropped in this fashion.
16 x 9 – Choose this setting if your DVD/VCR is connected to a widescreen TV. If you
choose this setting and you don’t have a widescreen TV, the images on the screen might
appear distorted due to vertical compression. If you play a disc recorded in 4 x 3 format
on a widescreen TV, the left and right sides of the screen will appear black.
Angle Icon: Some DVDs are produced with multiple camera angles. However, it is difcult to
know when the angle feature is available throughout a movie. If you turn on the Angle Display,
an icon will appear on the screen whenever multiple angles are available for a particular scene
in a movie.
Watch TV
Disc
Tape
Disc Library
Timers
Setup
Play Disc
Disc Title Menu
Player Menu
Playlist
Disc Options
To start playback from the beginning, press OK.
Watch TV
Disc
Tape
Disc Library
Timers
Setup
Play Tape
Play From Start
Copy Tape
Rewiew A-B Edits
Delete A-B Edits
Tape Options
To start playback from the beginning, press OK.
Watch TV
Disc
Tape
Disc Library
Timers
Setup
Tape AutoPlay
Playback Mode
Auto Rewind