DVD/ VCR combo � MDVDVCR5 1
Introduction Congratulations on the purchase of your Magnavox DVD and VCR player. It is hoped that you have a lot of enjoyment from your player. Thank you very much for your purchase of this product. To enjoy your player to the full from the very beginning, read this manual carefully and keep it handy for ready reference. • Do not block and of the ventilation openings. Ensure that vents are not covered by newspapers, tablecloths, curtains, etc. Do not install in a tight fitting cabinet.
Compulsory Warning Caution If the supply cord is damaged it must be replaced by the manufacturer or its service agent or a similarly qualified person in order to avoid a hazard. • Do not open - do not attempt to repair, disassemble or modify this appliance. • Dangerous high voltages exist inside this appliance. Save These Instructions • This appliance is only to be serviced by a qualified person. • No user-serviceable parts inside. • Class 1 laser product.
Warning To prevent fire or shock hazard, do not expose this appliance to rain or moisture. The apparatus should not be exposed to dripping or splashing and that no objects filled with liquids, such as vases, shall be placed on the apparatus. The ventillation should not be impeded by covering the ventilation openings with items, such as newspapaers, tablecloths, curtains, etc. No naked flame sources, such as lighted candles, should be placed on the apparatus.
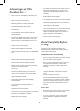
Advantages of This Product Are..... • DVD, VCD, CD, CD-R(MP3), CD-RW, VHS playback function • DVD one-touch record function • Watching DVD for recording broadcast • Integrated REMOTE (VCR, DVD) • Index Search • GUI (Graphical User Interface) OSD (On Screen Display) • By using the [DISPLAY] button on the remote control, information on the DVD / VCD / CD player and disc, can be displayed on the TV screen.
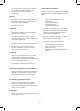
• Tape and Disc Handling In case you don’t use the unit for a long time, the unit may not function properly in the future. Turn on and use the player occasionally. Do not use any tape and disc as below. Damage of video head or cut/coiling of tape may cause failure. Moving • • • • Repack the unit as it was originally packed at the factory. Alternatively, pack this product with towel not to be damaged. • • • Eject any videotape.
Identification of Controls Main body (front panel) 1. Standby/On button Press to turn the VCR on or off. 10. Remote sensor This receiver receives a signal from your remote control. NOTE: The Standby/On button is no function During OTR and Record mode. 11. VCR mode indicator 12 Display panel Display system informations 2. Eject/VCR Press to stop tape movement and eject a video cassette. 13. DVD mode indicator 3. Cassette compartment Insert a video cassette into this slot. 14. Pause/Step 4.
Operation Display Window 1. VCR Operation 7. Disc In Operation 2. Child (Lock) 8. DVD Disc Operation 3. TIMER REC display • TIMER Recording, • To be Timer-recorded, In Timer record state - will flash on/off indicating ‘No tape’ or ‘Tape without tab’ 9. Dolby Sound Indicator 4. Title This is displayed in VCD and CD disc. 12. Copying Indicator Use to copy contents of disc into videotape. 10. dts Sound indicator 11. REC Indicator 5. Chapter This is displayed in DVD disc. 6.
Rear Panel 1. DVD 5.1 CH Audio Out 2. Audio Out (R/L) 3. Video/Audio RCA IN/OUT (AV) 4. TV Antenna In 5. DVD Digital Audio Out(Optical) 6. DVD S-Video Out 7. DVD Component Video Out (Green / Blue / Red) Engineering note: Please check correct color on sockets. Y=Green(top) Blue(middle) Red(bottom) 8. DVD Digital Audio Out(Coaxial) 9. TV/VCR RF Out Accessories 1. 3. Remote RF wire 2. 4. User manual 5.
Remote Control Remote 1. Display Button 2. Open/close Button (DVD) Eject (VCR) 3. +10 Button 4. SP/LP Button 5. Enter Button 6. Set up Button 7. Stop Button 8. Fast Backward Button 9. Fast Forward Button 10. PBC Button 11. Return Button 12. Root Button 13. Zoom Button 14. Angle Button 15. Audio Button 16. CLK Button 17. Subtitle Button 18. TV/AV Button 19. Standby/On Button NOTE: The Standby/On switch is no function During OTR and Record mode. 20. DVD MUTE Button 21. Numeric Buttons (TRACKING) 22.
Instructions in Using Remote Connecting Your TV Through Antenna • Operate REMOTE within 5m from the unit. • • Do not press 2 (two) buttons at the same time. • Do not light up sending part of REMOTE. • Do not keep in the place with much dust and humidity. Before you start, unplug all the equipment from the mains supply. Option 2 (1) Insert the Aerial cable into the VCR “TV Antenna In”. (2) Connect the RF cable form “VCR RF Out” into the TV RF In.
Setting Up Your Player How to Connect Your Player to a Camcorder Connecting your player through extra equipment (satellite system) • • Before you start, unplug all the equipment from the mains supply. How to Connect How to Connect Your Player to Another Player • Before you start, unplug all the equipment from the mains supply. If you have connected your camcorder in this way, you can also connect a RCA lead from “AV” on the back panel of the player to the television.
AV RCA Connecting How to connect The product has the AV input, shown in the diagram below, you can connect other equipment. When connecting other equipment please refer to their manuals for further information. Recording from Other Equipment Simple recording can be performed, ensure the equipment is turned on and is displaying the correct channel. Timer recording, set the video to perform a timed recording ensuring AV is selected as the channel to be recorded.
Auto Setting 1. Press the [ / ] buttons to select the desired country on the setup manu. And press the [ENTER] button to confirm the selected country. Then VCR will auto-search and setup all your channels automatically. (Only on the first time setup off the factory) Option 1 2. After the channel auto searching is completed,the “Please wait” screen will appear a while. Connecting your TV thru Antenna and RCA cable (Recommended setup) (please make sure that you connected your TV and VCR properly) 3.
Setup Operation (4) The [ENTER] button is pressed to confirm the new clock, the Main SETUP will appear after storing the changed data in VCR. And the [SETUP] button is pressed to interrupt before confirming the changed data and the main SETUP will appear without the data change. 1. Display Color All lines have gray background and selected line have green background white characters. 2. Basic Operation (1) Press the [SETUP] button to display the SETUP menu on a TV screen.
CLOCK SET SETUP Clock set Record timer Installation Search Preferences ----------> Time --:-- Date -- / -- / - - - - ENTER: Confirm SETUP: End SETUP: End CLOCK SET Time --------> Date CLOCK SET 11:-- Time ----------> -- / -- / - - - - SETUP: End Date 11:11 -- / -- / - - - - SETUP: End -----> CLOCK SET CLOCK SET Time Date 11:11 -- / -- / - - - - SETUP: End --> Time Date 11:11 -- / -- / - - - - SETUP: End 16 CLOCK SET --> Time 11:11 Date 11 / 11 / 2011 (Fri) ENTER: Confir
Record Timer • 1. Recording Programming All the procedures of daily (Mon-Fri) recording are the same as “once timer recording”. 1-1.MENU OPERATIONS • (1) Press the [SETUP] button to call the Setup Menu in TV state. • (2) At that time, the VCR will check whether there are some errors or not: • DAILY(MON-SUN) [In the case of selecting the type to “DAILY(MON-SUN)”] All the procedures of daily (Mon-Sun) recording are the same as “once timer recording”.
* ONCE TIMER 1 SETUP: End --> PR Starttime Endtime Startdate Howoften Tapespeed 11 --:---:-11/11(Wed) Once SP TIMER 1 --> PR Starttime Endtime Startdate Howoften Tapespeed 11 12:---:-11/11(Wed) Once SP SETUP: End --> SETUP: End TIMER 1 PR Starttime Endtime Startdate Howoften Tapespeed 11 12:20 14:20 11/11(Wed) Once SP ENTER: Confirm SETUP: End --------------> 11:11 12:12 11/11(Wed) Once SP -> TIMER 1 PR Starttime Endtime Startdate Howoften Tapespeed ENTER --------------> --------------
TIMER 1 TIMER 1 --> PR Starttime Endtime Startdate Howoften Tapespeed 11 12:20 14:-11/11(Wed) Once SP SETUP: End SETUP: End TIMER 1 TIMER 1 11 12:20 14:20 11/11(Wed) Once SP -> ENTER: Confirm SETUP: End -> PR Starttime Endtime Startdate Howoften Tapespeed PR Starttime Endtime Startdate Howoften Tapespeed 11 12:20 14:20 11/11(Wed) Once SP ENTER: Confirm SETUP: End TIMER 1 -> --> 11 12:20 --:-11/11(Wed) Once SP PR Starttime Endtime Startdate Howoften Tapespeed 11 12:20 14:20 11/11(Wed)
2. Timer Review (Erasure & Correction) 2-1.Erasure (3) The [ / ] buttons are pressed to correct the record timer program, the OSD screen will be changed to the screen of (3). (1) Press the [SETUP] button to call the SETUP menu in TV state or press the [PROGRAM] button. (4) How to correct: See the NEW PROGRAMMING procedures. The next steps are same as the steps of New Programming. Press the [ / ] buttons to select the line of “Record Timer” and press the [ENTER] button to confirm that.
SETUP SETUP Clock set Record timer Installation Search Preferences -> (1) GO TO “Clock set” -> (2) GO TO “Installation” ENTER: Confirm SETUP: End ENTER: Confirm SETUP: End (1) (2) -> ENTER PR Start End Date 01 11 AV 04 06 07 07 14:10 10:00 12:00 10:10 11:40 15:00 18:00 16:00 12:00 14:00 11:30 12:00 17:00 19:00 19/11 24/12 25/12 Mo-Fri W/Fri Mo-Sa Mo-Su ENTER: Confirm SETUP: End ---> Clock set Record timer Installation Search Preferences (3) TIMER 2 -> PR Starttime Endtime Startdate Ho
Installation This function is for you tune your TV to find the VCR channel. 1. Auto Installation 1. Test Signal Generation Mode (1) Press the [SETUP] button to display the Setup Menu screen in TV mode. (1) If you use the TV Aerial RF input for the VCR. In power-on state, press the [ENTER] button for 5 seconds to go to the test signal generation mode. Press the [ / ] buttons to select the line of “ Installation “ and press the [ENTER] button to confirm that.
• • Auto search -The user can either launch the auto search using right and left keys, or directly enter the channel number. Auto search moves automatically from last cable to first antenna channel found and vice versa. (1) SETUP Clock set Record timer Installation Search Preferences Fine Tuning-The user can fine tuning using right and left keys. 3. Organizer ENTER: Confirm SETUP: End This function is for you to edit the name of channel and delete the channel.
ENTER: Confirm SETUP: End 3-3. Swap With PR (1) Press the [SETUP] button to call the Setup Menu in TV mode. PR Name Swap with PR Delete program. Press the [ / ] buttons to select the line of “Installation” an press the [ENTER] button to cofirm that. 01 ----01 (2) Press the [ / ] buttons to select the line of “organizer” and press the [ENTER] button to confirm that. ENTER: Confirm SETUP: End (3) Press the [ / ] buttons to select the aligning channel and press the [ENTER] button to confirm that.
4. RF Output Set SETUP Clock set Record timer Installation Search Preferences In case, your VCR RF output interface the TV channel output, your need to change the RF setup as per following steps. (1) Press the [SETUP] button to call the Setup Menu in TV mode. Press the [ / ] buttons to select the line of “Installation” and press the [ENTER] button to confirm that. ENTER: Confirm SETUP: End (2) Press the [ / ] buttons to select the line of “RF Output Set” and press the [ENTER] button to confirm that.
Preferences 1. OSD On/Off. (OSD - On Screen Display) SETUP Clock set Record timer Installation Search Preferences The OSD On/Off control is set to “ON” mode before shipping and it can be changed to “OFF” mode. (1) Press the [SETUP] button to call the Main SETUP screen. Press the [ / ] buttons to select the line of “Preference” and press the [ENTER] button to confirm that. ENTER: Confirm SETUP: End (2) Press the [ / ] buttons to select the line of “OSD” and press the [ENTER] button to select.
2. Index + SETUP Searching a cassette tape for programs (indexing) Clock set Record timer Installation Search Preferences When you record a programs, the VCR places an index mark at the start of the recording. To search for an index mark: (1) Press the [SETUP] button to call the Main SETUP screen in [cassette-in] state. ENTER: Confirm SETUP: End Press the [ / ] buttons to select the line of “Search” and press the [ENTER] button to confirm that.
3. IndexSETUP (1) Press the [SETUP] button to call the Main SETUP screen in [cassette-in] state. Clock set Record timer Installation Search Preferences Press the [ / ] buttons to select the line of “Search” and press the [ENTER] button to confirm that. (2) Press the [ / ] buttons to select the line of “Index -” and press the [ENTER] button to confirm that.
4. VISS (VHS Index Search System) (2) The index marks are automatically recorded on the tape at the recording start time. It is impossible to record and erase the index marks at any time. Remarks : Subtitle after the point 4 diagrams. (1) Under the following conditions, VISS can be executed.
Special Playback/ Picture Search 3-2.review (1) During playback mode, press the [REW] button once, VCR will search the picture backward: SP (x3), LP (x5). 1. Variable Slow (2) Press the [REW] button again, the tape will advance more rapidly. : SP (x7), LP (x15) (1) During playback mode, press the [SLOW] button once to see the slow picture. The review mode is automatically changed to playback mode, when this mode is continued for more than 5 minutes without any mode changes.
(2) In special playback mode, tracking data is obtained in slow mode. 2. V-LOCK Control In still mode, press the [ V-LOCK. / ] buttons to adjust But, the optimal V-LOCK position, which has no picture movement in still mode, can be recognized by TV screen only because there is no display for this operation. Operating a Tape Mode When the VCR operates a tape, the tape mode display, the tape speed indicator and the tape counter will be displayed.
Front Display (Array) The Other Operations Synopsis 1. Child Lock 1. TAPE running mode In power-off state, if press the [STANDBY/ON] button for 5 seconds sequentially, the VCR will switch to power-on state, and then will go to the child lock mode. The tape running displays (PLAY, FF, REW, ....) appear. 2. TV tuning mode In power-on state, If press the [STANDBY/ON] button for 5 seconds sequentially, the VCR will switch to power-off state, and then will go to the child lock mode.
VCR Playback 1. Press [ • ] button to power on. Place the desired DVD dis c on DVD tray, press [VCR/DVD] button to DVD mode and press [PLAY] button. Then, you can watch DVD. Press [VCR] button of remote control to change into VCR mode. To Copy From DVD To Videotape 2. Insert the desired tape. 1. Insert the desired DVD disc and press [PLAY] button. 3. If you want to playback it, press [PLAY] button. • When the operational picture status is flickering or poor, adjust with [ / ] button. 2.
One Touch Timer Recording (OTR) When your urgent business happens suddenly in watching TV or you want to record the current TV program for the desired time, follow the procedures below. 1. First, follow the steps 1 to 4 in “Recording With VCR”. 2. Press [REC] button as much as you want. • See the “Recording Times Table” below.
About VCR Erasure Protection Video Head Cleaning Video cassettes are equipped with a safety tab to prevent accidental erasure. When the tab is removed, recording can not be performed. The video heads enable the VCR to read video information pictures from the tape during playback. In the unlikely event that the heads become clogged with dirt video playback will be impossible. This can easily be determined during playback of a known good tape, there is good sound, but the picture is extremely snowy.
What Is Dew Condensation Symptom? 3. The Disc will be played automatically. If a VCR is moved from a cool place to a warm and damp place or a place facing a direct cool wind from air-conditioner...and others, temperature varies sharply, which makes dew on head drums of VCR. • If it is a DVD disc, it will show the Menu/ Title Page on the screen. • If it is a CD, it will play the first track directly. 4.
DVD Player Operation Set Menu Items: . . General Setup Page . . Press the SETUP Button on the remote controller. The following menu will be shown: TV Display Angle Mark OSD Lang Captions Screen Saver 1. GENERAL SETUP TV DISPLAY • Go To General Setup Page Normal/PS This is selected when the DVD player is connected to a normal TV. Wide-screen images are shown on the screen. but with some parts cut automatically.
- GENERAL SETUP PAGE- Screen Saver Start the screen saver, the screen saver image appears when the player stops or the image is frozen for a few minutes. This saver can keep the screen from being damaged. • On (Start the screen saver). • Off (Remote the screen saver). • Back to the feature bar, press TV Display PS Angle Mark On OSD Lang ENG Captions On Screen Saver Off Off Screen Saver key On 2. AUDIO SETUP . . Audio Setup Page . .
- SPEAKER SETUP PAGE- Rear Speaker User can setup the rear speakers. The option is available when DOWNMIX is off. • LARGE • SMALL • OFF Downmix STR Front Speaker LRG Center Speaker SML Rear Speaker Subwoofer SML Large On Small Off Setup Rear Surround Speaker They are for 5.1 Channel speaker output only. - SPEAKER SETUP PAGE- Subwoofer User can turn on/off the subwoofer through this option.
Component User can set the S-Video or YUV video output. . . Video Setup Page . . Component S-Video S-Video TV Mode YUV Quality Component TV Mode In YUV video mode, user can selete Interlace or Progressive scan mode. . . Video Setup Page . . Component S-Video TV Mode P-SCAN Quality Interlace Set P-SCAN On/Off - Video Quality Setup- Sharpness User can set the level of sharpness for the image displayed. There are three different levels.
4. Preference Setup - Preference Page - (Under in DVD Stop mode) . . Preference Page . .
Disc Menu - Preference Page- If a language listed below is record on the disc, you can set the Menu to be displayed in such language. If not, the language recorded will be used.
Default DVD Root menu User can load the original factory setting by choose RESET and press ENTER. The DVD Menu Play function is only applicable for DVD movie. User can access the casting information, Production History, Movie Introduction etc. directly through this function. • RESET 6. Exit Setup 1. Press the DVD ROOT Button on the remote controller to enter the Root Menu. Quit the Setup Menu. 2. Use the Direction button ( ) or input the item index through the Number keys (0-9) to do the selection.
PREV./NEXT ( / ) Subtitle During playback, press one of the PREV./NEXT buttons (PREVIOUS button and NEXT button) • • This function is only applicable for DVD disc. It can change the subtitle language shown on the screen. When the PREV. button is pressed once, the pickup returns to the beginning of the PREVIOUS playing chapter or track. Note : Number of subtitle available depends on the DVD disc. When the NEXT button is pressed once, the pickup will go to the beginning of next chapter or track.
Display (Remain Time) This function is applicable for DVD only. It will display the timing information of the playback on the screen. • For DVD playback, subsequent key press on the DISPLAY Button will show the Title Elapsed Time, Title Remain Time, Chapter Elapse Time and Chapter Remain Time one by one.
Program Mode Program : TT(- -)/CH (- -) This function is applicable for DVD and CD audio. User can assign the playback sequence according to his/her preference. For CD audio, user can assign the track sequence while for DVD disc, user can assign both the Title and Chapter sequence. 01 02 03 04 05 06 07 08 09 10 Exit NEXT Program : TT(- -)/CH (- -) 1. Press the PROGRAM button. The Program Sequence table will be shown on the screen. 01 02 03 04 05 2.
MP3 Operation Operations This unit can support ISO9660 file system CD-ROM navigation. Multi-Media files such as MP3 thus can be played in the player. During Slide Show Mode: • Press the PAUSE Button will freeze the screen so that the current picture can be held for a long time. To resume the slide show mode, press PLAY Button. • Press the NEXT Button on the remote controller will skip the next picture. • Press the PREVIOUS Button on the remote controller will repeat the current picture.
Before Doubting About Troubles (DVD) Symptom Checks The recorder does not play. • If a DVD is from overseas, it may not be played. Please check a DVD’s region code whether it has the relative region code. • Please check whether a DVD is inserted in a right direction. • If it is a CD-ROM for PC or DVD-ROM, it does not work.
Symptom Checks “Power On” does not work. • Please check whether a powre plug is inserted in an electric outlet. • Please check whether a videotape is inserted in. • Try to insert a plug again. • Please check whether a power plug is inserted in an electric outlet. • Please check whether a videotape is in.
Symptom Checks While recording and playing, the top of screen extremely waves. A screen is not clear. • Since VCR Play signals are not stable like a TV signals, screen may be unstable or curved while in playing. To fix the problem, please horizontal adjustment. • In case videotape is the one recorded by other products or old one, stripe may appear on the screen. • Try to adjust the screen by [TRACKING +/-] button • Try to use a head-cleaner. • Try to adjust the screen by [TRACKING +/-] button.
Specifications Power 240V~50Hz Consumed electricity 50W Weight 5.7kg Dimension (WxHxD) 430mm x 91mm x 355.5mm Operative temperature +5°C~40°C Installation condition Horizontal/Relative humidity under 80% Signal type PAL B/G COLOR Antenna Input/output U/V-mixed:75Ω unbalanced VIDEO input 1.0 Vp-p (unbalanced, RCA JACK) AUDIO input RCA JACK UHF output 21~69 CH VIDEO output (common use of DVD and VCR) VIDEO output terminal 1.
Warranty DO NOT SEND IN THIS WARRANTY Fill out the following details and file with your purchase invoice. The benefits conferred by this warranty are in addition to all implied warranties, other rights and remedies in respect of the product which the consumer has under the Trade Practices Act and similar State and Territory Laws. RETAIN & FILE WITH YOUR RECEIPT. Your Purchase Receipt/Invoice is proof of date of purchase.