INTRODUCTION The model and serial numbers of this unit may be found on the cabinet. You should record and retain those numbers for future reference. Made! No. Serial No: WARNING: TO REDUCE THE RISK OF FIRE OR ELECTRIC SHOCK, DO NOT EXPOSE THIS APPARATUS TO RAIN OR MOISTURE, APPARATUS SHALL NOT 8E EXPOSED TO DRIPPING OR SPLASHING AND NO OBJECTS FILLED WITH LIQUIDS, SUCH AS VASES, SHALL BE PLACED ON THE APPARATUS.
INTRODUCTION CAUTION: Danger of explosion if battery is incorrectly replaced. Replace only with the same or equivalent type. WARNING: Batteries (Battery pack or battery installed! shall not be exposed to excessive heat such as sunshine, fire, of the like. LASER SAFETY This apparatus employs a laser. Only a qualified service person should remove the cover or attempt to service this apparatus, due to possible eye injury.
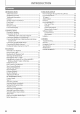
INTRODUCTION INTRODUCTION Safety Instructions Supplied Accessories... Trademark Information Features Symbols Used in this Manual Remote Control... Front Panel Display. CONNECTIONS Placing the Speakers. Connection to the TV HDMI Mode and Actual Output Signal: Connecting Speakers and Sub woofer .. Connecting Audio from Cable Box/Recorder/Game Console or TV Connecting Portable Media Player Connecting FM Radio Antenna... Finding the Video Channel on Your TV. PLAYBACK Information on Playback...
INTRODUCTION LIST HS Remote Control x 1 Video cable FM wire (CONCLUDED} (WPZ1520TMO002/ antenna Batteries (AA, 1.5V x2) WPZ1525CP003) Trademark Information Homer HDMI, the HDMI Logo, and High-Definition Multimedia Interface are trademarks or registered trademarks of HDMI Licensing LLC in the United States and other countries. Bipolar. ITAL PLUS PRG LOGIC Manufactured under license from Dolby Laboratories, Dolby, Pro Logic, and the double-D symbol are trademarks of Dolby Laboratories.
INTRODUCTION ne Blu-ray Disc You can enjoy Blu-ray Disc which is capable of storing five times more data than a conventional DVD, BOD-Java With some BDs which support Java applications, you can enjoy the interactive functions such as games or interactive menus. Full high-definition video playback Watch movies in the highest picture quality available for your HOT.
INTRODUCTION 7 {7 The unit can alas be muted on by pressing haste buttons, 1. STANDBY/ON & button 7. VOLUME A /¥ button + Press to tum on the unit, or to tum the unit into the « Press to adjust the volume. _ standby mode. (To completely tm off the unit,you ~~ 8. STOP button ES must unplug the AC power cord} « Press to stop playback. B + Press and hold for 10 seconds fo shutdown the unit. 9.
INTRODUCTION 126 The uri can also be muted on by pressing these buttons, 1. STANDBY/ON & button «+ Press to turn on the unit, of to tum the unit into the standby mode. (To completely tum off the unit, you must unplug the AC power cord.} 2. DISPLAY button + Press to display the on-screen display menu. 3, SUBTITLE button « Press to display the subtitle menu. 4, Number buttons Press to enter the title, chapter, track or file number. + Press to enter values in the input field. 5.
INTRODUCTION 24. RETURN button + Press to return to the previously displayed menu screen, 25. OK button « Press to confirm or select menu items. 26. POP MENU / MENU button 8D: « Press to display the pop-up menu. DVD: « Press to display the disc menu, 27. CLEAR button DISC: + Press ta clear the information acne entered or to cancel the programming for audio CD, etc. RADIO: + Press to erase the selected preset station. 28.
INTRODUCTION ] i Rama nail ist inst mass F331: FIE: Fife. Ocean reed Fiend Site segue, (FIEF Jinan Fri's | | dents TLL o Tali Ye * Brightness of the display can be adjusted. Refer to "Panel Display” in “List of Setup Menus” on page 40, 1. Displays repeat icon. (Appears during repeat playback.) 2. Displays media mode icon {disc mode or SD card mode), 3. Displays playback status icon. Refer to table A below. 4.
CONNECTIONS Placing the Speakers Make the following connection to ensure an optimum sound experience, Place the front left and right speakers at equal distances from the TV and at an angle of approximately 45 degrees from the listening position, . 2 Place the center speaker above the TV or the main unit so that the center channel's sound is localized. 5 3 Place the rear speakers at normal fastening ear level facing each other. 1 4 Place the sub woofer at the corner of the room.
CONNECTIONS | Better (supports up to 1080i resolution.) foam] ik 8 Component video cable eee > B ERI EL RE . Lee ee Cree ee Basic {Supports only 480i resolution.) Your TV DEO I arn Video cable Ee Go To ese) « Connect this unit directly to the TV. If the video cables are connected to a VCR, pictures may be distorted due to the copy right protection system. © Videocassette | 2 Connect the cables by following the descriptions below.
CONNECTIONS Component Video Connection Component video cable Standard Video Connection C Video cable HDMI Mode and. Actual Output Signals You can change the resolution of the video signal being output trim the HOM! GUT jack in the setup menu.
CONNECTIONS Connecting Speakers and Sub: SUB WOOFER FRONT CENTER REAR RIGHT REAR LEFT FRONT RIGHT FRONT LEFT T Connect the speaker cables to the matching color sockets on the speakers. 2 Connect all the speakers and sub woofer to the matching sockets at the rear of the main unit. Make sure that the colors of the cables and sockets are matched.
CONNECTIONS This unit provides analog and digital audit connection. You can connect the audio output from an audio / video device {e.g. DVD Recorder, VCR, Cable / Satellite Box, game console or TV) to this Blu-ray Disc Home Theater in order to enjoy the multi-channel surround sound capabilities.
CONNECTIONS | Connecting Portable Media Player Connect a 3.5mm stereo audio cable(not supplied) to the MP3 LINE-IN jack on this unit and the headphone jack on your portable media player. te dis fon our fot merchandiser LR Connecting FM Radio Antenna 7 Connect the supplied FM wire antenna to the FM ANT 752 jack on this unit. 2 Extend the FM antenna and fix its ends to the wall for optimum reception. (Note Lc Forelimb PM store SIE eit intestinal EM antenna hot si) © ¢ Place they anticking ata front yeu TV.
CONNECTIONS After you have completed all the connections, you must find the correct video channel (textual input channel) on your TV. Finding the Video Channel on Your TV — After you have made all the necessary connections, press [STANDBY/ON O] to turn EN on the unit, Turn on your TV. Press the button on the TV's remote control that accesses the external input channel. It may be labeled “SOURCE”, “AV” or “SELECT” (refer to your TV's user manual).
PLAYBACK Playable Discs and Files Woke for 5D Memory Cords. : This unit Is compatible to play back the pi discs / files. 0 c To play back a disc / file, make sure that it meets the requirements for region codes and color systems as described below. You can play back discs that have the following logos. i ona computer HIRSUTE the Gide lease reformat th Other disc types are not guaranteed to play back. Mere ths Lady > This unl dos spb Rhenish ad mit spic mutiny not read SD Lemon Cdk formatted.
PLAYBACK 1 color Systems. DB-video and DVD-video are recorded in different color systems throughout the world. The most common color system is SCENT (which is used primarily in the United States and Canada}. This unit employs SCENT color system, so the disc you play back must be recorded In the SCENT system.
PLAYBACK Chapter information Disc information
</li><li><h6><a class="text-decoration-none text-link fw-bold" href=/manual/magnavox/mrd410b-f7/manual-english/page-21.html>PAGE 21</a></h6><p>| PLAYBACK How to Insert a Disc 1 Press [OPEN/CLOSE A] to open the disc tray. 2 Place the disc on the disc tray with its {able side facing up. Align the disc to the disc tray guide. + Make sure the disc is compatible with this unit. (Refer to page 18 for the list of compatible discs) 3 Press [OPEN/CLOSE 4] to close the disc tray. © ft may take a while to load the dies. To eject the disc: Press [OPEN/CLOSE #4] to open the disc tray. Remove the disc. Press [OPEN/CLOSE #4] to close the disc tray.</p></li><li><h6><a class="text-decoration-none text-link fw-bold" href=/manual/magnavox/mrd410b-f7/manual-english/page-22.html>PAGE 22</a></h6><p>PLAYBACK Selecting the Media Mode For the playback media to be read by this unit, the correct media mode should be selected. You can switch the media rode by following the steps below. “Media Select” is available only when an SD Memory Card is inserted and this rhinitis in Disc / $0 card mode, 1 In stop mode, press [SETUP]. 2 Use [a / ¥]to select /2, then press [OK]. Boone Hails Sari Oise . Ukases HON das Resin Aun Component uit.</p></li><li><h6><a class="text-decoration-none text-link fw-bold" href=/manual/magnavox/mrd410b-f7/manual-english/page-23.html>PAGE 23</a></h6><p>PLAYBACK Playing Back a DB-or a DVD EN Press [STANDBY/ON &1. Turn on the TV and select the appropriate input on the TV to which the unit is connected. Insert a disc (refer to “How to Insert a Disc” on page 21). Playback may start automatically. iF not, press [ (play}l. Some discs may show a title or a disc menu. in such case, refer to “Using the Title / Disc / Pop-up Menu” on page pause playback: Press [11 {pause}]. To return to the normal playback Press [w (play).</p></li><li><h6><a class="text-decoration-none text-link fw-bold" href=/manual/magnavox/mrd410b-f7/manual-english/page-24.html>PAGE 24</a></h6><p>PLAYBACK sii the title Dist Popup Ens Many of DB-video and DVD-video discs contain title menu (DB-video / DVD-video), disc menu (DVD-video} or pop-up menu (DB-video} which guides you through the available functions in the disc. The contents of the menus may differ depending on the discs. Title menu (DB-video / DVD-video) 1 Press [TOP MENU]. 2 Use la /v select an item, then press [OK]. 3 Press [TOP MENU] to exit, Disc menu (DVD-video) 1 Press [POP MENU / MENU]. 2 Use la /¥ / item, then press [OKL.</p></li><li><h6><a class="text-decoration-none text-link fw-bold" href=/manual/magnavox/mrd410b-f7/manual-english/page-25.html>PAGE 25</a></h6><p>PLAYBACK | dons: Folder This unit can lase run JPEG files stored on Kodak Picture — CD. You can enjoy picture images on the TV set by playing EN back the Kodak Picture CD. This unit conforms to ver.7.0 of MP3 files Kodak Picture CD. For details of Kodak Picture CD, contact a shop that provides developing service of Kodak Inc. audio CD tracks WIA files 1 When Kodak Picture CD is inserted in this unit, Kodak Picture CD menu will appear automatically on the TV screen. 4 Press [Il {stop)] to stop playback.</p></li><li><h6><a class="text-decoration-none text-link fw-bold" href=/manual/magnavox/mrd410b-f7/manual-english/page-26.html>PAGE 26</a></h6><p>_ PLAYBACK welled He will the eth nie ency Tachycardia 5 In bun Br = seconds Lyra pre on [ANGLE wi on ihe ast | clockwise by b) deg en: when an image = headpiece. « Toothache the visual eff thing the | Hab Image pres | loner th i/o [OK] to switch between er Lade our ud ion wie to en sie Ho ea mage then tae [REG OK] 0 sii Between “Normal [00% and Small 0500 The spe change that have no effect on ee ihe mall Pressie 1 During playback, press p# {(forward)] repeatedly for fast forward.</p></li><li><h6><a class="text-decoration-none text-link fw-bold" href=/manual/magnavox/mrd410b-f7/manual-english/page-27.html>PAGE 27</a></h6><p>PLAYBACK eR ET ETE CEE You can play back the disc/card in your desired order. 1 unstop mode, press {MODE}. 2 track / folder / file, then press [OK]. audio CO 3] adieu CD : Track information MP3 /WMA/ : File information JPEG {2} adieu CD + “CO-DA" will be displayed. MP3 /WMA/ : Current Disc, SD Memory Card, JPEG ot folder name will be displayed. [2] Track / Folder / : Track / Folder / File list in the Fife list original order. [3 Programmed list : Track / File list in the programmed order.</p></li><li><h6><a class="text-decoration-none text-link fw-bold" href=/manual/magnavox/mrd410b-f7/manual-english/page-28.html>PAGE 28</a></h6><p>| PLAYBACK | Random Playback ZEKE ERE This function shuffles the playback order of tracks / files. 1 unstop mode, press [MODE] twice. audio C0 {i} adieu CD : Track information MP3 /WMA/ : File information JPEG {2} audio CD + “CD-DA” will be displayed. MP3 /WMA/ : Current Disc, SD Memory Card, or JPEG folder name will be displayed. [5] Track / File list : Track File listing the original order will be displayed. : Crass [RED] to go to the previous page in the track / file list.</p></li><li><h6><a class="text-decoration-none text-link fw-bold" href=/manual/magnavox/mrd410b-f7/manual-english/page-29.html>PAGE 29</a></h6><p>| PLAYBACK CE Some DB-video have the PIP function which enables you 10 display the secondary video in the primary video. You can call up the secondary video by pressing IMMODEST} whenever the scene contains the secondary video. primary video secondary video 1 During playback, press [MODE] repeatedly until the PIP function appears. 2 Use [a the secondary video you want, + The secondary video will be displayed and the secondary audio will be output. + Use [I] to switch between current setting and “Off”.</p></li><li><h6><a class="text-decoration-none text-link fw-bold" href=/manual/magnavox/mrd410b-f7/manual-english/page-30.html>PAGE 30</a></h6><p>PLAYBACK Using ie (ep (skip] : 1 During playback, press b® {skip} to move to the next track / title / chapter / file. Press it repeatedly to skip to subsequent tracks. Press iw (skip}] once to go back to the beginning of the current track. Press it repeatedly to go to the previous tracks. « For JPEG files, press [i {skip)] to go back to the previous file. — Note < For BD RADAR Site coonskins (skip) changes the bile { JPEG fle [Be] also available using [SEARCH], you can select the following search modes.</p></li><li><h6><a class="text-decoration-none text-link fw-bold" href=/manual/magnavox/mrd410b-f7/manual-english/page-31.html>PAGE 31</a></h6><p>PLAYBACK | You can select the format of audio and video as you prefer depending on the contents of the disc you are playing back. LAT oe Some video materials may have subtitles in 1 or more languages. For commercially available discs, the supported languages can be found on the disc case. Follow the steps below to switch the subtitle language during playback. 1 During playback, press [SUBTITLE]. 2 Use[a / Vito select “Primary Subtitle”, “Secondary Subtitle” or “Subtitle Style”, then press [OK].</p></li><li><h6><a class="text-decoration-none text-link fw-bold" href=/manual/magnavox/mrd410b-f7/manual-english/page-32.html>PAGE 32</a></h6><p>| PLAYBACK | The econ mn ol the Debut when the ay Vi splinted or sheen BO Audio Audio Pita For one lar le output oven depending on the doss Rite anal Accompanying the ob + AUDIO may nt nul oe in wi pule ae ren or colonels n, DVDs The Chan Sl audio Setting on the dies ennui. ita language halt bes lines in i hn Sill bedizened sl Hume yo nue the audio lan ee ending i mi other bridges.</p></li><li><h6><a class="text-decoration-none text-link fw-bold" href=/manual/magnavox/mrd410b-f7/manual-english/page-33.html>PAGE 33</a></h6><p>PLAYBACK You can control the volume level of the audio output from 5.1ch speakers. To increase or decrease the volume level : Press VOL. +/ ~L « The volume level will increase or decrease, every time IRE ER Select the sound effect mode for the audio output from 5.1ch speakers to suit your video or music. 1 During playback, press [SOUND MODE] repeatedly to select the desired sound effect mode. LITE Description Turns off the sound effect mode. Enhanced low and high range.</p></li><li><h6><a class="text-decoration-none text-link fw-bold" href=/manual/magnavox/mrd410b-f7/manual-english/page-34.html>PAGE 34</a></h6><p>PLAYBACK EE aE You can change the active source mode to the desired external audio inputs and enjoy audio from the connected device with the multi-channel surround sound capabilities. 1 Press [SOURCE “Input Select” screen will appear, 2 Use la /selectivity the desired source mode, then press [0K] “Disc / SD" Set the active source mode back to this unit, “Aux: Set the active source mode to the AUDIO IN(AUX) jacks. “Coaxial” Set the active source mode to the DIGITAL AUDIO IN {Coaxial} jack.</p></li><li><h6><a class="text-decoration-none text-link fw-bold" href=/manual/magnavox/mrd410b-f7/manual-english/page-35.html>PAGE 35</a></h6><p>PLAYBACK By connecting the supplied FM wire antenna, you can listen to FM radio on this unit. Presetting Radio Stations When you access radio mode for the first time, follow the instruction to store a radio station to your preset station fist. You can store radii stations in the memory. 7 Connect the supplied FM wire antenna to the FM ANT 752 jack on this unit, + Refer to "Connecting FM Radio Antenna” on page 16. 2 Press [SOURCE “Input Select” screen will appear. 3 "FM", then press [OK]. 4 Pressurize.</p></li><li><h6><a class="text-decoration-none text-link fw-bold" href=/manual/magnavox/mrd410b-f7/manual-english/page-36.html>PAGE 36</a></h6><p>FUNCTION SETUP In the setup menu screen, you can access various kinds of menus, and customize them as you prefer. To call up the setup menu screen, press [SETUP]. Then follow the instructions below to navigate through the screen. < Setup menu screen > J Quick menu Contains only the frequently used menus. {2} Custom menu Contains all the available setup menus, oe Ste {3} Initialize menu HOU Ides Desolation Arno irs th hat rel.</p></li><li><h6><a class="text-decoration-none text-link fw-bold" href=/manual/magnavox/mrd410b-f7/manual-english/page-37.html>PAGE 37</a></h6><p>FUNCTION SETUP Ed Language Player Menu* [a Auto (XXX) English Franglais Espalier fro Sets the language for player menu. (on-screen display menu) “Auto”; Activates the Get & Set Menu Language function (refer to page 44). » “Auto” is available only when “funLink{HDMI CEC) is set to "On. + Inside the parentheses next to “Auto” will be currently selected language.</p></li><li><h6><a class="text-decoration-none text-link fw-bold" href=/manual/magnavox/mrd410b-f7/manual-english/page-38.html>PAGE 38</a></h6><p>FUNCTION SETUP Category [Tr Description Still Mode Adjusts picture resolution and duality in ie still mode. “Auto”: Automatically selects the best resolution setting {'Frame” or *Field”) based on the data characteristics of the pictures "Field": Stabilizes the pictures, although the picture quality may become coarse due to the limited amount of data.</p></li><li><h6><a class="text-decoration-none text-link fw-bold" href=/manual/magnavox/mrd410b-f7/manual-english/page-39.html>PAGE 39</a></h6><p>FUNCTION SETUP 80 Audio Mode Ado Output + Refer to page 42 for more information. [ ha Audio Dina HO Audio Output Shaken HOM Normal HOMILETIC . Description For BD, selects whether fo output the secondary and interactive audio with primary audio fit is available or only the primary audio Refer to “Setting the BD Audio Mode” on page 32.</p></li><li><h6><a class="text-decoration-none text-link fw-bold" href=/manual/magnavox/mrd410b-f7/manual-english/page-40.html>PAGE 40</a></h6><p>FUNCTION SETUP Ed s available only when “Audio Output” is set to" Speakers”. (Refer to page 42, [ Beet Meters me Distance a parameter Desire Sets the unit of measure for “Delay Time’. for optimizing the timing at which the sound outputs from the speakers according ta the distance from the listening petition. Front Center Surround Fest: 0~15 Meters G~45 Sets the distance from fhe listening point to each speaker to get the ideal delay ime.</p></li><li><h6><a class="text-decoration-none text-link fw-bold" href=/manual/magnavox/mrd410b-f7/manual-english/page-41.html>PAGE 41</a></h6><p>FUNCTION SETUP Category Setup Data (SD Card) [ «Refer to page 45 for more information [— Resets all the settings, except for “Parental” to the factory default. Re-formats SO card. Re-formats local storage (Player) used for Java. Re-formats local storage (SD card) used for DB-Java.</p></li><li><h6><a class="text-decoration-none text-link fw-bold" href=/manual/magnavox/mrd410b-f7/manual-english/page-42.html>PAGE 42</a></h6><p>FUNCTION SETUP Brat SETUP] = ‘Customs’ "View = “TV Aspect’ Use this feature to adjust the aspect ratio of the video source which is different from your TV's ratio to fit your TV monitor without distorting the picture.</p></li><li><h6><a class="text-decoration-none text-link fw-bold" href=/manual/magnavox/mrd410b-f7/manual-english/page-43.html>PAGE 43</a></h6><p>FUNCTION SETUP EEL Audio Source + FED Audi ote” sentient [IRE av as Which ath format a bs cut deepen: sm the somatic of the connected device.</p></li><li><h6><a class="text-decoration-none text-link fw-bold" href=/manual/magnavox/mrd410b-f7/manual-english/page-44.html>PAGE 44</a></h6><p>FUNCTION SETUP re SETUP] = Custom’ = Parental” Some DB-videos or DUD-videos feature a parental lock level. Playback will stop if the ratings exceed the levels you set, it will require you to enter a password before the disc will play back. This feature prevents your children from viewing inappropriate material. 1 then press [OK]. Password input field appears. 2 Ifa password has not hen set, follow A), if a password has already been set, follow B}.</p></li><li><h6><a class="text-decoration-none text-link fw-bold" href=/manual/magnavox/mrd410b-f7/manual-english/page-45.html>PAGE 45</a></h6><p>FUNCTION SETUP | ELT ET TI [ Current Version . You can confirm the current software version, 1 In stop mode, press [SETUP]. 2 §ii, then press [OK]. 3 Use la / Vito select 7, then press [OK]. 4 use |[a select “Software Update”, then pass OKL 5 Use [a select “Current Version”, then press OKL 6 Press [OK] or [RETURN] to exit, Frm : Visit ma on «onto dnd fest oy ie vert. Biscuits You can update the software by using disc. 1 Prepare a software update disc Please access yu mag navox.</p></li><li><h6><a class="text-decoration-none text-link fw-bold" href=/manual/magnavox/mrd410b-f7/manual-english/page-46.html>PAGE 46</a></h6><p>Ita LT Lo LSD 8 If the unit does not perform properly when operated as instructed in this manual, check the unit, consulting the following checklist. [2 No power i ’ the AC i is properly ETE Unplug the AC cord once, and Walt for 5-10 seconds and then plug it in again. No sound or picture Check if the connected TV is turned on, Check if the connections are made securely and correctly. Check whether the connected TV or other device supports PHD.</p></li><li><h6><a class="text-decoration-none text-link fw-bold" href=/manual/magnavox/mrd410b-f7/manual-english/page-47.html>PAGE 47</a></h6><p>OTHERS [2] he unit does not respond to some operating commands during playback Operations may not I E the a Refer to the instructions of the disc. The unit cannot chad BD / DVD/CD page 18.</p></li><li><h6><a class="text-decoration-none text-link fw-bold" href=/manual/magnavox/mrd410b-f7/manual-english/page-48.html>PAGE 48</a></h6><p>OTHERS Dolby Digital Region Code The system to compress digital sound developed by Dolby Laboratories, it offers you sound of stereo (2ch) or multichannel audio. Dolby Digital Plus Dolby Digital Plus is the next generation digital audio compression technology developed as an extension to Dolby Digital. Blu-ray Disc supports 7.1 multi-channel surround sound output.</p></li><li><h6><a class="text-decoration-none text-link fw-bold" href=/manual/magnavox/mrd410b-f7/manual-english/page-49.html>PAGE 49</a></h6><p>| OTHERS | [Language] Code J Language J code J tongues J Code J Language ] Coe | AB French [FRE] 5264 Macedonian 5957 Si swat 6565 Brazilian 4748 Frisian 5271 Malagasy 5953 Slovak [SLO] 6557 EN Afar 4747 Clinician 5358 Malay 5965 Slovenian 6558 Afrikaans 4752 Georgian 5747 Malayalam 5958 Somali 6561 Albanian £563 German [GER] 5051 Maltese 5966 Spanish [SPA] 5165 Amharic 4759 Greek [GRE] 5158 Maori 5955 Sundanese 6567 Arabic 4764 Greenlandic 5758 Marathi 5964 Swahili 6569 Armenian 5471 Guarani 5360 Moldavian</p></li><li><h6><a class="text-decoration-none text-link fw-bold" href=/manual/magnavox/mrd410b-f7/manual-english/page-50.html>PAGE 50</a></h6><p>OTHERS Yul wile Te ES Signal system SCENT Color Power requirements, 120V AC, 60 Hz Power consumption Total output power (Amplifier) Dimensions (width x height x depth) Weight Operating temperature Operating humidity 70W (standby: 0.6 W) Home theater mode: 1000 W FTC! output power © 700W “(Main Ch @ 1 kHz within 109 THD, Sub Ch 60 Hz within 2.5% THI) 17.2 x 24% 11.7 inches (435 x 59 x 267 mm) Total weight: 27,56 Ibs, (12.50 kg) Main unit: 8.16 Ibs. (3.</p></li><li><h6><a class="text-decoration-none text-link fw-bold" href=/manual/magnavox/mrd410b-f7/manual-english/page-51.html>PAGE 51</a></h6><p>OTHERS LEE Servicing » Please refer to relevant topics on “Troubleshooting” on page 46 before returning the product. + If this unit becomes inoperative, do not try to correct the problem by yourself. There are no user-serviceable parts inside. Turn the unit to the standby mode, unplug the power plug, and please contact 1-800-605-8610 of visit: Cleaning the cabinet pe the front panel and other exterior surfaces of the unit with a soft cloth Never use a solvent, thinner, benzene or alcohol to clean the unit.</p></li><li><h6><a class="text-decoration-none text-link fw-bold" href=/manual/magnavox/mrd410b-f7/manual-english/page-52.html>PAGE 52</a></h6><p>MAGNATE LIMITED WARRANTY FUNGI CORP. will repair this product, free of charge in the USA in the event of defect in materials or workmanship as follows: DURATION: PARTS: FUNGI CORP. will provide parts to replace defective parts without charge for one (1) year fro the date of original retail purchase, Certain parts are excluded from this warranty. LABOR: FUNGI CORP. will provide the labor without charge for a period of ninety (50) days from the date of original retail purchase.</p></li></ul></nav></div></section></section></main><footer class=page-footer><div class="container flex-column py-3 py-sm-4"><div class="row mb-1 mb-sm-2 mb-md-5"><a href=/ class="brand offset-sm-0 col-sm-4 col-md-3 col-lg-2 offset-2 col-8 text-center text-md-start"><img class=logo-small src=/assets/img/brand-large.png alt=Manualshelf></a></div><div class=row><dl class="text-center text-sm-start col-sm-3"><dt class=fw-bold>Who We Are</dt><dd><a class=text-decoration-none href=/about>About Us</a></dd><dd><a class=text-decoration-none href=/company>Company</a></dd><dd><a class=text-decoration-none href=/careers>Careers</a></dd><dd><a class=text-decoration-none href=/terms>Terms & Privacy</a></dd></dl><dl class="text-center text-sm-start col-sm-3"><dt class=fw-bold>Resources</dt><dd><a class=text-decoration-none href=/brands>List of Manufacturers</a></dd><dd><a href=/ class=text-decoration-none>Support</a></dd><dd><a class=text-decoration-none href=/press>For the Press</a></dd><dd><a class=text-decoration-none href=/press#assets>Media assets</a></dd><dd><a class=text-decoration-none href=/faq>FAQ</a></dd></dl><dl class="text-center text-sm-start col-sm-3"><dt class=fw-bold>Get in touch</dt><dd><a class=text-decoration-none href=#>Blog</a></dd><dd><a class=text-decoration-none href=#>Email</a></dd><dd><a class=text-decoration-none href=/dmca>DMCA</a></dd></dl></div><div class=row><div class="text-center text-sm-start col-sm-4 pe-sm-0"><a href=https://www.facebook.com/pages/ManualShelf/1488826334681423 class="fs-5 text-center d-inline-block social rounded-2 align-middle text-decoration-none me-2"><i class="fab fa-facebook-f"></i></a><a href=https://www.twitter.com/ManualShelf class="fs-5 text-center d-inline-block social rounded-2 align-middle text-decoration-none me-2"><i class="fab fa-twitter"></i></a><a href=https://plus.google.com/+ManualShelf class="fs-5 text-center d-inline-block social rounded-2 align-middle text-decoration-none me-2"><i class="fab fa-google-plus-g"></i></a><a href=http://www.pinterest.com/ManualShelf class="fs-5 text-center d-inline-block social rounded-2 align-middle text-decoration-none"><i class="fab fa-pinterest-p"></i></a></div><div class="col col-sm-8 d-flex flex-column align-items-center flex-sm-row flex-wrap flex-sm-nowrap justify-content-center justify-content-sm-end"><div class="copy w-auto d-flex align-items-center justify-content-center justify-content-sm-end mt-2 mt-sm-0 me-2">ManualShelf © 2013-2025</div><select class="form-select form-select-sm w-auto mt-2 mt-sm-0"><option value=usa>USA</option></select><div></div></div><div id=pixel><script>
googletag.cmd.push(function() { googletag.display('pixel'); });
</script></div></footer><script src=/assets/js/jquery-3.3.1.min.js></script><script src=/assets/js/bootstrap.bundle.min.js></script><script src=/assets/js/jquery.autocomplete.min.js></script><script type=text/javascript>
$.extend({
redirectPost: function(location, args) {
var form = '';
$.each(args, function(key, value) {
form += '<input type="hidden" name="' + key + '" value="' + value + '">';
});
form = '<form id="s1" action="' + location + '" method="POST">' + form + '</form>';
$(document.body).append(form);
$("#s1").submit();
}
});
$(document).ready(function(){
$("#query").autocomplete({
minChars: 3,
groupBy: 'type',
paramName: 'q',
dataType: 'json',
serviceUrl: '/autocomplete',
noCache: true,
showNoSuggestionNotice: true,
noSuggestionNotice: 'Zarro results found',
onSelect: function (suggestion) {
$.redirectPost(suggestion.data.url, {highlight: encodeURIComponent(JSON.stringify(suggestion.data.hls))});
}
});
var toc = $('.toc-selector');
if (toc.length) {
var slideParams = { duration: 800, easing: 'linear' };
toc.click(function() {
$(this).toggleClass('open');
var section = $('.toc-content');
var isCollapsed = section.attr('data-collapsed') === 'true';
if (isCollapsed) {
section.slideDown(slideParams)
section.attr('data-collapsed', 'false')
} else {
section.slideUp(slideParams);
section.attr('data-collapsed', 'true')
}
});
}
});
var lastSmall = $(window).width() < 576;
$(window).resize(function() {
var newSmall = $(window).width() < 576;
if (lastSmall != newSmall) {
lastSmall = newSmall;
window.location.href = window.location.href;
}
});
</script></body></html>