Video Cassette_ReCorder VRX463 Owner's Manual Easy Taping.
Once your PHIUPS MAGNAVOX purchase is registered, you'r'e eligible to receive all the privileges of owning a PHIUPS MAGNAVOX product. So complete and return the Warranty Registration Card enclosed with your purchase at once.And take advantage of these important benefits. Know these safetysymb01s PHILIPS Congratulations welcome on your purchase, and to the "family!" r_UTImk I0 IqEIOUCE TtlE IImK 0F B.
Introduction 3 • eti o,••••,• mooootoo_•ooooo eoo_.moo ••oQ o.,i o,•o eo,Joo ooo•_, o•_ooo ool oooQloo•iQ! • • Q• •oool _••Q_,•• o• • _lo• o• •Q o•Qot o• Welcome to yourVCR owner's manual• This manual has six sections: Setting Up Your VCR; Description of Controls; Basic Operations; Recording; Playing;and Information You May Need.The instructions explain all of theVCR's features, which are listed below.You cannot hurt yourVCR by trying the features! So read on - and relax.
TableofContents Setting Up Your VCR Introduction ...... .................................................... Table of Contents ...................................................... 3 4 Before Using Your VCR .................................................. Hookups Without a Cable Box ......................................... Hookups With a Cable Box/DSS Receiver ................................ Turning onYourVCR ............................................... Automatic Channel Programming ............
BeforeUsing YourVCR5 ! To remove the battery then pull up the lid. compartment lid, push in the tab, 2 Place three AA batteries inside the battery compartment with their polarities (+ and - ends) aligned as indicated. 3 Replace the battery compartment Using the Remote • Point the remote control at theVCR's lid. Control remote sensor. • Do not put objects between the remote control and the VCR. • Press theVCR button before pressing otherVCR operation buttons.
Hookups Without a CableBox o• • •e• eQooootooooeeoeoeeQeQ oe• • • •e ee • ••eoo••o eQe• ••, .•o•ooiQe • • ••_ • • •eoeeoeee •e•e•••oe • ••o • • • •e • • • • •e eeeoee•e•e The basicVCR/TV connection - antenna/cable to VCR to "IV - is shown below. If you have a Cable Box or a Digital Satellite System Receiver, please refer to pages eight-nine.After you hook up theVCR, please go to page 10 to turn on theVCl_ I Disconnect the antenna or cable from your TV.
Hookups Withouta CableBox(cont'd)7 eooet e eQeo .e ooe ee o! • e. ee • oe .eeoe e • .. • ee .ieee • • oeeoe • eoe eeoe eee • • • • • • • • •. • _ e .. oe oe • e 0. o e oe oe e e e.... • oeeeoo oe ee ee Connect the RF coaxial cable (supplied) to the RF OUT Jack on the back of theVCR and to the ANTENNA IN Jack on theTV. (You may use either a snap-on type or screw-on type of coaxial cable, whichever you prefer.A snap-on type is supplied.
Hookups Witha CableBox/DSS Receiver oe oeeoeoeoeeeeeeeeee eoeeooe oeee • 0• ••oeoe •e• •e 0o• •oeeee •• •••e •e ••6e• •0• •0o• co• •• •• • •• •o •e• •• •• ee o• 0• • •0 •e • • • •oe This connection allows you to view any channel. After you connect the Cable Box/DSS Receiver, VCR, andTV as shown below, the features described on this page will be available. 3. Use a second RF coaxial cable to connect the RF OUT Jack on theVCR to the TV's Antenna In jack. I.
Hookups Witha CableBoxlDSS Receiver (cont'd)9 • o• Q •1 •a • • •• • i• el •9 •i •• •l •a I• •• • •1.1 o• •loo o! • •Qo• •oQ •ooQo• •ool ol moo• Qol ol •• i_l ot o• ool •ooo ioQ ,o •o• •l •l •a ol •l •• This connection allows you to program an unattended recording of more than one unscrambled channel and to watch one channel while recording another.After you connect theVCR, Cable Box/DSS Receiver, and TV as shown below, the features on this page will be available. I.
I0 Turning onYour VCR *e ee ee *•lee lee eo*le *e* i*eeee le eel• • lle •,lee le •*el • 1.• ee •lie e• • lee*• •• Before turning on yourVCR, make sure there are batteries in the remote control. Details are on page five. Make sure theVCR, TV, and Cable Box/DSS Receiver (if applicable) are connected. Details are on pages six - nine. If you are going to set up the Controller now, connect the Controller before you begin. Details are on page 42.
Turning onYourVCR(cont'd)II 6 Press the MENU _CONNECTANTENNA OR CABLE THEN... PUSH CH UP KEY TO VCR OR... FOR channels. Wait for theVCR to program button. The menu shown below will appear. PLAY ONLY - PUSH STOP 1 7 Press the CHANNEL Up button to begin automatic channel programming.AUTO SET PROCEEDING/PLEASEWAIT will appear on-screen.
Automatic Channel Programming Programming Channels Although yourVCR may automatically memorize the channels you receive when you turn it on for the first time, this function lets you reprogram channels. Make each entry within one minute of the previous entry. I Press theVCR button, then press the MENU bring up the main menu display. button channels.
Automatic Channel Programming (cont'd)13 Adding/Deleting I 2 Channels I Press the VCR button. Press the MENU button to bring up the main menu display. I PROGRAM 2 3 4 5 VCR SET UP TUNER SET UP INPUT SELECT SET CLOCK 6 SET REMOTE 2 LOCATOR END PUSH EXIT 3 Press the Number 3 button to select TUNER SET UR /TOSELECT _.
Settingthe Clock There are four ways to set the VCR's clock: Manually, with Time Zone Selection, with Manual PBS Channel Selection, or with Automatic PBS Channel Selection. Cable Box/DSS Receiver users must set the clock manually. Before you set the clock, make sure: • TheVCR power is on. • The VCR light appears on the display panel. If it does not, press the VCR/TV button once. • Channels are programmed. Details are on page 12. • You make each entry within one minute of the previous entry.
SettingtheClock(cont'd)15 Time Zone Selection I Press theVCR button, I PROGRAM 2 VCR SET UP | | 3 TUNER | SET UP then press the MENU 6 m [ 4 INPUT SELECT S SET CLOCK 6 SET REMOTE LOCATOR i button. / END PUSH 2 EXIT j Press the Number 5 button to select SET CLOCK. CABLE BOX USERS SET CLOCK MANUALLY will appear on-screen briefly.Then, the menu shown below will appear. (If AUTO CLOCK is set to OFF, SETTIME ZONE will not be available in the menu.
Setting theClock(cont'd) Manual PBS Channel I 2 Press theVCR button, Press the Number Selection then 5 button press the MENU button. to select SET CLOCK. CABLE 7 BOX USERS SET CLOCK MANUALLY will appear on-screen briefly.Then, the menu shown below will appear. (If AUTO CLOCK is set to OFF, SETTIME ZONE will not be available.) sETcLOCK I 2 3 4 AUTO CLOCK (ON) DAYLIGHT SAVTIHE (ON) SET MANUAL CLOCK (OFF) SETTIHE ZONE l (AUTO) TO _.O 5 J I I I SELECT PUSH NO.
SettingtheCIock(cont'd) 17 • Automatic oeele • teoeeeeeooeeQee PBS Channel i 2 Press theVCR button, Press the Number • eeeeeeoeeeooe • • eo ee • eooeoeeeoeelee • oeoeeeeoe • oo eo • _e • eo • ooe Selection then press the MENU 5 button • o_ I button. to select SET CLOCK. CABLE 7 BOX USERS SET CLOCK MANUALLY will appear on-screen briefly.Then, the menu shown below will appear. (If AUTO CLOCK is set to OFF, SETTIME ZONE will not be available.
Daylight-Saving TimeSelection Daylight-Saving Time Selection Follow the stepsbelow to program theVCR so its clock will automatically move forward one hour in April and turn back one hour in October. I I Press theVCR button, then press the MENU bring up the main menu display. 2 3 4 S button to VCR SET UP TUNER SET UP INPUT SELECT SET CLOCK 4 6 SET KEHOTE LOCATOE END PUSH EXIT 2 Press the Number 5 button to select SET CLOCK. CABLE BOX USERS SET CLOCK MANUALLY will appear on-screen briefly.
LanguageSelection 19 • • • el 11 Language • coo • 11 1• eeils• el oe • • 111 e• •• ee •• • •e • • ,1 •e • • • Selection Follow the steps below to change the language of the on-screen displays. I I Press theVCR l 2 3 4 5 button, then press the MENU button. PROGRAM VCR SET UP TUNER SET UP INPUT SELECT SET CLOCK 6 SET REMOTE LOCATOR O END PUSH 5 EXIT 2 Press the Number 2 button to selectVCR SET UR SETRE_.
Remote Control Buttons VCR .... Button Press this button before pressing VCR operation buttons. CBL/DSS Button Press this button before pressing other "IV operation buttons, _POWER Button Press this button before pressing Cable Box or DSS Receiver operation buttons. PAUSE/STILL Button After pressing the CBL/DSS,VCR, or TV button, press to turn on or off the Cable Box/DSS Receiver, VCR, orTV. _MUTE Button Press to eliminate the-I-V's sound.
Remote Control Buttons (cont'd)21 PLAY Button REW(ind) Bu_on When in Stop mode, press to rewind the tape at high speed. During tape playback, press to rewind the tape while the picture stays on-screen. Details are on page 56. If you have a Magnavox or Philips TV, press to adjust (decrease) the picture controls. STOP Button In VCR mode, press to play a tape. Also, press to release Slow, Still, or Search mode and to return to normal playback. Details are on page 56.
Display Panel VCR Display Panel Information aboutVCR operations appears here. Different information appears at different times. Cassette Compartment Insert a tape here. VCR Light 1, This light appears when theVCR is in VCR )osition. J_ / J _ _ _ Sound Light This light appears when a timer recording is programmed or is in progress. Details are on pages 34 - 4 I. This light blinks rapidly if the VCR is turned off to set aTimer Recording but a tape is not in the VCR.
Display Panel(cont'd)23 Remote Sensor OTR Light This light blinks when a one touch recording is in progress. Details are on page 32. Receives a signal from your remote control so you can operate yourVCR from a distance. Press theVCR button on the remote control before pressing otherVCR operation buttons. Tape Speed Lights Memory A tape speed light indicates the tape speed during recording and playback. This light appears when the tape counter has been reset to zero and memorized.
FrontPanel FF (Fast Forward) Button When tape playbackis stopped, press to fast forward the tape at high speed. During tape playback,press to fast forward the tape while the picture stays on-screen. Details are on page 56. PLAY Button Press to play a tape.Also, press to release Slow, Still, or Search mode and return to normal playback. Details are on page 56. REW(ind) Button When tape playback is stopped, press to rewind the tape at high speed.
RearPanel25 ioeoeolooeol•oDeeoeoleeoeeoBoQeeeoBoeooooooo• ANT(enna) • ••e • •• •eol• • •••oBeeeoeomoQeeoQioQoaoo• •ao• I• eooo• O• ••Go • ••lo••••o IN Jack Connect your antenna or cable here. Detai_ are on pages six - nine. AUDIO OUT Jacks Connect cables going to the AUDIO IN jacks of a camcorder, another VCR, or an audio source here. Details are on pages 47 and 50. CABLE BOX Jack Connect the Controller here.You may usethe Controller with either a Cable Box or a DSS Receiver.
Setting theRemote Control to OperateaTV YourVCR remote control may operate your TV. Follow these steps to set the remote control code. Find the code for yourTV. I Point the remote control at yourTV. Press theTV button, then press the POWER button. If yourTV turns on or off, try the CHANNEL Up/Down buttons. If your TV doesn't turn on or off, or if the CHANNEL Up/Down buttons don't work, go to step 2. If yourTV does work, you're finished.
Setting theRemote Control to Operatea CableBox/DSS Receiver 27 oo.o • oo. • • • ooooe YourVCR • oeoo remote oe eeoo Receiver. Follow these I • Qeo control steps • eouole,ee • oleoo • eolee • ee4oool eoaoQeoaeomeeoolooeeG • oleeloo to set the remote control code. 2 i control at your Cable Box/DSS Receiver. Press the CBL/DSS button, then the POWER button. If your Cable Box/DSS Receiver turns off, try the CHANNEL Up/Down buttons.
An on-screenstatusdisplay,which includesthe current time, channel,and other information (see illustrationof the status display at right), will appear when you press the EXIT/STATUSbutton or certain function buttons.The contents of the status display may vary. ON SCREEN ON: • Whenever you press the PLAY button or the STOP button, some of the contents of the status display will appear for five seconds. COUNTER ONLY: • The tape counter will appear on-screenat all times (except in Search,Slow or Still mode).
Remote Locator29 • ••eJ• •o••eJe ee • eeeeoe•e • o•e•ee•• • • eee oeeoee•o•eo When you use the Remote Locator feature, yourVCR can find your remote control.To find your remote, follow these steps. button on theVCR • •e • ••••••••• ••eeee• • • To program the VCR to find its remote control only.... I Press the POWER • • • • •••e I to turn on theVCR. LOCATING REMOTE appears on the TV screen briefly.Within a few seconds, the remote control will start beeping.
Playing Readand follow the steps below to play a tape. I Turn on the TV. Turn on the TV and set it to channel 3 or 4, whichever the CH3/CH4 switch on the back of theVCR is set to. Insert a tape. 2 Insert a tape in theVCR.The power will come on.The VCR will place itself in VCR position automatically (the VCR light will appear on the display panel of theVCR). If theVCR light does not appear, press the VCR/TV button once. If the tape's record tab has been removed, playback will start automatically.
Recording 31 Read and follow the steps below to record a television program. I Turn on the "IV. Turn on the TV and set it to channel 3 or 4, whichever the CH3/CH4 switch on the back of theVCR is set to. 2 Insert a tape with its record tab intact (details are on page five) in theVCR.The power will come on. 3 4 Press the VCR Insert a tape. 3 8 button. If theVCR light appears on the display panel of theVCR, go to step 5. If theVCR light does not appear, press theVCR/TV button once.
OneTouch Recording • eoe og eQeee •••e eeoel oeeeeeeel oe Jeeeeel Ioeeeoeooe eeee • •e ea • eoe =ei•e •e••• •e • • •• • •• • • •.= oe •e• oe • • • •• ee e•e The one touch recording (OTR) function allows you to start an immediate timed recording 30 minutes to nine hours long of the channel you are watching. Before you begin, make sure: • Channels are programmed. Details are on page 12. • The desired recording speed (SP or SLP) has been selected with the (Tape) SPEED button.
Recording OneChannel/Watching Another33 I 2 Press the VCR button. I Press the REC(ord)IOTR Details are on page 31. button to start a recording. 3 Press theVCR/TV button to put theVCR inTV The VCR light will disappear from the display panel. position. 8 5 4 Use the TV remote control to select the channel you want to watch. Or, if the VCR remote control operates yourTV, press theTV button, then use the CHANNEL Up/Down buttons or the Number buttons to select the channel you want to watch.
TimerRecording • .e it ••lie Iioeeeeil •e Be el• ••••lee •e •co! oo• • • •OIl .•••11 eeeol OOe• ice•e• •eeoc• •• • •e o• Q .• tQIOQ ee .• Oi lee lee Follow the steps below to program yourVCR to record TV programs while you're away from home.You can program up to eight timer recordings. For each one, theVCR will turn itself on, record, and turn itself off automatically. eel• el •Q • I Before you begin make sure: • Channels are programmed. Details are on page 12.
TimerRecording (cont'd)35 4 Use the Number buttons (I - 8) to select a slot in which to store the timer recording. Flashing numbers indicate an open slot (one in which a timer recording has not yet been stored). NOTF_"If you select a number that has already been used to store a timer recording, PREVIOUSLYSETPROGRAM will appear on-screen briefly. Then information about the program in that slot will appear. If this happens, press the EXIT/STATUS button. Start again at step I.
8 Press the Number I button to record in SP speed. Press the Number 2 button to record in SLP speed. You cannot use the (Tape) SPEED button at this time. NETIME PR(3""-JRAM PROGRAM I CHAN N EL TIME ON TIME OFF REC SPEED I0 CABLE/IV 09:30 PM l I I.'COPM l SIP l | sP:lsu_-2 l II / CORRECT PUSH CLEAR END F_SH EXIT J ._ 9 Press two Number buttons for the month and two I Number buttons for the day you want the program to record. For example, for July I 0, press 07, 10.
TimerRecording (cont'd)37 i 2 Press theVCR I button. Make sure the VCR is in VCR position. (The VCR light will appear on the display panel.) If the VCR light does not appear, press theVCR/TV button once. 3 Press the MENU 7 8 button. 4 5 Press the Number I button to select Press the Number 4 button to select PROGRAM PROGRAM. REVIEW. Th_ timer recording information for the program in the lowest numbered slot will appear on-screen.
Setting UptheVCRPlus+Programming System I First, fill in the boxes on this page.It will only take a few minutes, and you must do it if you want theVCR Plus+ programming system to work properly. Sincethe channel numbers of the stations you receive may not be the same as the station numbers, and since channel numbers differ from area to area,you must program the VCR with your local channel information.
Setting UptheVCRPlus+Programming System (cont'd)39 2 Now, compare the channel numbers you have written into the VCR PLUS+ CH. and CABLE/TV CH. columns.You'll notice that some stations haveVCR Plus+ and Cable/TV channel numbers that are the same, and other stations have channel numbers that do not match.Where the channel numbers DO NOT match, you must tell theVCR theVCR Plus+ and Cable/TV channel numbers according to the following Examine page 38. the listson steps.
TimerRecording WiththeVCRPlus+Programming System i .ooe .e eQ • • • •1 •• •• •• • .1 •1 • ••• •• • •• •• • •1 •• oe• •••• ••••1 • • •• • • i •• • •• • • •• Follow the steps below to program a timer recording using PlusCode programming numbers. Before you begin make sure: • Channels are programmed. Details are on page 12. • The clock is set. Details are on pages 14 - 17. • There is a tape in theVCR.
TimerRecording WiththeVCRPlus+Programming System (cont'd)41 5 Press the Number I button to record in SP speed or the Number 2 button to record in SLP speed. You cannot use the (Tape) SPEED button at this time. PROGRAM 2 CHANNEL 2S C ABLF./TV TIME TIME 10.'(30 AM 01:00 PM ON OFF 7 REC SPEED START DATE SLP 07/10/97 THU, SH I=SP OR 2=SLP END PUSH EXIT 6 6 Press the EXIT/STATUS button. PROGRAM WAS COMPLETED/PLEASE TURN OFF VCR FOR TIMER RECORDING should appear on the screen.
Connecting theController OaOIDOeOOIQ O0 OO0 OaOOO0 OO0 OOQI OIOeO OO0 OOOOQIOOlOO0 • O0 • OOOeOOOO0 • • •• QOOQOeeIOOeOOOIOQOOOIO04 OO• OaO0 • OiOIOOS •• OIOQ If you are using a Cable Box or DSS Receiver, connect the Controller to yourVCR.The Controller will automatically select channels at the Cable Box or DSS Receiver during a timer recording. Leave your Cable Box or DSS Receiver turned on during a timer recording. I Connect the Cable Box or DSS Receiver to theVCR as shown below.
Setting theController to Operatea CableBox43 • If you use a Cable Box, you must set the clock manually. Details are on page 14. • Complete the steps on page 27 before proceeding.This will enable you to use theVCR remote control to operate the Cable Box, and you will learn your Cable Box code. ° Make each entry within one minute of the previous entry. to a channel other than channel Turn on the Cable Box. Set it 09. 2 I 2 Turn on the Cable Box. Select a channel other than 09.
Setting theController to Operatea CableBox(cont'd) 7 Use the Number your Cable buttons to enter the two-digit code for Box. (See list below.) OF YOUR o_ABLE BOX IiO TEST PUSH MENU CABLE BOX CHANGE CHANNEL 09! SELECT CODE NUMBER I YES 2 NO END PUSH EXIT CABLE BOX/DSS RECEIVER CODES GENERAL INSTRUMENTS .... 01,02, 03, 04, 05, 06, 07 HAMLIN ................................ 2 I, 22 JERROLD ................. 01,02, 03, 04, 05, 06, 07 OAK ................................ 16, 17, 18 PANASONIC ....
Setting theController to Operatea DSSReceiver 45 • If you use a DSS Receiver, you must set the clock manually. Details are on page 14. • Complete the steps on page 27 before proceeding.This will allow you to use the VCR remote control to operate the DSS Receiver, and you will learn your DSS Receiver code. J Selectona channel Turn the DSSother Receiver. than 205. I 2 Turn on the DSS Receiver; 205 at the DSS Receiver.
Setting theController to Operatea DSSReceiver (cont'd) 6 Press the MENU OF¥OUR ? button. RECEIVER END PUSH EXIT 7 A zero will appear in the SELECT OUTPUT CH menu. Press one Number button (3 or 4) to complete the output channel of your DSS Receiver (channel 03 or 04). • Press 0 if you connected theVIDEO/AUDIO OUT Jacks of the DSS Receiver to the VCR's VIDEO/AUDIO IN Jacks.A/V will appear on-screen as the output channel.AN CONNECT A/V REAR ONLY will appear.
Rerecording (TapeDuplication) 47 • ••••el ,O•O..O,•.OQOO,.O•OO,O,OI••OQi•OOee•IO •ooo• iOOlel olooooloiooloooloololololoQooooloIoololoQeooeooiQioaooo The instructions on this page show you how to copy tapes. DifferentVCRs may operate differently. To duplicate a tape, make the connections shown, then follow steps I - 6. (You may use the AUDIO and VIDEO IN jacks on the front ofVCR 2 instead if you prefer.
Index Search ooeooeo eoe ee • ooo e• eeIooe'QIoooe • ei • oeo •••• When you make a recording, theVCR ea • .oe • • ••Q••e•eQ-•• • •••• • •••--+••••••••••• •• •e•• oooeoee•looooo • • e.•• • • automatically places an index code at the beginning of the recording. Essentially, an index code is a type of"bookmark" for your tape.This feature is useful if you have several different programs recorded on a single tape. mlj Insert a tape.
Multi.Channel Television Sound System49 o• ol o• ooe ol ol ll ot Bi o• • •• o• • • oQ ioo • • oQ eo• oeoQ ooooo i• o• o• o• e• ooooQ o• oQ • o• If a tape is recorded in stereo, the VCR will play the tape in stereo. If a TV program is broadcast in stereo, the VCR will receive the program in stereo. (You must program theVCR and make the appropriate stereo hookups. Details are on pages 50 51.) YourVCR will do several additional things.
Multi-Channel Television SoundSystem (cont'd) ioiDooll • OOQOQIOIOlOOOOOOOOSO • • • • • • • • a• •••OQOQDOOOIOetOOOQO• • ••B• • • 1• • •• OQ• •• • ••••••• •IOO0 •••• • • •••OmOIOOOlOQtl To receive and record programs broadcast in second audio, follow steps I - 10.To record a program broadcast in stereo, make one of the connections shown, then follow steps I - IO. If you have a Stereo and a MonitorT_, use a video cable to connect theVCR'S VIDEO OUT Jackto theTV'sVIDEO IN Jack.
Hi.FiStereo TapePlayback51 i• • e oe • eoloeoQoeeo • eeo eeeQ• e• ••e oeQ el•eeool 4 e•egQ • eeoleooeeoe • • eee • • • osoeJeJIoeooeo • eoooee.oQJQeQeQ im e• •oeeeeeo If a tape is recorded in Hi-Fi stereo, follow the steps below to play the tape in Hi-Fi stereo. I Press theVCR button, 2 3 4 then press the MENU Press the Number 2 button to selectVCR Press the Number 7 button to select AUDIO Press theNumber I OUT.
TapeCounter Memory Using the Tape Counter Follow the steps below to reset the tape counter to zero at a tape location you want to refer to later. I Play,fast forward, or rewind a tape to the location that you would like to refer to later. Press the STOP button to stop the tape. 2 Press the EXITISTATUS button. The status display,which includesthe tape counter,will appearon-screen. 3 5 ! 2 While the tape counter is still on-screen, press the CLEAR button to reset the tape counter to zero.
Go-ToFeature53 o..,,oooQooollo,,oolooooo Jesol ot olooo oeelo • tleooeeeeoeoooooeoQooeeeolooooooaoeooteoloooeeoloeooeoeeQoooeolloool Follow the steps below to program the VCR to go to a place on a tape with a specified tape counter location number. • Make sure the VCR is in VCR position. (The VCR light will appear on the display panel. If it does not, press the VCR/TV button once.) I 2 Press the VCR I 4 button. When tape playback is stopped, to bring up the GOTO display.
Repeat Playback • eeoeeleoe • • ••eoeo• • • • oeloeoeoei• ••••••••oeoeeeQoeo• Follow the steps below to program theVCR and ovee oQo •• • • •• ••l • • • • ••••••• o• I Press theVCR button, ••• ••eooo• • •ooeoeee ••• ooloe • eeeoe • to play a tape over then press the MENU I button. I 2 3 4 $ I PROGRAM VCR SET UP TUNER SET UP INPUT SELECT SET CLOCK TO SELECT PUSH NO" SHO_fN 1 6 SET REMOTE LOCATOR TO END PUSH EXIT 2 4 Press the Number 2 button to sele_VCR SET UP.
Video Stabilizer 55 Video Stabilizer You can correct vertical vibration when playingback tapes recorded in SLPspeed.When Video Stabilizer is ON, vertical vibration will be corrected automatically.Video Stabilizer is OFF when you receive the VCR. Follow the steps below to turn Video Stabilizer ON. I I Press the VCR button, then press the MENU button. I TOS, .O HOW. i _oGP_a_ / 2 VCR SET UP 3 TUNER SET UP | J 4 INPUT SELECT J S SET CLOCK J I 6 SET REMOTE LOCATOR END PUSH EXIT 4 .
Playback Options Forward and Reverse Searching I During tape playback, press and release the FF (Fast Forward) button or the REW(ind) button. A fast forward reverse picture search will begin. or 2 To return to playback, press the PLAY button. Viewing a Still Picture I During tape playback, press the PAUSE/STILL still picture (frozen image) will appear on-screen. button. A 2 To advance the still picture frame-by-frame, F.(rame) ADV(ance) button.
Automatic OperationFeatures 57 Automatic Playback When you put a tape in theVCR, the power will come on automatically.If the tape's record tab is missing,playbackwill begin. Automatic Rewind When a tape is played, fast forwarded, or recorded to its end, the VCR will rewind the tape to the beginning, then stop. If the Memory light appears on the display panel, the tape may stop at 0H00M00S on the tape counter.
Glossary oeooe • eteoe •o• oeolooo •eo oooeeo oo•o iooooooole ooo • • ooo•ooo•o oe • • ••OOOQOQ OOOO.•eooooloaommOI OOO_OO AUDIO IN/OUT Jacks: jacks located on the front and back of theVCR which are used to record audio from another source (IN) or to send audio to another source (OUT). Automatic Channel Programming: process in which theVCR scans all available channels and places the ones you receive in its memory.
Specifications 59 Video Signal EIA standards; NTSC color Antenna VHF/UHF - 75 ohm external antenna terminal VHF Output Signal Channel 03 or 04 (switchable) 75 ohms unbalanced Power Requirement 120V AC; 60 Hz Power Consumption 21W Operating Temperature 41°F (5°C) to 104°F (40°C) Relative Humidity 10% to 80% Weight 7.3 Ibs.(3.3 kg.
HelpfulHints • •ee ee eeeeee ee eeeeoeeo_eeee aoe eo ee •ee ee lee ee •ee eo oe •eeeeoe eoee • •e •.ee eelee .oee eee oeoeee eeeee e• eo •• eeoo• eee e• e• • If you are having problems with yourVCR, check the following list of problems and possible solutions before requesting service.You may be able to solve the problem yourself. The VCR has no power. • Make sure the power plug is completely • Make sure the power is turned on. connected to an AC (alternating current) outlet.
HelpfulHints(cont'd)61 ee ee eee ee eee ee oeee ee ee • eQ e• eQ •e• •e ee •• • ee e• • ee •De eeee •••e•eeeee •• ee• e• ee•e •e •e• oeeee e,ee •e•ee ee • • ee •e ee• ee •eoe There is no playback picture, or the playback picture is noisy or contains streaks. • Make sure the'IV is on the same channel as theVCR's CH3/CH4 switch. Details are on pages six - nine. • Make sure theVCR is inVCR position. Details are on pages 2 I, 22, 24, and 33.
Limited Warranty OQOOQQOOOO! OQO00 IOIOIQOJQ O0 OOI Oa O0 _'O OOOOOO0 VIDEO OOOOI OOOO! QOO0 OO0 OeOl CASSETTE OOQQ DO m• • •• •• • • •o9 O• • O• 1• •• • O• • • •• ••• •1 •" e• •• •! RECORDER 90 Days Free LaborlOne Year Parts Exchange. This product must be carried in for repair. WHO IS COVERED? You must have proof of purchase to receive warranty service.A sales receipt or other document showing that you purchased the product is considered proof of purchase.
Index63 ac power cord accessories ant,_enna)in iack auduoin[out jacks automatic playback rewind batteries 25 64 6 - 9, 25 24 - 25, 47, 58 57 57 5 cablebox connections 8-9 jack 25,42 outputchannel 8-9 coae 27,44 cable/tvchannels 38 - 39 cassettecompartment 22 cassette-inside light 22 cbl/dssbutton 20 ch3/ch4switch 25 channel above I00 20 adding 13 deleting 13 display 23 programming 12 13 rewewnng up/down buttons 2 I, 24,57 clearbutton 21,52 clock disp!ay 23 settnng 14-17 automatically 16 - 17 manually 14
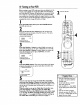
Check to be sure the items on this page are packed with your VCR. These accessories are provided to help you use or set up your VCR. Remote Control 4835 218 37196 Three "AA" Batteries 4835 138 17012 W U U RF Coaxial Cable 4835 321 27302 m Controller 4835 321 27344 If any of these items are not included, or if you need to replace an item, contact Philips Service Company at the address below. Philips Service Company RO. Box 967 Greeneville, TN 3 7744-0967 IB779BEO01 Or, call 1-800-851-8885.