
Instructions / Assembly


12 of 16
14. Touch up any nail holes by rubbing the
delivered (factory finished units only) crayon into
the nail holes and rub off excess with a clean
rack. For unfinished units, use wood putty to
touch up nail holes.
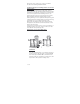
15. Caulk around the outside of the door unit
between the siding and the brick mould, along
the front side of the threshold and between the
jamb sides and the threshold.
FAILURE TO FOLLOW PROPER INSTALLATION AND
FINISHING INSTRUCTIONS WILL VOID THE WARRANTY!
FINISHING INSTRUCTIONS:
Before getting started, here are some helpful hints:
Wear safety glasses for eye protection, and rubber
gloves to avoid skin irritation.
Always follow paint or stain manufacturers’
instructions.
Ask your local hardware / paint store for the best
quality materials and make sure that all materials
are compatible with each other.
Never finish only one side of the door.
Always allow material used enough time to dry
Seal and finish all six sides of a door.
Remove hardware from door and mask off glass
prior to finishing.
Finish in a dust free, well-ventilated environment,
away from the sunlight.
STAIN- Finishing instructions
When working with finishing materials, always follow
the instructions of the material’s manufacturer.
Always keep finishing materials out of reach of
children.
1. Lightly block sand the surfaces of the unit with
sandpaper 150 grit in the direction of the wood
grain. Never sand cross grain!
2. Clean unit from all dust.
3. Check all surfaces to be clean and smooth.
4. Apply stain with a brush or cheesecloth evenly in
direction of the grain. Wipe off excess stain to
achieve the desired color and grain effect. After