REV 13 Date: 04/15 DUAL PRESSURE WASHER DPW-2500, DPW-2500-0AHA, DPW-2500-0AHU OPERATOR’S MANUAL
Table of Contents INTRODUCTION ...................................................................................................................................................... 4 DISCLAIMER ............................................................................................................................................................ 4 ABOUT THIS MANUAL ............................................................................................................................................
Changing Pump Oil ....................................................................................................................................... 30 Checking the oil level .................................................................................................................................... 31 Lengthy pump lay-offs .................................................................................................................................. 32 Putting the pump back into service .....
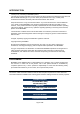
INTRODUCTION Thank you for purchasing a MAKINEX product. This manual provides information and procedures to safely operate and maintain the Dual Pressure Washer DPW-2500 Range. For your own safety and protection from injury, carefully read, understand and observe the safety instructions described in this manual. Keep this manual or a copy of it with the machine. If you lose this manual or need an additional copy, please contact MAKINEX.
ABOUT THIS MANUAL This manual uses the following symbols to help differentiate between different kinds of information. The safety symbol is used with a key word to alert you to potential hazards in operating and owning power equipment. Follow all safety messages to avoid or reduce the risk of serious injury or death. KEY TERMS READ CAREFULLY READ CAREFULLY – refers to important information that should be paid careful attention.
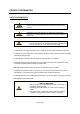
PRODUCT INFORMATION SAFETY INFORMATION WARNING Read this manual thoroughly before operating your pressure washer.
ALWAYS operate pressure washer in a well-ventilated area. Avoid enclosed areas such as garages, basements etc. ALWAYS keep exhaust gas from entering a confined area through windows, doors, ventilation intakes, or other openings. ALWAYS follow manufacturer’s recommendations, use a respirator or mask whenever there is a chance that vapours may be inhaled. WARNING RISK OF FALL HAZARD Use of pressure washer can create puddles and slippery surfaces. Kick back from spray gun can cause you to fall.
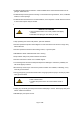
WARNING RISK OF FLUID INJECTION The high pressure stream of water that this equipment produces can cut through skin and its underlying tissues, leading to serious injury and possible amputation. Spray guns trap high pressure, even when engine is stopped and water is disconnected, which can cause injury. ALWAYS point spray gun in safe direction and squeeze trigger, to release high pressure, every time you stop the engine. NEVER aim spray gun at people, animal, or plants.
DANGER RISK OF CHEMICAL BURN Use of acids, toxic or corrosive chemicals, poisons, insecticides, or any kind of flammable solvent with this product could result in serious injury or death. Wear protective clothing to protect eyes and skin from contact with sprayed material. DANGER RISK OF HOT SURFACES Contact with hot surfaces, such as engines exhaust components, could result in serious burn. During operation, touch only the control surfaces of the pressure washer.
SAFETY DECALS MODEL DPW-2500 Page 10 of 54
PRODUCT DESCRIPTION AND SPECIFICATIONS The MAKINEX Dual Pressure Washer DPW-2500 Range is a versatile, 2 in 1 compact 2500 psi pressure cleaner. It is designed and engineered to simplify the process of pressure washing.
OVERALL MACHINE DIMENSIONS Page 12 of 54
PUMP SPECIFICATIONS MAKINEX AUS MAKINEX USA DPW-2500 (With AR XM11.17N) DPW-2500-0AHA and DPW-2500-0AHU (With AR XMV2.5G26D-F25) PRESSURE OUTPUT MAX 2500 psi/172.4 bar 2600 psi/179.3 bar FLOW RATE MAX 11L/min (2.9 gal/min) 9.5L/min (2.5 gal/min) OIL TYPE 10W30 10W30 RPM 1450 3400 WEIGHT 6.5kg/14.3lb 6.8kg/15.
IGNITION SYSTEM Transistorized Magneto STARTING SYSTEM Recoil Starter LUBRICATION SYSTEM Splash GOVERNOR SYSTEM Mechanical AIR CLEANER Dual Element OIL CAPACITY 0.6L (0.63 US qt) FUEL TANK CAPACITY 3.3L (3.1 U.S. qts) FUEL Unleaded 86 Octane or higher DRY WEIGHT 16.
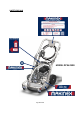
CONTROLS AND FEATURES MODEL DPW-2500 Page 15 of 54
FEATURES Adjustable valve for easy operation switch Adjustable Pressure 1000-2500 psi Built in Pressure Gauge Durable Galvanised frame Easy manoeuvrable Trolley with front swivel castors Pull Start motor Gear Box reduction (2:1) for prolonged pump life (Model DPW-2500) External Bypass Valve for seal heat protection Thermal dump valve for over heat discharge Multi cushion isolators for vibration reduction 10m high pressure hose attached Spray gun included and mounted on frame Built in 21’’ 2500 psi Roto-Clea
OPERATION BEFORE USE 1. Add Engine Oil (New machines will be pre-oiled from MAKINEX) 1.1 Place Pressure Washer on a flat, level surface. 1.2 Clean area around oil fill and remove oil fill cap. 1.3 Using oil funnel (optional), slowly pour contents into oil fill opening. (Oil capacity is 1.1L) 1.4 Replace oil fill cap and tighten. NOTE: IMPROPER treatment of pressure washer can damage it and shorten its life.
WHEN ADDING FUEL TO PRESSURE WASHER, OBSERVE THE FOLLOWING STEPS: 2.1 Turn pressure washer OFF and let it cool for at least two minutes before removing fuel cap. Loosen fuel cap slowly to release pressure. 2.2 Fill fuel tank outdoors. 2.3 DO NOT overfill fuel tank. Leave room for fuel to expand. 2.4 Wait for spilled fuel to evaporate before cranking engine. 2.5 Keep fuel away from sparks, open flames, pilot lights, heat and other ignition sources. 2.
OPERATING YOUR PRESSURE WASHER 1. How to Pre-start your pressure washer To start your pressure washer for the first time, follow these instructions. This information also applies if you let the pressure washer sit idle for at least a day. 1.1 Place pressure washer near an outside water source capable of supplying water at a flow rate at least 5 gallons/19L per minute and no less than 20 psi at pressure washer end of garden hose. 1.
3. Connect garden hose to water inlet connector 3.1 Before connecting the garden hose to the water inlet connector, inspect the filter 3.2 Run water through your garden hose for 30 seconds to clean put any debris 3.3 Release any pressure from spray gun by pulling the trigger. 3.4 Connect the garden hose to the water inlet connector (not to exceed 15m/50ft in length and with the inner diameter of hose no less than 13mm). 3.
4. Adjust valve position to Roto-Clean CORRECT POSITION 4.1 Make sure the valve is pointing to the Roto-Clean position before starting as this makes sure pressure is constantly released before you start the engine and during initial running. WARNING RISK OF EYE INJURY. SPRAY CAN SPLASH BACK OR PROPEL OBJECTS Always wear safety goggles when using this equipment or in vicinity of where equipment is in use. Before starting the pressure washer, be sure you are wearing adequate safety goggles.
***IMPORTANT*** DO NOT run the pump without the water supply connected and turned on. Damage to equipment resulting from failure to follow this instruction will VOID WARRANTY 6. Checking/adjusting pressure The MAKINEX dual pressure washer operating pressure is pre-adjusted to 2500 Psi. Over adjusting pressure will VOID WARRANTY. 6.1 Check the operating pressure when the machine starts; allow some time to build up pressure. 6.2 The by-pass valve has a knob to adjust pressure.
7. Two types of operations By using the valve, you can choose between two types of operation.
8. Nozzle selection The nozzle on the spray gun that comes with the MAKINEX dual pressure washer is a ¼ NPT M 15° Size 3. Your Roto-clean will come installed with one set of 25015 nozzles (25 degree 1.5 orifice). The minimum orifice to be used in your Roto-clean is half that which is being used in your pressure washer. Example: If your pressure washer uses a size 5 orifice, you need to use a size 2.5 orifice in your Roto-clean.
9. Foldable Handle 8.1 release the lock pin by pressing down on spring tab of the handle lock tab. Refer to above. 8.2 Use both hands at the same time. 8.3 Lock pin will spring into place at their designated grooves.
10. How to stop your pressure washer 10.1 Turn off the engine 10.2 Release pressure from spray gun, ALWAYS point gun in safe position before pressing trigger. NOTE: Spray gun traps high water pressure, even when engine is stopped and water is disconnected. 10.3 Move throttle control lever on engine to stop position 10.
MAINTENANCE General Recommendations: Regular maintenance will improve the performance and extend the life of the pressure washer. The pressure washer’s warranty does not cover items that have been subjected to operator abuse or negligence. To receive full value from the warranty, the operator must maintain the pressure washer as instructed in this manual and in the engine manual, including proper storage as detailed in Winter Storage and Long Term Storage.
Pressure Washer Maintenance Clean Debris Daily or before use, clean accumulated debris from cleaning system. Keep the unit clean at all times. Keep area around and behind muffler free from any combustible debris. Inspect cooling air slots and openings on the pressure washer. These openings must be kept clean and unobstructed. NOTE: IMPROPER treatment of pressure washer can damage it and shorten its life. DO NOT spray any objects through cooling slots.
Check Spray Gun Examine the hose connection to the spray gun and make sure it is secure, and make sure the ‘safety lock’ is present and attach on the trigger, it helps to prevent any accidental jets when in operation. Replace spray gun immediately if the safety lock is damaged or not functioning. Check Wand Occasionally, the spray wand can be clogged with foreign materials such as dirt. When this happens, excessive pressure can develop.
12. Use same nozzle maintenance with the Roto-clean. If pressure drops off check nozzle for wear. Nozzles should be replaced on a regular basis (suggestion: every month for machines in regular use, every three months for machines used intermittently). Using the machine with the incorrect nozzle size or worn nozzle will VOID WARRANTY and can be DANGEROUS to operator.
Checking the oil level Check the oil with the pump level and cold. Check the amount of oil through the level gauge (A). If necessary, top up with oil with the characteristics specified in the ‘lubricants table’. To top up with oil proceed as described below. 1. Unscrew the plug (B) and pour oil in until it is halfway up the level gauge (A). 2. Screw on the plug (B). Position the machine in which the pump is incorporated perfectly level, with the pump slightly warm.
Lengthy pump lay-offs If the pump is to be unused for a long time, proceed as described below. 1. Run the pump with clean water for a few minutes. 2. Operate the pump without water for 10 seconds with the end of the delivery pipeline open to empty the pump and the delivery circuit and prevent scaling. 3. Flush the pump with water and solvents authorised by the relevant laws. 4. Dry the pump with a pressurised air jet. 5. Protect the pump from weather.
Roto-clean Maintenance The Roto-clean must be maintained to ensure correct function and longevity of life. There are two nozzles attached and they need to be checked before every use and are similar to nozzle maintenance of the spray gun. We recommend that you supply grease to the rotary head every 30 – 40 hours of use (if frequent usage, grease every 20-30 hours of operation). Simply add a small squirt of automotive grease, do not overfill with grease as it will bog down the rotary head.
STORAGE Long term storage instructions (fuel in tank) Gasoline fuel can become stale when stored over 30 days. Stale fuel causes acid and gum deposits to form in the fuel system or crucial carburetor parts. To keep fuel fresh, add a fuel stabiliser liquid additive to fuel. The fuel stabiliser is available at most auto parts stores. Draining gasoline is unnecessary if the fuel stabiliser is used according to the instructions that come with it.
Storage of Pressure washer 1. Drain all water from high pressure line, coil it and store it in cradle of pressure washer handle. 2. Drain all water from spray gun and spray wand by holding spray gun in vertical position with nozzle pointed downward. Squeeze trigger to remove fluids from spray gun and spray wand. Store in spray gun holder. 3. Store high pressure hose and spray wand so they are protected from damage.
Charge the battery For pressure washer equipped with batteries for electric starting, proper battery maintenance and storage should be followed. An automatic battery charger with automatic trickle charging capability should be used to charge the battery. Maximum charging rate should not exceed 1.5amps. Follow the instructions included with the battery charger. The battery should be fully charged at least once per month. Other Storage tips 1.
TROUBLESHOOTING TROUBLE SHOOTING GUIDE PROBLEM CAUSE Pump sucking air Restore the tightness of the intake line Increase the size of the intake pipelines Remove and kinks from the pipes Intake flow rate insufficient Increase the filter capacity or clean the filter cartridge Increase the RPM to the rated speed Replace the valves (1) Replace the valve Replace the gaskets (1) Replace nozzle Check and Replace Replace the valves (1) Clean the valves (1) Restore the tightness of the intake pipeline connection
Water in oil Oil leak from pump Water leaking at pump Engine shuts down when running Engine will not start Guide piston gasket worn High humidity percentage in air Worn gaskets Worn gaskets Worn pistons Loose drain plug pump overfilled Replace the gaskets (1) Change the oil twice as often Replace the gaskets (1) Replace the gaskets (1) Replace the pistons (1) Tighten drain plug Check for correct amount incorrect oil use Drain and refill with correct type and amount of oil Oil seals worn Replace se
LIMITED WARRANTY In order to take advantage of the MAKINEX limited warranty, you must have maintenance performed according to the schedule (contained in relevant owner’s manual supplied with this product), by an authorised MAKINEX dealer or MAKINEX service technician.
Warranty exclusions: This warranty does not cover the following repairs and equipment: Normal Wear Pressure washers need periodic parts and service to perform well. This warranty does not cover repair when normal use has exhausted the life of a part or the equipment as a whole.
- Strict adherence to the maintenance daily checks and schedule with proof of scheduled maintenance service required by an authorised agent or qualified mechanic and/or electrician. - Maintenance services are not covered under warranty. - It is the consumer’s responsibility to deliver the machine in question to our service premises or to the premises of our appointed agent at the consumer’s expense for replacement or repair as applicable.
WARRANTY CONTACT INFORMATION: AUSTRALIA Tel + 61 2 9460 8071 Fax +61 2 9439 9815 d.lobban@Makinex.com.au 15 Waltham St, Artarmon, NSW 2064 AUSTRALIA USA Tel 407-446-1966 407-826-0000 j.spencer@makinexusa.com m.spencer@makinexusa.com EUROPE Tel +31 (0)6 24881203 +31 (0)6 50841849.
CONTACT INFORMATION AUSTRALIA/ NEW ZEALAND UNITED STATES OF AMERICA EUROPE W makinex.com E sales@makinex.
APPENDICES APPENDIX A – GENERAL EXPLODED PARTS DIAGRAM APPENDIX B – PUMP ASSEMBLY PARTS APPENDIX C – HANDLE ASSEMBLY PARTS APPENDIX D – FRAME ASSEMBLY PARTS APPENDIX E – PUMP EXPLODED PARTS APPENDIX F- ROTARY CLEANER EXPLODED PARTS APPENDIX G- RISK ASSESSMENT Page 44 of 54
REC'D: ITEM 1 2 3 4 5 6 7 8 9 10 11 12 13 14 15 16 17 18 19 20 APPENDIX A – GENERAL EXPLODED PARTS DIAGRAM 3 4 5 6 7 8 PART # 27-8065 29-0007 N/A 27-9610 28-0003 27-8064 28-0004 30-3159 N/A N/A 17-0076 27-8066 33-0568 15-0342 851-0409 30-3156 18-0053 16-0470 16-0001 17-0005 VENDOR DPW-27-8065 DPWN2A-29-0007 DPW2-27-9610 DPW-28-0003 DPW-27-8064 DPW-28-0004 DPW-30-3159 DPW2-200 DPW2-100 DPW-307-3-A DPW-27-8066 DPW-311 DPW2-306 DPW2-303 DPW-30-3156 DPW2-N15030 DPW4-308-L-A DPW-308-G DPW-307-6 DATE: D
REC'D: ITEM 1 2 3 4 5 6 7 8 9 10 11 12 13 14 15 16 17 18 19 APPENDIX A – GENERAL EXPLODED PARTS DIAGRAM M:\Drawings\PRIVATE LABEL\MAKINEX\DPW-2500\DPW-2500-0AHU UNIT ASSY.
REC'D: ITEM 1 2 3 4 5 6 7 8 9 10 11 12 13 14 15 16 17 18 APPENDIX B- PUMP ASSEMBLY PARTS 1 2 6 5 4 3 PART # 1-0088 43-0073 28-0022 29-0007 27-0092 3-0193 27-8065 8-0631 23-0012 23-0514 23-0045 42-0011 15-0007 24-0105 15-0194 14-0144 20-1391A77 22-0005 VENDOR DPW2-301 DPW2-43-0073 DPW-28-0022 DPWN2A-29-0007 DPW2U-27-0092 DPW2U-302 DPW-27-8065 DPW2U-302-UL DPW2-23-0442 DPW2-309-5 DPW-309-2 DPW-309-4 DPW-307-1 DPW-309-1 DPW2-306B DPW2-128 DPW2U-114 DPW-309-6 DATE: DESCRIPTION ENGINE HONDA 6.
REC'D: APPENDIX B- PUMP ASSEMBLY PARTS 3 M:\Drawings\PRIVATE LABEL\MAKINEX\DPW-2500\DPW-2500-0AHA PUMP_ENG ASSY.
REC'D: ITEM 1 2 3 4 5 6 7 8 APPENDIX C- HANDLE ASSEMBLY PARTS 1 M:\Drawings\PRIVATE LABEL\MAKINEX\DPW-2500\DPW-2500 HANDLE ASSY.iam 2 3 4 5 PART # 7-0248A77 27-9609 30-3158 49-0173 20-1389A31 28-0004 30-3159 20-1390A31 VENDOR DPW2-200 DPW-27-9609 DPW-30-3158 DPW-210 DPW-205 DPW-28-0004 DPW-30-3159 DPW-206 DATE: DESCRIPTION HANDLE - DPW2500 PFHMS - M4-0.7 X 12MM HEX NYLON LOCKNUT-ZINC M4-0.7 LEAF SPRING- HANDLE RELEASE HANDLE LOCK - RIGHT WASHER - ZI SAE 3/8" HEX NYLON LOCKNUT-ZINC M10-1.
REC'D: APPENDIX D- FRAME ASSEMBLY PARTS 2 1 33 17 32 3 * USE AS NEEDED 31 30 29 19 3 TO UNLOADER 28 4 5 27 TO WHIRLY 19 12 11 13 26 25 M:\Drawings\PRIVATE LABEL\MAKINEX\DPW-2500\DPW-2500 FRAME ASSY.
APPENDIX E - PUMP PARTS BREAK DOWN MODEL DPW-2500 Page 49 of 54
Page 50 of 54
APPENDIX F- ROTARY CLEANER EXPLODED PARTS Page 51 of 54
Page 52 of 54
APPENDIX G- RISK ASSESSMENT
Page 54 of 54