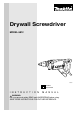
Drywall Screwdriver MODEL 6812 002602 DOUBLE INSULATION I N S T R U C T I O N M A N U A L WARNING: For your personal safety, READ and UNDERSTAND before using. SAVE THESE INSTRUCTIONS FOR FUTURE REFERENCE.
SPECIFICATIONS Model Capacities 6812 Self drilling screw 5 mm (3/16”) Drywall screw 5 mm (3/16”) No load speed (RPM) 1,500 - 4,500/min. Overall length 294 mm (11-5/8”) Net weight 1.3 kg (2.9 lbs) • Manufacturer reserves the right to change specifications without notice. • Specifications may differ from country to country. GENERAL SAFETY RULES USA002-2 (For All Tools) WARNING: Read and understand all instructions.
5. Avoid body contact with grounded surfaces such as pipes, radiators, ranges and refrigerators. There is an increased risk of electric shock if your body is grounded. 6. Do not expose power tools to rain or wet conditions. Water entering a power tool will increase the risk of electric shock. 7. Do not abuse the cord. Never use the cord to carry the tools or pull the plug from an outlet. Keep cord away from heat, oil, sharp edges or moving parts. Replace damaged cords immediately.
SERVICE 23. Tool service must be performed only by qualified repair personnel. Service or maintenance performed by unqualified personnel could result in a risk of injury. 24. When servicing a tool, use only identical replacement parts. Follow instructions in the Maintenance section of this manual. Use of unauthorized parts or failure to follow Maintenance instructions may create a risk of electric shock or injury. USE PROPER EXTENSION CORD: Make sure your extension cord is in good condition.
SAVE THESE INSTRUCTIONS WARNING: MISUSE or failure to follow the safety rules stated in this instruction manual may cause serious personal injury. SYMBOLS USD201-2 The followings show the symbols used for tool. V ....................... volts A ....................... amperes Hz ..................... hertz n ....................no load speed ˚ ....................Class II Construction .../min................revolutions or reciprocation per minute ................
FUNCTIONAL DESCRIPTION • 002610 A CAUTION: Always be sure that the tool is switched off and unplugged before adjusting or checking function on the tool. Depth adjustment The depth can be adjusted by turning the locking sleeve. Turn it in “A” direction for less depth and in “B” direction for more depth. One full turn of the locking sleeve equals 1.5 mm (1/16”) change in depth. B 1 1. Locking sleeve 002615 1mm (3/64") 1 1. Locator 002616 1mm (3/64") 1 1.
002626 Switch action 1 2 • CAUTION: Before plugging in the tool, always check to see that the switch trigger actuates properly and returns to the “OFF” position when released. To start the tool, simply pull the switch trigger. Release the switch trigger to stop. For continuous operation, pull the switch trigger and then push in the lock button. To stop the tool from the locked position, pull the switch trigger fully, then release it. 1. Lock button 2.
002639 (rpm) No load speed 4500 Refer to the figure for the relationship between the number settings on the adjusting dial and the kind of work. A range: C 1500 1 2 For work that requires a subtle speed control such as centering or final fastening. B A 3 4 B range: 5 Dial setting Use when screws/drywall boards might be damaged with C range speed. C range: For regular fastening work. NOTE: • • • 002643 17mm(11/16 ) or 37mm(1-7/16 ) 1 2 1. Hook 2.
ASSEMBLY • CAUTION: Always be sure that the tool is switched off and unplugged before carrying out any work on the tool. Installing or removing the bit 002651 To remove the bit, first pull the locator out of the locking sleeve. 002658 Hook the neck of the bit with one of the holes on the locator and pull. The bit is thus easily removed. 002659 To install the bit, insert it as far as it will go through the opening in the soft rubber collar (dust ring) on top.
OPERATION Fit the screw on the point of the bit and place the point of the screw on the surface of the workpiece to be fastened. Apply pressure to the tool and start it. Withdraw the tool as soon as the clutch cuts in. Then release the switch trigger. • • MAINTENANCE • 001145 CAUTION: When fitting the screw onto the point of the bit, be careful not to push in on the screw. If the screw is pushed in, the clutch will engage and the screw will rotate suddenly.
ACCESSORIES • CAUTION: These accessories or attachments are recommended for use with your Makita tool specified in this manual. The use of any other accessories or attachments might present a risk of injury to persons. Only use accessory or attachment for its stated purpose. If you need any assistance for more details regarding these accessories, ask your local Makita service center.
Memo 12
Cut Stamp Timbre Makita Canada Inc.
Your answers to the following questions are appreciated. 1. This product was purchased from? 3. How did you first learn of Makita Power Tools? Hardware/lumber Store Industrial Supply Tool Distributor Other ( ) Magazine/Newspaper Catalog From dealer Other ( ) Store display 2. Use of the product is intended for? 4. Most favored points are? Construction trade Home maintenance Design Makita Brand Industrial maintenance Other ( Features Power Size Other ( ) ) Price 5.
Factory Service Centres Head Office: 1950 Forbes St., Whitby, Ontario, L1N 7B7 (905) 571 - 2200 1-800-263-3734 Regional Office: 11771 Hammersmith Way, Richmond B.C. V7A 5H6 (604) 272 - 3104 1-800-663-0909 Regional Office: (Montreal) 6389 boul, Couture, St. Leonard, Quebec H1P 3J5 (514) 323 - 1223 1-800-361-7049 Dartmouth: 202 Brownlow Avenue Dartmouth, N.S., B3B 1T5 (902) 468 - 7064 1-888-625-4821 Ville St. Laurent: (Montreal) 1140 Rue Bégin, Ville St.
MAKITA LIMITED ONE YEAR WARRANTY Warranty Policy Every Makita tool is thoroughly inspected and tested before leaving the factory. It is warranted to be free of defects from workmanship and materials for the period of ONE YEAR from the date of original purchase. Should any trouble develop during this one year period, return the COMPLETE tool, freight prepaid, to one of Makita’s Factory or Authorized Service Centres.