
Use and Care Manual
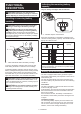


6 ENGLISH
Switch action
CAUTION: Before installing the battery car-
tridge into the tool, always check to see that the
switch lever actuates properly and returns to the
"OFF" position when released.
CAUTION: Be sure to hold the tool rmly
before the tool is switched off.
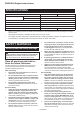
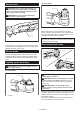
1
►1. Switch lever
Tostartthetool,simplypulltheswitchlever.Toolspeed
is increased by increasing pressure on the switch lever.
Release the switch lever to stop.
Electric brake
Thistoolisequippedwithanelectricbrake.Ifthetool
consistently fails to quickly stop after the switch trigger
is released, have the tool serviced at a Makita service
center.
Lighting up the front lamp
CAUTION: Do not look in the light or see the
source of light directly.
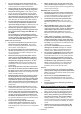
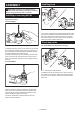
For model AD03
1
►1. Lamp
For model AD04
1
►1. Lamp
Pulltheswitchlevertolightupthelamp.Thelamp
keeps on lighting while the switch lever is being pulled.
Thelightautomaticallygoesoutapproximately10sec-
onds after the switch lever is released.
NOTE: Use a dry cloth to wipe the dirt off the lens of
the lamp. Be careful not to scratch the lens of lamp, or
it may lower the illumination.
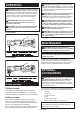
Reversing switch action
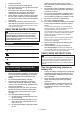
A
B
1
1
►1. Reversing switch lever
CAUTION: Always check the direction of
rotation before operation.
CAUTION: Use the reversing switch only after
the tool comes to a complete stop. Changing the
direction of rotation before the tool stops may dam-
age the tool.
CAUTION: When not operating the tool,
always set the reversing switch lever to the neu-
tral position.
Thistoolhasareversingswitchtochangethedirection
of rotation. Depress the reversing switch lever from the
AsideforclockwiserotationorfromtheBsideforcoun-
terclockwise rotation.
When the reversing switch lever is in the neutral posi-
tion, the switch lever cannot be pulled.