Air Nailer MODEL AG090 MODEL AG125 I N S T R U C T I O N M A N U A L WARNING: For your personal safety, READ and UNDERSTAND before using. SAVE THESE INSTRUCTIONS FOR FUTURE REFERENCE. w w w. m a k i t a t o o l s.
SPECIFICATIONS Model AG090 AG125 Air pressure Nail length 32 - 90 mm (1-1/4 ” - 3-1/2”) 4.5 - 8.5 kgf/cm G (65 - 120 PSIG) 75 - 125 mm (3” - 5”) 2 Diameter of nail head Overall length Min. hose diameter Net weight 7.5 - 11.0 mm (0.295” - 0.433”) 260 mm (10-1/4”) 6.5 mm (1/4”) 1.3 kg (2.9 lbs) • Manufacturer reserves the right to change specifications without notice. • Specifications may differ from country to country.
READ ALL INSTRUCTIONS. For personal safety and proper operation and maintenance of the tool, read this instruction manual carefully before using the tool. Always wear safety glasses to protect your eyes from dust or nail injury. The safety glasses should conform with the requirements of ANSI Z87.1 - 1979. • WARNING: It is an employer’s responsibility to enforce the use of safety eye protection equipment by the tool operators and by other persons in the immediate working area.
General Tool Handling Guidelines: 1. Always assume that the tool contains fasteners. 2. Do not point the tool toward yourself or anyone whether it contains fasteners or not. 3. Do not actuate the tool unless the tool is placed firmly against the workpiece. 4. Respect the tool as a working implement. 5. No horseplay. 6. Do not hold or carry the tool with a finger on the trigger. 7. Do not load the tool with fasteners when any one of the operating controls is activated. 8.
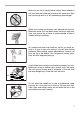
Only those involved in the work should be in the vicinity. Children especially must be kept away at all times. There may be local regulations concerning noise which must be complied with by keeping noise levels within prescribed limits. In certain cases, shutters should be used to contain noise. Shutter Bang ! Securing the trigger in the ON position is also very dangerous. Never attempt to fasten the trigger.
Always check the tool for its overall condition and loose screws before operation. Tighten as required. Make sure the safety system is in working order before operation. The tool must not operate if only the nail guide is pressed against the wood. Nail guide Trigger Adjuster Test for possible faulty operation with nails unloaded and the adjuster set to the number 1. Check walls, ceilings, floors, roofing and the like carefully to avoid possible electrical shock, gas leakage, explosions, etc.
Make sure no one is nearby before nailing. Never attempt to nail from both the inside and outside at the same time. Nails may rip through and /or fly off, presenting a grave danger. Watch your footing and maintain your balance with the tool. Make sure there is no one below when working in high locations, and secure the air hose to prevent danger if there is sudden jerking or catching. On rooftops and other high locations, nail as you move forward.
DO not point the ejection port at anyone in the vicinity. Keep hands and feet away from the ejection port area. When the air hose is connected, do not carry the tool with your finger on the trigger or hand it to someone in this condition. Accidental firing can be extremely dangerous. Handle the tool carefully as there is high pressure inside the tool that can be dangerous if a crack is caused by rough handling (dropping or striking). Do not attempt to carve or engrave on the tool.
Perform cleaning and maintenance right after finishing the job. Keep the tool in tip-top condition. Lubricate moving parts to prevent rusting and minimize friction related wear. Wipe off all dust from the parts. Do not operate this tool if it does not contain a legible WARNING LABEL. Do not modify tool without authorization from Makita. Ask Makita’s Factory or Authorized service center for periodical inspection of the tool.
TOOL INSTALLATION INSTRUCTIONS AND USE Selecting compressor The air compressor must comply with the requirements of ANSI B19.3 - 1981. Select a compressor that has ample pressure and air output to assure cost-efficient operation. The graph shows the relation between nailing frequency and compressor air output at a compression of 8.5 kgf/cm²G (120 PSIG). Thus, for example, when you drive about 10 nails 3.75 mm x 90 mm (0.148” x 3-1/2”) per minute, a compressor with an air output over 55 l/minute is required.
Lubrication To insure maximum performance, install an air set (oiler, regulator, air filter) as close as possible to the tool. Adjust the oiler so that one drop of oil will be provided for every 20 nails. When an air set is not used, oil the tool with pneumatic tool oil by placing 2 (two) or 3 (three) drops into the air fitting. This should be done before and after use. For proper lubrication, the tool must be fired a couple of times after pneumatic tool oil is introduced.
Loading nailer • Nail head Nail shank • Nail tip CAUTION: Be careful not to touch the trigger when loading the nail. When loading nail into the nailer, grip the nail by the shank, not the tip. Hold the nail shank lightly and insert the nail head into the nail guide until the nail is held firmly by the magnet. Magnet Nail Nail guide Contact arm Adjusting depth of nailing • CAUTION: Always disconnect the hose before adjusting the depth of nailing.
Operation Driving surface • CAUTION: Make sure the safety system is in working order before operation. To start driving, place the tip of the nail against the driving surface and pull the trigger. At the start of driving, apply gentle downward pressure on the nailer in the arrow direction to hold the nail firmly. When the impact of the contact arm stops, the driving operation is over. If the nail is not driven deep enough, place the ejection port of the nailer over the nail head.
Air exhaust Exhaust cover Air exhaust direction can be changed easily by rotating the exhaust cover. Change it when necessary. Jammed nailer Pliers Nail Nail guide • CAUTION: Always disconnect the hose before cleaning a jam. When the nailer becomes jammed, do as follows: Use pliers to bend the jammed nail so that the nail head comes out of the nail guide. Then remove the jammed nail. After removing the jammed nail, make sure that the nail guide and the contact arm move smoothly.
MAINTENANCE • CAUTION: Always disconnect the hose before attempting to perform inspection or maintenance. Maintenance of nailer Always check the tool for its overall condition and loose screws before operation. Tighten as required. With tool disconnected, make daily inspection to assure free movement of the nail guide and trigger. Do not use tool if the nail guide or trigger sticks or binds.
Maintenance of compressor, air set and air hose After operation, always drain the compressor tank and the air filter. If moisture is allowed to enter the tool, it may result in poor performance and possible tool failure. Check regularly to see if there is sufficient pneumatic oil in the oiler of the air set. Failure to maintain sufficient lubrication will cause O-rings to wear quickly. Keep the air hose away from heat (over 60°C, over 140°F), away from chemicals (thinner, strong acids or alkalis).
Cut First-Class Postage Required Post Office will not deliver without proper postage. Makita U.S.A., Inc.
MAIL THIS PORTION Your answers to the following questions are appreciated. 1. This product was purchased from: Home Center 3. How did you learn about this product: Magazine Radio Hardware/Lumber Store From Dealer Exhibition Tool Distributor Newspaper From Friend Industrial Supply Store Display Previous Usage Construction Supply Catalog Other ( Other ( ) 2. Use of the product is intended for: ) 4.
FACTORY SERVICE CENTERS 1-800-4-MAKITA RETAIN THIS PORTION FOR YOUR RECORDS ALABAMA 2365 Pelham Parkway Pelham, AL 35124 (205) 620-1791 COLORADO 11839 E. 51st Ave. Denver, CO 80239-2709 (303) 371-2850 KENTUCKY 1215 S. Hurstbourne Parkway Louisville, KY 40222 (502) 326-3740 NEW MEXICO 5805 Menaul Blvd. NE Albuquerque, NM 87110 (505) 881-4619 PUERTO RICO 200 Guayama St. Hato Rey, PR 00917 (787) 250-8776 ARIZONA 3707 E. Broadway Rd., Ste. 6 Phoenix, AZ 85040 (602) 437-2850 CONNECTICUT 508 Spring St.
MAKITA LIMITED ONE YEAR WARRANTY Warranty Policy Every Makita tool is thoroughly inspected and tested before leaving the factory. It is warranted to be free of defects from workmanship and materials for the period of ONE YEAR from the date of original purchase. Should any trouble develop during this one-year period, return the COMPLETE tool, freight prepaid, to one of Makita's Factory or Authorized Service Centers.