
User Manual


10 ENGLISH
Installing or removing the rod and
piston
1. Inserttherodfromtherearsideofthetoolwithits
teeth facing down.
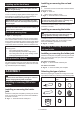
►Fig.13: 1. Long rod or black rod
NOTICE: For 600 ml size holder, use the long
rod. For 800 ml size holder, use the black rod.
2. Attach the piston with the screw.
►Fig.14: 1. Screw 2. Piston 3. Long rod or black rod
Toremovetherodandpiston,followtheinstallation
procedure in reverse.
Installing or removing 600 ml or 800
ml size holder
CAUTION: Secure the holder to the holder
joint rmly. Otherwise the holder may come off
during operation and may cause an injury.
Toinstalltheholder,turnitclockwisermlyuntilitstops
whileholdingtheholderjoint.
►Fig.15: 1. Holder
Toremovetheholder,followtheinstallationprocedure
in reverse.
OPERATION
Using cartridge
Preparing cartridge for use
1. Cut the tip of the cartridge nozzle so that the suit-
able amount of caulking material is fed.
►Fig.16: 1. Nozzle
2. Makeaholeontheprotectivelmwiththetipof
the nozzle.
►Fig.17: 1. Nozzle
3. Attach the nozzle to the cartridge.
NOTICE: Be sure to check the cartridge for
damage before installation. Using the damaged
cartridge may cause malfunction.
NOTICE: When reusing the partially used car-
tridge, be sure to remove the solid caulking mate-
rial before the installation.
Installing cartridge to 300 ml size
holder
NOTICE: Make sure that piston A is attached
to the rod. Do not use other type of piston for
cartridge.
1. Pull the rod handle backward slowly until it stops.
►Fig.18: 1. Rod handle
2. Insertthecartridgeintotheholderasshowninthe
gure.
►Fig.19
3. Push the rod gently until the piston touches the
bottom of cartridge.
Toremovethecartridge,followtheinstallationproce-
dure in reverse.
Installing cartridge to 600 ml or 800
ml size holder
NOTICE: Make sure that piston A (for 600 ml
size holder) or piston D (for 800 ml size holder) is
attached to the rod. Do not use other type of pis-
ton for cartridge.
1. Remove the holder cap from the holder, and then
pull the rod handle backward slowly until it stops.
►Fig.20: 1. Holder cap 2. Rod handle
2. Insertthecartridgeintotheholder.
►Fig.21: 1. Holder
3. Attachtheholdercapbyturningitrmlywhile
holding the holder.
►Fig.22: 1. Holder cap 2. Holder
4. Push the rod gently until the piston touches the
bottom of cartridge.
Toremovethecartridge,followtheinstallationproce-
dure in reverse.
Using lm type package
Preparing package for use
Cut off the tip of the package.
►Fig.23
NOTICE: Be sure to check the package for dam-
age before installation. Using the damaged pack-
age may cause malfunction.
Installing lm type package to 600 ml
or 800 ml size holder
NOTICE: Make sure that piston B (for 600 ml
size holder) or piston E (for 800 ml size holder) is
attached to the rod. Do not use other type of pis-
ton for lm type package.
1. Remove the holder cap, nozzle, and rubber ring
from the holder.
►Fig.24: 1. Holder cap 2. Nozzle 3. Rubber ring
4. Holder
2. Pull the rod handle backward slowly until it stops.
3. Insertthepackageintotheholder.
►Fig.25: 1. Holder
4. Attach the rubber ring, nozzle, and holder cap by
turningtheholdercaprmly.
►Fig.26: 1. Holder cap 2. Nozzle 3. Rubber ring
4. Holder