
User Manual


6 ENGLISH
FUNCTIONAL
DESCRIPTION
CAUTION: Always be sure that the tool is
switched off and the battery cartridge is removed
before adjusting or checking function on the tool.
Installing or removing battery
cartridge
CAUTION: Always switch off the tool before
installing or removing of the battery cartridge.
CAUTION: Hold the tool and the battery car-
tridge rmly when installing or removing battery
cartridge.Failuretoholdthetoolandthebattery
cartridgermlymaycausethemtoslipoffyourhands
andresultindamagetothetoolandbatterycartridge
andapersonalinjury.
►Fig.1: 1.Button2. Battery cartridge
Toremovethebatterycartridge,withdrawitfromthe
toolwhilepressingthebuttonsonbothsidesofthe
cartridge.
Toinstallthebatterycartridge,alignthetongueonthe
batterycartridgewiththegrooveinthehousingandslip
it into place.
CAUTION: Always insert it until it locks in
place with a little click.Ifnot,itmayaccidentally
falloutofthetool,causinginjurytoyouorsomeone
aroundyou.
CAUTION: Do not install the battery cartridge
forcibly.Ifthecartridgedoesnotslideineasily,itis
notbeinginsertedcorrectly.
Battery protection system
Thetoolisequippedwithabatteryprotectionsystem.
Thissystemautomaticallycutsoffpowertothemotorto
extendbatterylife.
Thetoolwillautomaticallystopduringoperationif
thetooland/orbatteryareplacedunderthefollowing
condition:
Low battery voltage:
Theremainingbatterycapacityistoolowandthetool
willnotoperate.Ifyouturnthetoolon,themotorruns
againbutstopssoon.Inthissituation,removeand
rechargethebattery.
Lock lever
CAUTION: When not operating the tool,
always set the lock lever in the locked position B.
►Fig.2: 1. Lock lever
WhenthelockleverisinthelockedpositionB,the
switchcannotbeactuated.
WhenthelockleverisintheunlockedpositionA,the
switchcanbeactuated.
Switch action
CAUTION: Before installing the battery car-
tridge into the tool, always check to see that the
switch actuates properly and returns to the "OFF"
position when released.
CAUTION: Always check the direction of
rotation before operation.
►Fig.3: 1. Lock lever 2. Switch
Tostartthetool,rstmovethelocklevertothe
unlockedpositionAtoreleasetheswitch.Andthensim-
plypushtheswitchonthe
Csidefortheclockwise
rotation and the Dsideforthecounterclockwise
rotation. Release the switch to stop.
NOTICE: Change the direction only after the tool
comes to a complete stop. Changing the direction
ofrotationbeforethetoolstopsmaydamagethetool.
Speed change
►Fig.4: 1. Speed change lever
CAUTION: Always set the speed change lever
fully to the correct position.Ifyouoperatethe
toolwiththespeedchangeleverpositionedhalfway
betweenthe"1"sideand"2"side,thetoolmaybe
damaged.
CAUTION: Do not use the speed change lever
while the tool is running.Thetoolmaybedamaged.
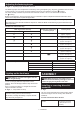
Position of
speed
change lever
Speed Torque Applicable
operation
1 Low High Heavy load-
ing operation
2 High Low Light loading
operation
Tochangethespeed,switchoffthetoolrst.Select
the"2"sideforhighspeedor"1"forlowspeedbuthigh
torque.Besurethatthespeedchangeleverissettothe
correctpositionbeforeoperation.
Ifthetoolspeediscomingdownextremelyduringthe
operationwith"2",slidethelevertothe"1"andrestart
the operation.