
Operators Manual


5
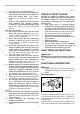
as shown in the figures. Drive a trial screw into your
material or a piece of duplicate material. If the depth is
still not suitable for the screw, continue adjusting until
you obtain the proper depth setting.
1
1mm
004149
1
1mm
004154
Switch action
1
2
009961
CAUTION:
• Before plugging in the tool, always check to see
that the switch trigger actuates properly and
returns to the "OFF" position when released.
To start the tool, simply pull the switch trigger. Tool
speed is increased by increasing pressure on the switch
trigger. Release the switch trigger to stop.
For continuous operation, pull the switch trigger and
then push in the lock button.
To stop the tool from the locked position, pull the switch
trigger fully, then release it.
NOTE:
• Even with the switch on and motor running, the bit
will not rotate until you fit the point of the bit in the
screw head and apply forward pressure to engage
the clutch.
Lighting up the lamps
1
009967
CAUTION:
• Do not look in the light or see the source of light
directly.
To turn on the lamp, pull the trigger. Release the trigger
to turn it off.
NOTE:
• Use a dry cloth to wipe the dirt off the lens of lamp.
Be careful not to scratch the lens of lamp, or it may
lower the illumination.
Reversing switch action
A
B
1
009962
CAUTION:
• Always check the direction of rotation before
operation.
• Use the reversing switch only after the tool comes
to a complete stop. Changing the direction of
rotation before the tool stops may damage the tool.
This tool has a reversing switch to change the direction
of rotation. Move the reversing switch lever to
the
position (A side) for clockwise rotation or
the
position (B side) for counterclockwise rotation.
1. Reversing
switch lever
1. Lamp
1. Switch trigger
2. Lock button
1. Locator
1. Locator