INSTRUCTION MANUAL MANUEL D'INSTRUCTION MANUAL DE INSTRUCCIONES Demolition Hammer Marteau Piqueur Martillo Demoledor HM1202 HM1202C 002877 DOUBLE INSULATION DOUBLE ISOLATION DOBLE AISLAMIENTO IMPORTANT: Read Before Using. IMPORTANT: Lire avant usage. IMPORTANTE: Leer antes de usar.
ENGLISH (Original instructions) SPECIFICATIONS Model HM1202 HM1202C Blows per minute 1,900 950 - 1,900 Overall length 578 mm (22-3/4") Net weight 9.9 kg (21.7 lbs) 10.0 kg (22.1 lbs) • Due to our continuing programme of research and development, the specifications herein are subject to change without notice. • Specifications may differ from country to country. • Weight according to EPTA-Procedure 01/2003 USA002-2 immediately. Damaged cords increase the risk of electric shock. 8.
17. 18. 19. 20. 21. 22. Accessories that may be suitable for one tool, may become hazardous when used on another tool. Service 23. Tool service must be performed only by qualified repair personnel. Service or maintenance performed by unqualified personnel could result in a risk of injury. 24. When servicing a tool, use only identical replacement parts. Follow instructions in the Maintenance section of this manual.
11. 12. 13. Do not point the tool at any one in the area when operating. The bit could fly out and injure someone seriously. Do not touch the bit or parts close to the bit immediately after operation; they may be extremely hot and could burn your skin. Some material contains chemicals which may be toxic. Take caution to prevent dust inhalation and skin contact. Follow material supplier safety data.
Number on adjusting dial 6 5 4 3 2 1 The side handle can be swung 360° on the vertical and secured at any desired position. It also secures at eight different positions back and forth on the horizontal. Just loosen the clamp nut to swing the side handle to a desired position. Then tighten the clamp nut securely. The side handle also can be mounted in the rear groove. Loosen the clamp nut and widen the side handle base. Slide the side handle back to the rear groove and secure it with the clamp nut.
Never use gasoline, benzine, thinner, alcohol or the like. Discoloration, deformation or cracks may result. • Replacing carbon brushes 1. Commutator 2. Insulating tip 3. Carbon brush 2 1 002923 Bit angle 3 1 1. Change ring 001146 When the resin insulating tip inside the carbon brush is exposed to contact the commutator, it will automatically shut off the motor. When this occurs, both carbon brushes should be replaced. Keep the carbon brushes clean and free to slip in the holders.
Center for this lubrication service. Run the tool for several minutes to warm it up. Switch off and unplug the tool. Loosen the six screws and remove the handle. To maintain product SAFETY and RELIABILITY, repairs, any other maintenance or adjustment should be performed by Makita Authorized or Factory Service Centers, always using Makita replacement parts. ACCESSORIES 1. Screws CAUTION: These accessories or attachments are recommended for use with your Makita tool specified in this manual.
MAKITA LIMITED ONE YEAR WARRANTY Warranty Policy Every Makita tool is thoroughly inspected and tested before leaving the factory. It is warranted to be free of defects from workmanship and materials for the period of ONE YEAR from the date of original purchase. Should any trouble develop during this one year period, return the COMPLETE tool, freight prepaid, to one of Makita’s Factory or Authorized Service Centers.
FRANÇAIS (Mode d’emploi original) SPÉCIFICATIONS Modèle HM1202 HM1202C Nombre de frappes par minute 1 900 950 - 1 900 Longueur totale 578 mm (22-3/4") Poids net 9,9 kg (21,7 lbs) 10,0 kg (22,1 lbs) • Étant donné l'évolution constante de notre programme de recherche et de développement, les spécifications contenues dans ce manuel sont sujettes à modification sans préavis. • Les spécifications peuvent varier suivant les pays.
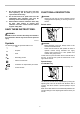
20. Prenez soin de bien entretenir les outils. Les outils de coupe doivent être toujours bien affûtés et propres. Des outils bien entretenus, dont les arêtes sont bien tranchantes, sont moins susceptibles de coincer et plus faciles à diriger. 21. Assurez-vous que les pièces mobiles ne sont pas désalignées ou coincées, qu'aucune pièce n'est cassée et que l'outil n'a subi aucun dommage affectant son bon fonctionnement. Le cas échéant, faites réparer l'outil avant de l'utiliser.
USB009-2 12. RÈGLES DE SÉCURITÉ PARTICULIÈRES NE vous laissez PAS tromper (au fil d'une utilisation répétée) par un sentiment d'aisance et de familiarité avec le produit, en négligeant le respect rigoureux des règles de sécurité qui accompagnent le marteau. L'utilisation non sécuritaire ou incorrecte de cet outil comporte un risque de blessure grave. 1.
DESCRIPTION DU FONCTIONNEMENT • Numéro sur le cadran de réglage 6 5 4 3 2 1 ATTENTION: Assurez-vous toujours que l'outil est hors tension et débranché avant de l'ajuster ou de vérifier son fonctionnement. 002898 Interrupteur • 1 Nombre de frappes par minute 1 900 1 800 1 600 1 300 1 050 950 1. Levier d'interrupteur ATTENTION: Le cadran de réglage de la vitesse ne peut pas dépasser le 6 et le 1.
La poignée latérale peut tourner de 360° à la verticale et se fixer sur n'importe quelle position. Elle se fixe également sur huit positions différentes en avant et en arrière à l'horizontale. Il vous suffit de desserrer l'écrou de serrage pour déplacer la poignée latérale sur la position voulue. Puis, resserrez l'écrou de serrage à fond. Vous pouvez également monter la poignée latérale dans l'encoche arrière. Desserrez l'écrou de serrage et élargissez l'embase de la poignée latérale.
ENTRETIEN 1 2 • • ATTENTION: Assurez-vous toujours que l'outil est hors tension et débranché avant d'y effectuer tout travail d'inspection ou d'entretien. N'utilisez jamais d'essence, de benzine, de solvant, d'alcool ou d'autres produits similaires. Une décoloration, une déformation, ou la formation de fissures peuvent en découler.
risque de ne pas bien fonctionner. Ne versez que la quantité de graisse spécifiée. 1 GARANTIE LIMITÉE D’UN AN MAKITA Politique de garantie Chaque outil Makita est inspecté rigoureusement et testé avant sa sortie d’usine. Nous garantissons qu’il sera exempt de défaut de fabrication et de vice de matériau pour une période d’UN AN à partir de la date de son achat initial.
ESPAÑOL (Instrucciones originales) ESPECIFICACIONES Modelo HM1202 Especificaciones eléctricas en México HM1202C 120 V Golpes por minuto 13 A 50/60 Hz 1 900 Longitud total 950 - 1 900 578 mm (22-3/4") Peso neto 9,9 kg (21,7 lbs) 10,0 kg (22,1 lbs) • Debido a nuestro programa continuo de investigación y desarrollo, las especificaciones aquí dadas están sujetas a cambios sin previo aviso. • Las especificaciones pueden ser diferentes de país a país.
20. Realice el mantenimiento a las herramientas eléctricas. Compruebe que no haya partes móviles desalineadas o estancadas, rotura de partes, y cualquier otra condición que pueda afectar al funcionamiento de las herramientas eléctricas. Si la herramienta eléctrica está dañada, haga que se la reparen antes de utilizarla. Muchos accidentes son ocasionados por herramientas eléctricas con un mal mantenimiento. 21. Mantenga las herramientas de corte afiladas y limpias.
Tabla 1. Calibre mínimo para el cable Volts 120 V~ Amperaje nominal Más de 0A 6A 10 A 12 A Longitud total del cable en metros 7,6 m (25 ft) 15,2 m (50 ft) 30,4 m (100 ft) 45,7 m (150 ft) No más de Calibre del cable (AWG) 6A 10 A 12 A 16 A 18 18 16 14 16 16 16 12 16 14 14 12 14 12 No se recomienda 000173 USB009-2 NORMAS ESPECÍFICAS DE SEGURIDAD Advertencias y precauciones 7.
USD203-2 Cambio de velocidad Símbolos Sólo para HM1202C A continuación se muestran los símbolos utilizados para la herramienta. ・ volts o voltios ・ amperes ・ hertz ・ corriente alterna ・ Construcción clase II ・ revoluciones o alternaciones por minuto ・ número de percusiones 1. Control de ajuste de velocidad. 1 002897 Los golpes por minuto pueden ajustarse con sólo girar el dial de ajuste. Esto se puede hacer incluso cuando la herramienta se encuentra en funcionamiento.
La luz roja indicadora de mantenimiento se enciende cuando las escobillas de carbón están prácticamente desgastadas, para indicar que la herramienta necesita mantenimiento. Después de aproximadamente 8 horas de uso, el motor se apagará automáticamente. Instalación o extracción del cincel. Limpie el zanco del cincel y aplíquele grasa antes de instalarlo. 1. Grasa para broca 2.
Ángulo del cincel 1 Reemplazamiento de las escobillas de carbón 1. Anillo de cambio 1. Conmutador 2. Punta de aislante 3. Escobilla de carbón 2 1 3 002939 001146 El cincel puede colocarse en 12 ángulos diferentes. Para cambiar el ángulo del cincel, deslice hacia adelante el anillo de cambio y luego gírelo para cambiar el ángulo del cincel. En el ángulo deseado, deslice hacia atrás el anillo de cambio hasta la posición original. De esta manera, el cincel quedará fijo en su lugar.
Para ello debe enviar la herramienta completa a un Centro Autorizado Makita o al Servicio Técnico de Fábrica. Deje la herramienta en marcha varios minutos para calentarla. Apague y desconecte la herramienta. Afloje los seis tornillos y retire la empuñadura. grasa vieja o instale la empuñadura.
GARANTÍA LIMITADA MAKITA DE UN AÑO Ésta Garantía no aplica para México Política de garantía Cada herramienta Makita es inspeccionada y probada exhaustivamente antes de salir de fábrica. Se garantiza que va a estar libre de defectos de mano de obra y materiales por el periodo de UN AÑO a partir de la fecha de adquisición original.
< USA only > WARNING Some dust created by power sanding, sawing, grinding, drilling, and other construction activities contains chemicals known to the State of California to cause cancer, birth defects or other reproductive harm. Some examples of these chemicals are: • lead from lead-based paints, • crystalline silica from bricks and cement and other masonry products, and • arsenic and chromium from chemically-treated lumber.