INSTRUCTION MANUAL MANUAL DE INSTRUCCIONES Cordless Vacuum Cleaner Aspiradora Inalámbrica XCV22 XCV25 IMPORTANT: Read Before Using. IMPORTANTE: Lea antes de usar.
ENGLISH (Original instructions) SPECIFICATIONS Model: XCV22 Standard filter type XCV25 Powder filter (for dry dust) 2.4 m3/min (84.74 cu.ft/min) Maximum air volume (with BL1850B, Φ38 mm (1-1/2") x 2.5 m (98-1/2") hose) Vacuum (with BL1850B, Φ38 mm (1-1/2") x 2.5 m (98-1/2") hose) 11 kPa Recoverable capacity Dimensions (L x W x H) 8 L (2.1 gal.) 15 L (4.0 gal.) 366 mm x 334 mm x 368 mm (14-3/8″ x 13-1/8″ x 14-1/2″) 366 mm x 334 mm x 421 mm (14-3/8″ x 13-1/8″ x 16-1/2″) Rated voltage D.C.
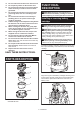
7. 8. 9. 10. 11. 12. 13. 14. 15. 16. 17. Do not put any object into openings. Do not use with any opening blocked; keep free of dust, lint, hair, and anything that may reduce air flow. Keep hair, loose clothing, fingers, and all parts of body away from openings and moving parts. Turn off all controls before removing the battery cartridge. Use extra care when cleaning on stairs. Do not use to pick up flammable or combustible liquids, such as gasoline, or use in areas where they may be present.
. 5. 6. 7. 8. 9. 10. 11. Use appliances only with specifically designated battery packs. Use of any other battery packs may create a risk of injury and fire. When battery pack is not in use, keep it away from other metal objects, like paper clips, coins, keys, nails, screws or other small metal objects, that can make a connection from one terminal to another. Shorting the battery terminals together may cause burns or a fire.
6. 7. 8. 9. 10. 11. 12. 13. 14. Tips for maintaining maximum battery life Do not store the tool and battery cartridge in locations where the temperature may reach or exceed 50 °C (122 °F). Do not incinerate the battery cartridge even if it is severely damaged or is completely worn out. The battery cartridge can explode in a fire. Be careful not to drop or strike battery. Do not use a damaged battery. The contained lithium-ion batteries are subject to the Dangerous Goods Legislation requirements.
18. 19. 20. 21. 22. 23. 24. 25. 26. 27. 28. 29. Do not remove the sticker on the wireless unit. Do not put any sticker on the wireless unit. Do not leave the wireless unit in a place where static electricity or electrical noise could be generated. Do not leave the wireless unit in a place subject to high heat, such as a car sitting in the sun. Do not leave the wireless unit in a dusty or powdery place or in a place corrosive gas could be generated.
To remove the battery cartridge, slide it from the tool while sliding the button in front of the cartridge. Indicating the remaining battery capacity CAUTION: Always install the battery cartridge fully until the red indicator cannot be seen. If not, it may accidentally fall out of the cleaner, causing injury to you or someone around you. 1 CAUTION: Do not install the battery cartridge forcibly. If the cartridge does not slide in easily, it is not being inserted correctly.
Suction power can be increased by turning the suction force adjusting knob from the symbol to the symbol. Tool / battery protection system The tool is equipped with a tool/battery protection system. This system automatically cuts off power to the motor to extend tool and battery life. The tool will automatically stop during operation if the tool or battery is placed under one of the following conditions: NOTICE: Always set the stand-by switch to the "O" side when not using the cleaner for long time.
Installing the paper pack ASSEMBLY Optional accessory CAUTION: Always be sure that the tool is WARNING: When using the paper pack, also use the prefilter together that is preinstalled on the tool. Failure to use the prefilter together may cause unusual noise and heat, resulting in a fire. switched off and the battery cartridge is removed before carrying out any work on the tool. CAUTION: Always wear dust mask during assembly or maintenance.
Spread the bag around the top of the tank so that the prefilter edge can catch and hold the bag securely. NOTE: Take the polyethylene bag carefully out of the tank so that the polyethylene bag cannot be caught and torn by the protrusion inside the tank when emptying it. 1 NOTE: Empty the polyethylene bag before it becomes full. Too much dust in the tank may cause the polyethylene bag to be torn. Installing the tool box 1. Release the lock of the battery cover, and open the battery cover. 2.
Insert the hose onto the mounting port of the tank and turn it clockwise until it locks. Adjusting the length of the slidetype extension wand Optional accessory With pressing the slide button, adjust the wand length. The length is locked when releasing the slide button. 1 Connecting the attachment with lock function Optional accessory Insert the attachment into the suction inlet until it clicks. To remove, pull the attachment while pushing the release button. WIRELESS ACTIVATION FUNCTION 1 3 ► 1 .
1. NOTICE: Be sure to refer to the instruction man- Open the lid on the cleaner as shown in the figure. ual of the tool when using the cleaner with wireless activation function. NOTICE: Do not disassemble or tamper with the wireless unit. NOTICE: To prevent dust coming into the slot of the wireless unit, always close the lid securely during operation and storage. NOTICE: Do not remove the wireless unit while the power is being supplied. Doing so may cause a malfunction of the wireless unit.
4. Press the wireless activation button on the cleaner for 3 seconds until the wireless activation lamp blinks in green. And then press the wireless activation button on the tool in the same way. After removing the wireless unit, keep it in the supplied case or a static-free container. NOTICE: Always use the hooks on the back of the lid when removing the wireless unit. If the hooks do not catch the wireless unit, close the lid completely and open it slowly again.
3. Connect the hose of the cleaner with the tool. CAUTION: Always check if the wireless activation function works before starting a work with the tool. To stop the wireless activation, push the wireless activation button on the tool, or set the stand-by switch on the cleaner to "I" or "O". NOTE: The wireless activation lamp on the tool will stop blinking in blue when there is no operation for 2 hours.
4. Press the wireless activation button on the cleaner for 6 seconds. The wireless activation lamp blinks in green and then become red. After that, press the wireless activation button on the tool in the same way. 1 Erasing all tool registrations You can erase all tool registrations from the cleaner as follows. 2 1 1 2 2 3 ► 1 . Stand-by switch 2. Wireless activation button 3. Wireless activation lamp 1. Install the wireless unit to the cleaner. 2. Install the batteries to the cleaner. 3.
Description of the wireless activation lamp status 1 2 ► 1 . Wireless activation button 2. Wireless activation lamp The wireless activation lamp shows the status of the wireless activation function. Refer to the below table for the meaning of the lamp status.
Troubleshooting for wireless activation function Before asking for repairs, conduct your own inspection first. If you find a problem that is not explained in the manual, do not attempt to dismantle the tool. Instead, ask Makita Authorized Service Centers, always using Makita replacement parts for repairs. State of abnormality Probable cause (malfunction) Remedy The wireless activation lamp does not light/blink. The wireless unit is not installed into the cleaner and/or the tool.
State of abnormality Probable cause (malfunction) Remedy The cleaner runs while the tool's switch trigger is not pulled. Other users are using the wireless activation of the cleaner with their tools. Turn off the wireless activation button of the other tools or cancel the tool registration of the other tools. Cannot erase all tool registrations in the cleaner. Pressing the wireless button on the tool. Press the wireless button on the cleaner for erasing all tool registrations.
Occasionally wash the powder filter in water, rinse and dry thoroughly in the shade before use. Never wash filters in a washing machine. MAKITA LIMITED WARRANTY Please refer to the annexed warranty sheet for the most current warranty terms applicable to this product. If annexed warranty sheet is not available, refer to the warranty details set forth at below website for your respective country. United States of America: www.makitatools.com Canada: www.makita.ca Other countries: www.makita.
ESPAÑOL (Instrucciones originales) ESPECIFICACIONES Modelo: XCV22 Tipo de filtro estándar 2,4 m3/min (84,74 cu.ft/min) Volumen de aire máximo (con BL1850B, manguera de Φ38 mm (1-1/2″) x 2,5 m (98-1/2″)) Aspiradora (con BL1850B, manguera de Φ38 mm (1-1/2″) x 2,5 m (98-1/2″)) 11 kPa Capacidad recuperable Dimensiones (La x An x Al) 8 L (2,1 gal) 15 L (4,0 gal) 366 mm x 334 mm x 368 mm (14-3/8″ x 13-1/8″ x 14-1/2″) 366 mm x 334 mm x 421 mm (14-3/8″ x 13-1/8″ x 16-1/2″) Tensión nominal 36 V c.c.
6. 7. 8. 9. 10. 11. 12. 13. 14. 15. 16. 17. No manipule la batería ni el aparato con las manos mojadas. No introduzca ningún objeto en las aberturas. No lo utilice con ninguna abertura bloqueada; manténgalo libre de polvo, pelusa, cabello y cualquier objeto que pueda reducir el flujo de aire. Mantenga el cabello, la ropa holgada, los dedos y todas las partes del cuerpo lejos de las aberturas y piezas móviles. Apague todos los controles antes de retirar el cartucho de batería.
19. Los niños deben supervisarse para asegurar que ellos no empleen los aparatos como juguete. 7. Uso y cuidado de la herramienta a batería 1. 2. 3. 4. 5. 6. Evite un arranque accidental. Asegúrese de que el interruptor esté en la posición apagada antes de conectar el paquete de baterías, levantar el aparato o cargarlo. Cargar el aparato con su dedo en el interruptor o pasar energía al aparato con el interruptor encendido puede propiciar accidentes.
Instrucciones importantes de seguridad para el cartucho de batería 1. 2. 3. 4. 5. 6. 7. 8. 9. Antes de utilizar el cartucho de batería, lea todas las instrucciones e indicaciones de precaución en el (1) el cargador de batería, (2) la batería, y (3) el producto con el que se utiliza la batería. No desarme el cartucho de batería. Si el tiempo de operación se ha acortado en exceso, deje de operar de inmediato. Podría correrse el riesgo de sobrecalentamiento, posibles quemaduras e incluso explosión.
22. Instrucciones importantes de seguridad para la unidad inalámbrica 1. 2. 3. 4. 5. 6. 7. 8. 9. 10. 11. 12. 13. 14. 15. 16. 17. 18. 19. 20. 21. 23. No desarme ni modifique la unidad inalámbrica. Mantenga la unidad inalámbrica alejada de los niños pequeños. En caso de ingerirla accidentalmente, solicite atención médica de inmediato. Utilice la unidad inalámbrica solamente con herramientas de Makita. No exponga la unidad inalámbrica a la lluvia ni a condiciones de humedad.
Para quitar el cartucho de batería, sáquelo de la herramienta mientras desliza el botón enfrente del cartucho. DESCRIPCIÓN DEL FUNCIONAMIENTO PRECAUCIÓN: Asegúrese siempre de que la herramienta esté apagada y el cartucho de batería haya sido extraído antes de realizar cualquier ajuste o comprobación en la herramienta. Instalación o extracción del cartucho de batería PRECAUCIÓN: Siempre introduzca completamente el cartucho de batería hasta que el indicador rojo no pueda verse.
Indicación de capacidad restante de la batería Sistema de protección para la herramienta/batería La herramienta está equipada con un sistema de protección de la herramienta/batería. Este sistema corta en forma automática el suministro de energía al motor para prolongar la vida útil de la herramienta y la batería.
Para poner la aspiradora en el modo en espera, oprima nuevamente el botón de encendido/apagado. Para apagar la aspiradora, ajuste el interruptor de modo en espera en el lado “O”. La potencia de succión se puede ajustar según sus necesidades de trabajo. La potencia de succión se puede incrementar girando la perilla de al símbolo .
Instalación de la bolsa de papel para polvo Accesorio opcional ADVERTENCIA: Cuando use una bolsa de papel para polvo, utilice también junto con esta el prefiltro preinstalado en la herramienta. No utilizar el prefiltro junto con la bolsa de papel para polvo podría ocasionar un ruido y calentamiento anormales, lo cual puede provocar un incendio. Instalación de la bolsa de polietileno La aspiradora también se puede utilizar sin la bolsa de polietileno.
3. Vaciado de la bolsa de polietileno Cierre la cubierta de la batería y ponga el seguro. ADVERTENCIA: Asegúrese siempre de que la aspiradora esté apagada y que el cartucho de batería haya sido extraído antes de vaciar la bolsa de polietileno. El no hacerlo podría ocasionar una descarga eléctrica y lesiones personales graves. PRECAUCIÓN: Evite los impactos fuertes sobre el tanque. Un impacto fuerte podría deformar y dañar las piezas.
Conexión del aditamento con la función de bloqueo Ajuste de la longitud del tubo de extensión de tipo corredera Accesorio opcional Accesorio opcional Inserte el aditamento en la entrada de succión hasta que escuche un clic. Para extraerlo, jale el aditamento oprimiendo simultáneamente el botón de liberación. Ajuste la longitud del tubo mientras presiona el botón deslizable. La longitud se bloquea cuando se suelta el botón deslizable. 1 3 1 2 ► 1 . Botón deslizable ► 1 .
1. Abra la tapa de la aspiradora tal como se muestra en la ilustración. AVISO: Asegúrese de consultar el manual de instrucciones de la herramienta cuando utilice la aspiradora con la función de activación inalámbrica. AVISO: No desarme ni modifique la unidad inalámbrica. AVISO: Para impedir que entre el polvo en la ranura de la unidad inalámbrica, cierre siempre bien la tapa durante la operación o el almacenamiento.
3. Ajuste el interruptor de modo en espera en la aspiradora en “AUTO”. 1 1 2 3 ► 1 . Interruptor de modo en espera ► 1 . Unidad inalámbrica 2. Gancho 3. Tapa Una vez extraída la unidad inalámbrica, guárdela en el estuche suministrado o en un contenedor libre de electricidad estática. 4. Oprima el botón de activación inalámbrica en la aspiradora durante 3 segundos hasta que la luz indicadora de activación inalámbrica parpadee en verde.
NOTA: Las luces indicadoras de activación inalámbrica terminarán parpadeando en verde después de un lapso de 20 segundos. Oprima el botón de activación inalámbrica en la herramienta mientras la luz indicadora de activación inalámbrica en la aspiradora esté parpadeando. Si la luz indicadora de activación inalámbrica no parpadea en verde, oprima el botón de activación inalámbrica durante un lapso breve y vuelva a mantenerlo oprimido. 5.
Si la cancelación se realiza exitosamente, las luces indicadoras de activación inalámbrica se encenderán en rojo durante 2 segundos y comenzarán a parpadear en azul. Cancelación del registro de herramientas para la aspiradora Realice el siguiente procedimiento para cancelar el registro de la herramienta para la aspiradora. 1. Instale las unidades inalámbricas en la aspiradora y en la herramienta respectivamente. 2. Instale las baterías en la aspiradora y en la herramienta. 3.
Descripción del estado de la luz indicadora de activación inalámbrica 1 2 ► 1 . Botón de activación inalámbrica 2. Luz indicadora de activación inalámbrica La luz indicadora de activación inalámbrica muestra el estado de la función de activación inalámbrica. Consulte la tabla a continuación para ver qué significa el estado de la luz indicadora.
Detección y solución de problemas para la función de activación inalámbrica Antes de solicitar alguna reparación, primero realice una inspección por su cuenta. Si detecta algún problema que no esté explicado en el manual, no intente desensamblar la herramienta. En vez de esto, solicite la reparación a un centro de servicio autorizado de Makita, usando siempre piezas de repuesto Makita. Estado de la anomalía Causa probable (avería) Remedio La luz indicadora de activación inalámbrica no enciende/parpadea.
Estado de la anomalía Causa probable (avería) Remedio La aspiradora no funciona junto con el interruptor de activación de la herramienta. La unidad inalámbrica no está instalada en la aspiradora y/o la herramienta. La unidad inalámbrica está instalada incorrectamente en la aspiradora y/o la herramienta. Instale la unidad inalámbrica correctamente. La terminal de la unidad inalámbrica y/o la ranura está sucia.
De vez en cuando lave el filtro de polvo con agua, enjuáguelo y séquelo bien a la sombra antes de usarlo. Nunca lave los filtros en la lavadora. La manguera se puede guardar alrededor de la herramienta conectando los extremos. NOTA: No frote ni raye el filtro de polvo, el prefiltro o el amortiguador con objetos duros tales como un cepillo y una pala. NOTA: Los filtros se desgastan con el tiempo. Se recomienda contar con piezas de repuesto.
GARANTÍA LIMITADA DE MAKITA Ésta Garantía no aplica para México Consulte la hoja de la garantía anexa para ver los términos más vigentes de la garantía aplicable a este producto. En caso de no disponer de esta hoja de garantía anexa, consulte los detalles sobre la garantía descritos en el sitio web de su país respectivo indicado a continuación. Estados Unidos de América: www.makitatools.com Canadá: www.makita.ca Otros países: www.makita.
< USA only > WARNING Some dust created by power sanding, sawing, grinding, drilling, and other construction activities contains chemicals known to the State of California to cause cancer, birth defects or other reproductive harm. Some examples of these chemicals are: • lead from lead-based paints, • crystalline silica from bricks and cement and other masonry products, and • arsenic and chromium from chemically-treated lumber.