
Use and Care Manual


6 ENGLISH
Lighting up the front lamp
1
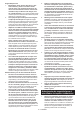
►1. Lamp
CAUTION: Do not look in the light or see the
source of light directly.
Pulltheswitchtriggertolightupthelamp.Thelamp
keeps on lighting while the switch trigger is being pulled.
Thelampgoesoutapproximately10secondsafter
releasing the switch trigger.
NOTE: Use a dry cloth to wipe the dirt off the lens of
the lamp. Be careful not to scratch the lens of lamp, or
it may lower the illumination.
Reversing switch action
1
A
B
►1. Reversing switch lever
CAUTION: Always check the direction of
rotation before operation.
CAUTION: Use the reversing switch only after
the tool comes to a complete stop. Changing the
direction of rotation before the tool stops may dam-
age the tool.
CAUTION: When not operating the tool,
always set the reversing switch lever to the neu-
tral position.
Thistoolhasareversingswitchtochangethedirection
of rotation. Depress the reversing switch lever from the
AsideforclockwiserotationorfromtheBsideforcoun-
terclockwise rotation.
Whenthereversingswitchleverisintheneutralposi-
tion, the switch trigger cannot be pulled.
ASSEMBLY
CAUTION: Always be sure that the tool is
switched off and the battery cartridge is removed
before carrying out any work on the tool.
Installing or removing driver bit/
socket bit
12 mm
(15/32”)
9 mm
(3/8”)
Useonlythedriverbit/socketbitshowninthegure.Do
not use any other driver bit/socket bit.
1
2
►1. Driver bit 2. Sleeve
Toinstallthedriverbit,insertitintothesleeveasfaras
it will go.
1
2
►1. Driver bit 2. Sleeve
Toremovethedriverbit,pullthesleeveinthedirection
of the arrow and pull the driver bit out.