
Installation Guide


Page 7 of 10
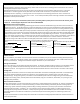
Step 3 - Install the Last Row
•
Use the pull bar to draw the last row to fit tightly to the previous row.
Glue Down Installation
PLEASE NOTE:
ANY EXCESS GLUE WHICH GETS ONTO THE SURFACE OF THE FLOOR MUST BE REMOVED IMMEDIATELY WITH ADHESIVE REMOVER
The steps in glue down method are very similar to the floating installation method. The only difference is the application of the glue to
the
subfloor prior to installation. For more detail instruction, see the floating installation section above.
Step 1 – Set up
•
Cut off the tongue from the long edge of the boards for the first rows.
•
Ensure expansion gap by marking off a starting line 1/2” away from the starting wall. Mark off approximately 2 planks width
area to
spread glue.
Step 2 – Spreading the glue
•
Spread the glue from the starting line out in the direction of the center of the room, the width of two planks. Or spread only
enough
glue to install what can be set within 45 minutes (15 minutes of OPEN TIME and an additional 30 minutes for actual
installation.
Usually about two rows width coverage). Different manufacturer may require different open time and set time. Use
spacers or boards
to maintain expansion gap during installation.
•
Repeat with the next two rows, etc.
Step 3 – Install the first two rows
•
Install the first row of starter planks.
•
The last plank of the first row may have to be cut to size. Discard remainder because the tongue has been removed.
•
Install the second row. Make sure there is a random staggering at the end joints of at least 6” apart.
•
Be attentive to staggering the ends of the boards correctly in adjacent rows to avoid clustering end joints.
•
Any glue that comes in contact with the face of the board should be removed immediately using adhesive remover formulated
for the
glue being used. Follow adhesive manufacturer’s instruction on adhesive removal.