For Best Results Bo nok throw away packaging materials until assembly Is complete, Assemble item on a soft surface, such as cardboard or carpet, to protect finish. Proper assembly requires two people.
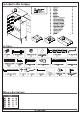
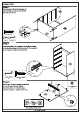
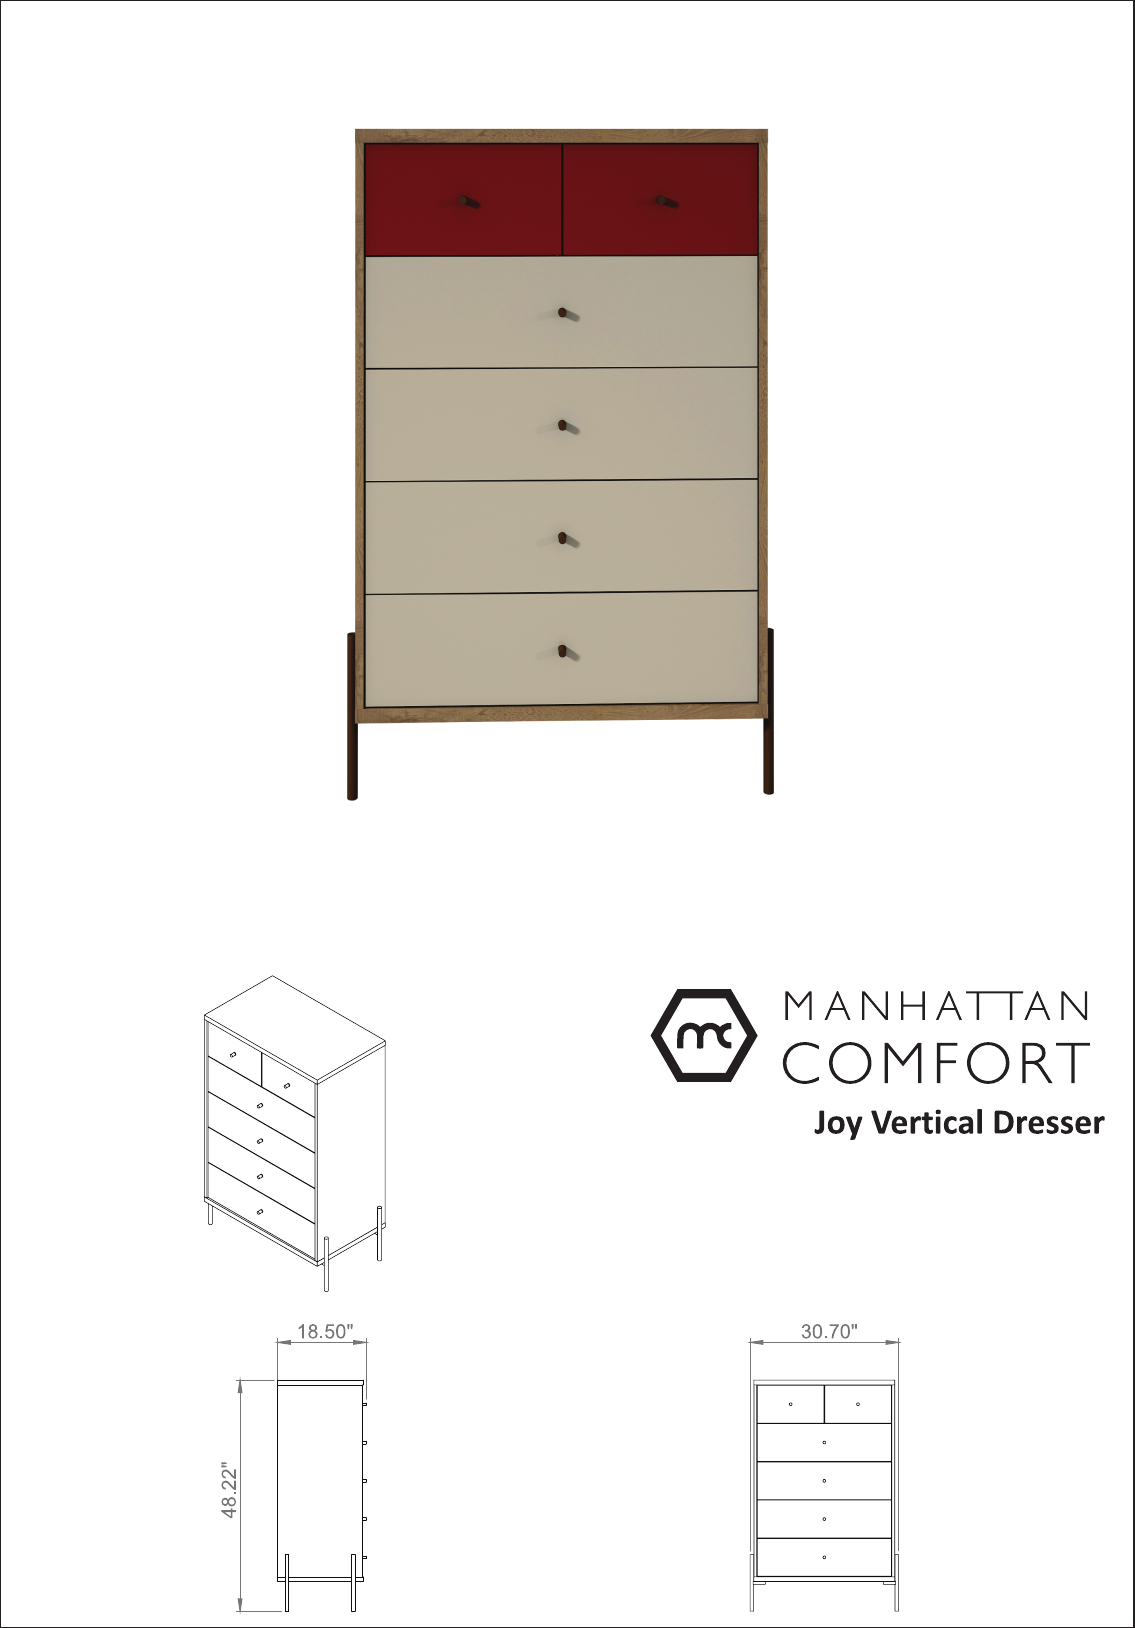
Included in this Package 19 Fittings OL LOWER TOP x1 a» Maximum 2 LEFT SIDE x1 Lbs) weight 03 RIGHTSIZE x supported.
Prepare the pieces Step 1 I Insert the wooden dowels {G) into i parts 02, 03 and 06. Remember to use the glue (Q). ; a WHITE GLUE x1 G 6X30MM WOODEN DOWEL xi It's important fo glue the wooden dowel. Step 2 Insert the wooden dowels {G} into parts 04, 08 and 09. Remember to use the glue (Q). ; 7 del WHITE GLUE x1 it’s important to glue G-6X30MM WOODEN the wooden dowel. X28 Step 3 Insert screw B into part 05. Tighten to the limit.
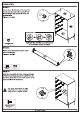
Prepare the pieces Step 4 Insert screw B into parts 12, 13 and 14. Tighten to the limit.
Assembly Step 5 Put the parts 01 and 02 together and use two screws (E) and the Allen wrench (F). — FALLEN WRENCH x1 Dt E7X50 SCREW 2 Step 6 Put the glue (Q) in the wooden dowel {G) already fixed into part 04, Then put part 04 together with part 02. it's Important to glue the wooden dowel. WHITE GLUE x1 Step 7 Put the parts 01 and 03 together and use two screws (E) and the Allen wrench (F). Remember to fit part 04 to part 03 before screwing.
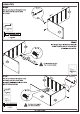
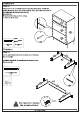
Assembly Step 8 Put feet on part 01 as the drawing. On each foot (N), use two screws (K} with the Allen wrench {F). N-FEET KT F-WRENCH a a Step 9 Insert the screw (I) through parts 02 and 03 according to the drawing using the Allen wrench (F). The screw (I) must fix parts 02 and 03 on the feet {N). F-ALLEN WRENCH | 1/4X25MM SCREW x1 x4 Step 10 & 9 Put the part 06 to the screws already fixed to part 05. Insert the two mini fix connectors {C) in part 06 and rotate clockwise as shown. Tighten to the limit.
Assembly Step 11 ~ Fit part 05 on the sides 02 and 03. Insert the four mini fix connectors (C) on parts 02 and 03 according to the indicated drawing and turn clockwise. Tighten to the limit. DIRECTION OF TURN C.15MM CONNECTOR Tighten the mini fix up to the limit “ to assembly don’t be slack. Step 12 Fix the corner plate (J) on the part 17 and use four screws (S). Tighten to the limit.
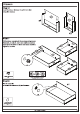
Assembly Step 14 Fix the back 18 to the bottom of the dresser using the balls (P). Then fit the profile (0) into the upper part of this back{18). Then, insert the second back 18 Into the profile (0) and fix it with nails (P). When it is ok, fix the back 07 at the top of the batten, as shown In the drawing. — P -10X10 NAIL 0-H PROFILE x50 x1 Drawers Step 15 For the BIG DRAWERS, fix parts 08 and 09 to part 16 using four screws (M). For SMALL DRAWERS, fix parts 08 and 09 on part 11 using four screws (M).
Drawers Step 16 Insert the drawer bottoms 11 and 15 into their respective drawers. Step 17 Fit the drawer assembly to the corresponding drawer fronts (12, 13 and 14). Insert two mini fix connectors {C) on parts 08 and 09 as shown and rotate clockwise. Tighten to the limit. €15MM CONNECTOR x12 Step 18 Put the cover (D} to the mini fix connectors (C) in all drawers.
Drawers Step 21 A) TO DRYWALL if you fix the dresser on the DRYWALL don't put the drawers, A\ TO MASONRY If you fix the dresser on the NMIASDNRY WALL vou should put the drawers, AOR OAR ANY Joy Vertical Dresser 11
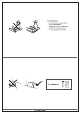
Safe and Security KIT FOR DRYWALL ow -prewar ell Crr— DWI-x1 DWI-x1 KIT FOR MASONRY mw = Masonry wall Go to Step 30 DeggeCI=A©) MW1 -x4 MW2 -x4 MW3 -x4 MW4 -x4 MEWS -x2 WARNING Serious or fatal crushing injuries can occur from furniture tip-over, ALWAYS secure this furniture to the wall using tip-over restraints. To further reduce the risk of serious injury and death from tip-overs: Place heaviest items in the lower drawer. Do not set TVs or other heavy objects on the top of this product.
Safe and Security KIT FOR DRYWALL 1. Make holes on the wall following the model below and specifications: Step 22 & 14mm drill. ¥ Depth of 60mm A Use an electric drill. 2, Separate the two nylon parts of the device.
Safe and Security 5. As the device inserted Into the drywall pull the nylon pieces as Step 26 below and fitting the two parts. A KIT FOR DRYWALL 6. Just the metal part detached to the hole made on the drywall. Step 7 For this necessary to pull the handle on the opposite direction. SS BEFORE AFTER 7. Cut the space nylon parts of the device.
Safe and Security 8. Put the dresser to the wall and aligning the hole In the Step 29 safety block with the hole that was made the drywall, Done so, insert the screw up to its maximum limit on. 1. Make holes on the wall following the model below and specifications: Step 30 & 8mm drill. ¥ Depth of 50mm A Use an electric drill. Step 31 2. Insert the bushing into the hole made on the wall.
Safe and Security 3. Put the screws into the bushings, but don’t tighten until Step 32 the end. it's necessary 0.35" {10mm} left to fit on the lock. x2 4. Put the lock on the horizontal as the pictures below. Step 33 A Hack the distance between walls holes. Et must be the same distance between centers of dresser’s device. 5. Drag the dresser carefully until you meet the screw’s head. Fit the screw into the lock as the picture below. A Put the two pieces together and insert the seal.
TAKING GOOD CARE OF YOUR FURNITURE Cleaning and caring instructions: Wipe the wood furniture down with a moist cloth to properly clean the furniture. Do not forget to dry your furniture out. Humidity can damage the finish or create mold. Chemical products are not recommended; Never clean the furniture with scouring powders, steel scrubber pads or any other product which can scratch its Furniture surfaces should not be covered with colored plastic or paper sheets.