
User Manual
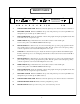

OPERATIONAL NOTES
8
SWITCHING ON
Allow this unit a few minutes for the tubes to warm up before use. It is not recommended that you
leave your preamplifier permanently switched on. This only wastes electricity and tube life. Your
preamplifier has solid state rectification and reaches peak operating condition in approximately 30
minutes.
TUBE LIFE
As with all tubes, their quality degrades with age. This is due to cathode emission, a natural process
found in all tubes. We recommend that you have your preamplifier checked every 4-5 years,
depending on usage, usually the preamplifier will require re-tubing after this time has elapsed.
Increased noise is usually a sign that the tubes need replacing.
OPERATION
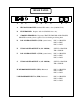
The Microphone Preamplifier is equipped with a switchable 48 Volt phantom supply. Pull the
toggle to turn phantom power on or off. You should only turn phantom power on once you have a solid
state(FET) condensor mic plugged in and patched through to the Mic Pre and the monitor volume is way
down or off. DO NOT use phantom with an unbalanced cable, unbalanced output mic, or valuable ribbon
mics. Damage to the Mic or preamp may result. Do not change mics or mic patches with phantom power
on especially if the monitors are up. See page 6.
The 40 dB Microphone Preamplifier is equipped with five preset GAINs, 40, 45, 50, 55 and 60 dB.
These "numbers" are only if the ATTENUATE control is turned to full. The GAIN control is not a pad.
The input attenuator is kinda like a pad. GAIN sets the amount of negative feedback used in the Mic Pre.
These preset gains affect tonal quality, noise and linearity characteristics. At lower gains (40 dB setting)
the Pre Amp has a very clean quality, in some ways like solid state and is the best at minimizing tube hiss.
50 is a "normal" setting because it tends to sound most like the source, and is very musical and real. The
lower settings can sound slightly slower, further back and more mellow by comparison. The 60 dB setting
uses almost no feedback and can give a slightly more punchy and forward or aggressive sound. It may be
a little "hot" (more than simply warm) for some tastes. Experiment to discover your own descriptions. You
will likely find a few settings that you prefer for your style of music.
The INPUT ATTENUATE controls the amount of signal entering the amplifier circuit. Use this
control to adjust the level of the input signal. It has no effect on the tonal quality and simply sets the level
sent to tape. Use the tape machine's meters to optimise levels.
The PHASE SWITCH can reverse the polarity of the mic signal. The middle position is used for
the 1/4" DIRECT INPUT and de-selects the mic input transformer. Reversing the polarity or phase is often
needed when two or more mics are picking up the same source. For example it would be needed when one
mics the top and bottom of a snare - one skin is going towards one mic and the other skin is going away
from the other mic. If one signal is not "reversed" then you lose lows. Polarity reverse can also help with
some vocal / mic / headphone situations because " somewhere " the polarity flipped one too many times.
It happens. General advise - try it each way - listen, with vocals always ask the singer which way they prefer.
The headphones may "cancel" with the sound they hear in their skull while singing.